Posted on 1 Comment

Cranberry Scones

cranberry scones
cranberry scones
Here’s a cranberry scone recipe bursting with ripe berry flavor and hints of orange and spice.
Jump to Recipe

It’s beginning to look a lot like… winter in Alaska. Which does look like Christmas, at least for the first few months. Maybe that’s why my oven keeps producing festive baked goods like these cranberry scones with a hint of orange.

All the snow may be pretty, but it doesn’t always feel like a glorious winter wonderland.

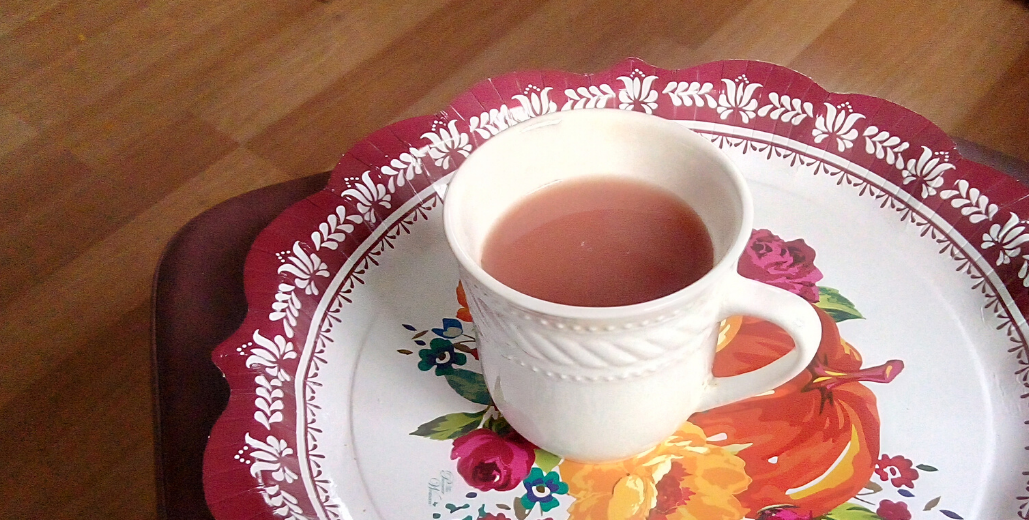
How do you motivate yourself on a cold, dark winter morning when the door is frozen shut, the rest of the family is sick, and all you really want to do is curl up with a mug of tea and a good book?

In my case, you snuggle up with a mug of tea and a hungry baby, and after he’s fed, don an apron and start heating the oven! There’s nothing like baking to raise my spirits and get my day off to a good start.

cranberry scones plate
cranberry scones

Bright Berries

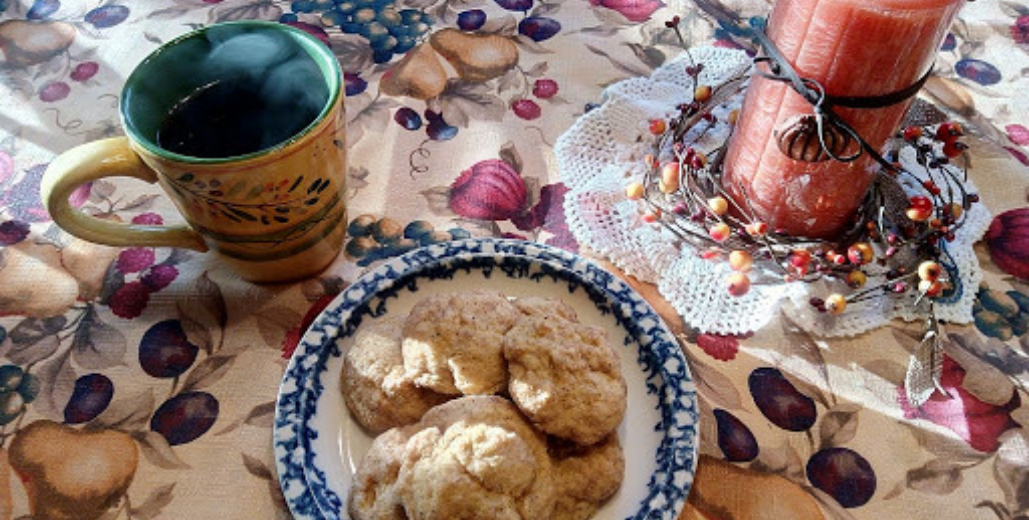
The bright red cranberries in these scones make them a particularly cheering, festive treat. Set a plate of these pretty scones on the table, and even an ordinary meal looks special! Or put the kettle on and invite a friend over for a cozy autumn tea.

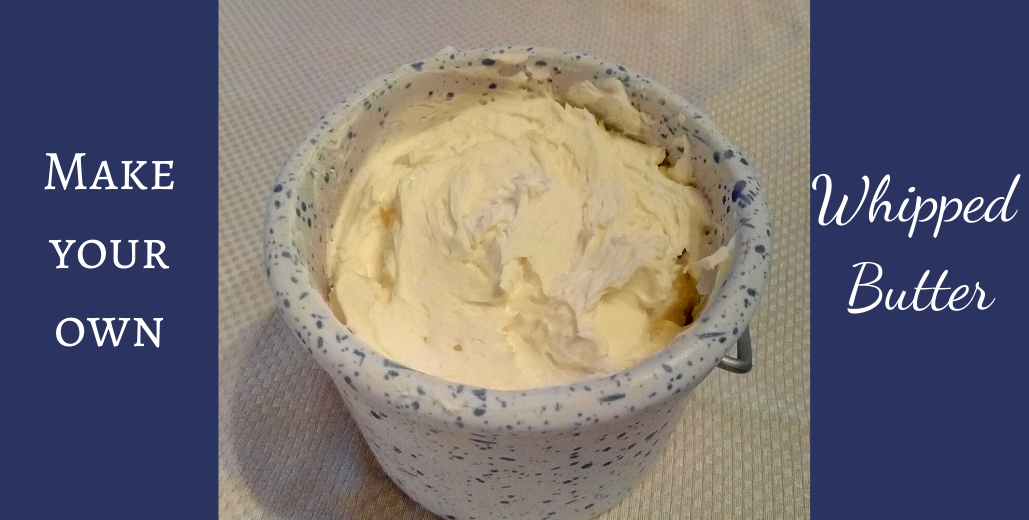
The dominant flavor in these scones is cranberry, with subtle spices and bright orange zest for contrast. The texture is about midway between feathery English scones and dense, sweet versions. They are best fresh from the oven with a bit of whipped butter or clotted cream.

Cranberries are tart, so this recipe includes just enough sugar to balance out the tartness without making the scones taste especially sweet. (I don’t prefer sweet scones, because the sugar makes them dense and heavy.) Feel free to vary the amount of sugar or even drizzle a vanilla-flavored glaze on top if you’re looking for a sweeter scone.

Looking for something a bit lighter and sweeter? Try Cranberry Almond Scones for a different flavor!

Other cranberry scone recipes I’ve tried taste mostly of scone and a little of cranberry. These ones taste mostly of cranberry, due to the amount of fruit in the dough. You can always decrease the amount of berries if you want the orange flavor to come out more.

You don’t have to wait until winter to make cranberry scones if you freeze cranberries when they are in season. I always try to buy extra after Christmas, so I will have some on hand for the next few months, at least.

To use frozen cranberries in this recipe, you will want to let them thaw partially so you don’t break your food processor. The easiest way to chop them is with a food processor, but you can also chop them by hand. It just takes longer, and doesn’t work as well for frozen berries.

Festive Cranberry Scones

Method

Preheat your oven to 425 degrees F and butter a baking sheet. One large baking sheet will do whether you are making small or large scones.

Combine the flour, baking powder, salt, cinnamon, and sugar in a large bowl. Add more cinnamon if you want a stronger flavor.

Cut the butter into smaller chunks. I usually slice a stick of butter five or six times crosswise, and then once lengthwise. Add the butter to the flour mixture.

Use a pastry blender or a fork to cut the butter into the dry ingredients. The butter should be in pea-sized pieces when you’re done. The chunks probably won’t all be the same size; don’t worry! As long as they are roughly pea-sized, it will be fine.

Combine the milk and egg and beat lightly with a fork. Pour the milk mixture into the flour mixture and stir to combine. You don’t want to mix the dough too much once you add the liquid, or the scones will be heavy.

Sometimes I leave a few streaks of flour in the dough at this point, knowing that I’ll be mixing it more when I add the cranberries in a few minutes.

Chop the cranberries roughly. You can do this by hand or with a food processor. They do not need to be in tiny pieces. Once when I was chopping them by hand, I just cut them each in half and called it good.

Zest an orange and reserve one tablespoon of the peel. I always use fresh orange zest (or clementine, which is a bit milder), but you can use dried orange peel if you prefer. I would cut the quantity down to 1 or 1 1/2 teaspoons if you use dried peel.

Fold in the chopped cranberries and orange peel. Mix gently to incorporate. Again, you don’t want to overmix the dough.

Turn the dough out onto a floured board or countertop. Knead it gently 6 times. How do you knead gently? Just pat it out about 1 1/2-2 inches thick, then fold in half. Turn the dough a quarter turn in front of you. Repeat this five more times.

If you’re having trouble treating the dough gently, try patting out the dough with the flat palm of your hand, instead of the heel of your hand, which has more force. Flour your hands if necessary, but you’re not trying to work more flour into the dough.

When the dough is kneaded, pat it out into one large circle or two smaller circles, depending on whether you want big or little scones. Big is coffee shop size! Small is probably a more normal size. In either case, the dough should be about 3/4-inch to 1-inch thick.

Slice the circles into wedges: 8 for the large circle, or 6 for each of the smaller circles. Transfer to a buttered baking sheet. Keep the scones in circle formation, but separate them a little so that the edges aren’t touching. If they are too close together, they will rise and stick to each other- and take longer to bake.

Sprinkle sugar on the tops of the scones before baking, if desired. A little bit of sugar on top is nice with the cranberries. Pop them in the oven for about 20-25 minutes. If you made your scones thicker, it might take longer.

The cranberry scones are done when the edges start to turn brown and the bottoms are golden. Cool on a rack and enjoy!

Cranberry Scones

Here's a festive scone recipe bursting with ripe cranberry flavor and hints of orange and spice. Not too sweet or tart, but just right with a cup of tea.
Prep Time20 minutes
Cook Time20 minutes
Total Time40 minutes
Course: Breakfast, Side Dish
Keyword: Bread, Cranberry, Quick bread, Scones
Servings: 8 large scones or 12 smaller scones

Ingredients

  • 2 1/2 cups all-purpose flour unbleached
  • 2 tsp baking powder
  • 3/4 tsp salt
  • 1/2 tsp cinnamon
  • 1/4 cup sugar
  • 1/2 cup cold butter cut into chunks
  • 1 egg slightly beaten
  • 3/4 cup milk
  • 1 tbsp orange zest
  • 1 cup cranberries coarsely chopped
  • extra sugar for dusting

Instructions

  • Preheat the oven to 425 degrees F.
  • In a large bowl, combine flour, baking powder, salt, cinnamon, and sugar.
  • Cut in butter with a pastry blender or fork until the butter is in pea-sized pieces.
  • Add egg and milk and mix just until blended.
  • Fold in cranberries and orange zest. Mix gently.
  • Turn dough out onto a floured board. Knead gently 6 times.
  • Pat out 3/4-inch thick, into one large circle or two smaller circles. Slice into wedges: 8 for the large circle or 6 for each of the smaller circles.
  • Transfer to a buttered baking sheet and sprinkle extra sugar over the tops, if desired.
  • Bake at 425 degrees F for about 20-25 minutes, until the edges begin to turn golden. Cool on a rack.
Posted on 4 Comments

Spiced Cranberry Tea

cranberry tea
cranberry tea
Warm up this winter with a cup of spiced cranberry tea. It’s packed full of delicious spices and fruits that support your immune system to help you stay healthy!
immune boosting tea

With cold weather here to stay for months ahead, cold and flu season has also arrived. If you’re looking for a way to warm up and fight cold symptoms at the same time, this is the drink for you! Spiced cranberry tea both warms your body and boosts your immune system. Oh, and it also tastes wonderful!

My mother has been making this tea for many years. She will make up a big batch several times every winter. That way, she always has some on hand to send to a sick relative or friend. In fact, some of her friends like it so much, they will call and ask for it when they’re sick!

I have a smaller family, so I usually freeze a quart or two when I make it. I find it very convenient to pull a container out of the freezer and heat it on the stove. Even if I’m not the one who’s sick, I’ll drink this warm spiced tea any day!

It doesn’t taste medicinal, so you could even serve it at a tea party or holiday gathering!

Immune Boosting Benefits

cranberry tea
This cranberry tea is full of powerful immune boosters to help your body fight infections!

The immune boosting elements in this beverage are cinnamon, cloves, honey, lemon, orange, and of course, cranberries! You may have heard of one or two of these used as home remedies for colds. Taken together, they make a great immune supplement!

Let’s start by going over the immune system benefits of each ingredient in this tea. My nurse practitioner side takes over when I talk about nutrition and health, but I’ll try to keep it short!

Cinnamon

Cinnamon, specifically the compound cinnamaldehyde, which is a component of cinnamon, has many health benefits. It is a potent antioxidant and has anti-inflammatory effects. It has also been used as an antifungal, antibacterial, and antiviral treatment in medical studies. This combination of effects makes cinnamon a powerful immune booster!

Cloves

Cloves also have many antioxidants, but their most notable contribution to immunity is as an antimicrobial. They are effective antibiotics, antivirals, and antifungals. Cloves have been used for centuries in traditional medicine, particularly in India and China (source: Solstice Medicine).

Honey

Honey is a powerhouse of health benefits. It has anti-inflammatory and antioxidant effects, as well as antimicrobial. It has also been used in traditional medicine to treat throat infections and asthma, among other things.

Lemon

Lemon’s immune benefits come from the vitamin C and potassium it contains, as well as from limonene and other compounds found in the oils of lemon and other citrus peels. You’ve probably heard of drinking lemon water to decrease stress and fight infection. Lemon oil is such a strong antibiotic that it’s used in household cleaning solutions!

Orange

Oranges are similar to lemons in health benefits. However, since we’re only using orange juice in this recipe, and not the peel with its oils, the main immune system benefits are vitamin C and potassium.

Cranberries

Cranberries are the last ingredient on our list. By now, their health benefits sound familiar: antioxidant, anti-inflammatory, antimicrobial. Most people associate cranberry juice with UTI treatment or prevention, but it also hinders other bacteria, particularly those in the mouth.

Whew! Thanks for sticking with me through that list. I know not everybody gets as excited about that stuff as I do! Now, on to the recipe.

spiced cranberry tea

Method

Spiced cranberry tea is very simple to make, and most of the ingredients are probably in your kitchen already.

Start with the cranberries. I have used both the large cranberries you can buy at the grocery store, and the wild lowbush cranberries (lingonberries) that grow in these parts. Frozen is fine; just let them thaw partially before trying to puree them in a blender.

As you may have guessed, the first step is to chop or puree the cranberries with water in a blender or food processor. They don’t need to be completely smooth; just keep in mind that the size the cranberries are now is about the size they will be in your cup. I don’t mind a lot of pulp in my drink, but some people do.

Pour the cranberry mixture into a large pot and add a quart of water and another of tea. I use regular black tea. My mother uses all water. If you would prefer to use herbal tea instead, I would suggest cinnamon, lemon, or something else that would complement the flavors of the drink.

Next, add 12 ounces of orange juice concentrate. This can be thawed or frozen. Stir in the cinnamon sticks and cloves, and simmer away for 20-40 minutes. It won’t look any different when it’s done; the simmering time is just to steep the spices in the hot liquid.

When you’re satisfied that the cinnamon and cloves have been thoroughly steeped, strain them out and stir in the honey, lemon juice, and lemon peel. The amounts given are really suggestions. Taste the tea and add more honey or lemon juice if you find it too tart or sweet.

That’s all there is to it! your cranberry tea is ready to be drunk or frozen as you wish. It will keep in the refrigerator for at least a week, and in the freezer for several months.

cranberry tea

Other Ideas for Cranberry Tea

Try chilling the tea, straining it if necessary, and mixing it with ginger ale or lemon-lime soda for a spiced holiday punch! Or freeze in ice cube trays and float in cranberry juice. You could even use it as the liquid when making a molded gelatin salad!

One last note: if you steep the spices for a long time, the flavor may be quite strong. I usually dilute the tea with a little water when I drink it. My husband prefers it full strength- or with a little extra honey!

If you make this spiced cranberry tea, let me know what you think! I’m always happy to answer any questions you might have about my recipes.

cranberry tea
Print Recipe
5 from 1 vote

Spiced Cranberry Tea

Has winter given you cold hands and a cold in your head? This cranberry tea will warm you right up and help boost your immune system to fight off infections.
Prep Time10 minutes
Cook Time40 minutes
Total Time50 minutes
Course: Drinks
Keyword: Cinnamon, Cranberry, Tea
Servings: 3 quarts

Ingredients

  • 4 cups cranberries
  • 2 cups water
  • 1 quart tea black or herbal
  • 1 quart water
  • 12 ounces orange juice concentrate
  • 4 cinnamon sticks
  • 12 whole cloves
  • 1 cup honey
  • 1 cup lemon juice
  • 1 tbsp lemon peel grated

Instructions

  • Puree cranberries and 2 cups water in blender or food processor until desired consistency.
  • Pour the cranberry mixture into a large pot. Add the tea, 1 quart water, orange juice concentrate, cinnamon sticks, and cloves. Simmer 20-40 minutes.
  • Stir in honey, lemon juice, and lemon peel until combined. Taste and add more honey or lemon juice as needed.

Notes

You may substitute water for the tea, or use decaffeinated or herbal tea if you don’t want any caffeine.

Posted on 1 Comment

Make your own whipped butter

whipped butter
whipped butter

Have you ever looked at those packages of “light” or whipped butter in the grocery store and wondered how they could charge the same amount for a product that has less butter and more air than the regular sticks? It’s a mystery to me. I do, however, make my own whipped butter at home. You can too, because the process is quite simple.

What is whipped butter?

Regular butter is just heavy cream that has been churned enough that the solid particles of fat stick together, while the protein-rich whey runs off. Salt may or may not be added, and then the butter is formed into sticks, rolls, or whatever shape you decide to make. (Have you ever seen old-fashioned butter molds? Some of them are very pretty!)

Whipped butter goes a step further by taking the soft butter and whipping it with some kind of liquid. In effect, you are beating air into the butter, and the liquid helps to thin it out a little. Why would anyone want to do this, you ask? There are actually some good reasons.

Why make whipped butter?

First of all, whipping butter increases the volume. Yes, the extra volume is provided by air (and some extra liquid), but that doesn’t matter too much when you’re spreading the butter on bread or pancakes.

However, you DO NOT want to substitute whipped butter for regular butter in recipes, as equal volumes of regular and whipped butter don’t contain equal amounts of fat. Just stick to sticks for cooking! (Sorry.)

That’s why whipped butter is sometimes labeled “light butter” on the package. It has fewer calories per tablespoon than regular butter, because the volume is partly made up by air.

This can be a good thing if, like me, you’re constantly wondering how the butter disappears so fast! At the rate we eat it, extra volume is a prime benefit.

Another reason to whip butter is because it’s easier to spread. More air = less density, meaning whipped butter reaches room temperature faster than regular butter when you take them out of the refrigerator. It’s also softer at room temperature. This is an especially useful quality when you’re serving bread for supper and forget to take butter out of the refrigerator until it’s almost time to eat.

If the above reasons haven’t convinced you, here’s one final try: whipping butter allows you to incorporate other flavors, in order to give your butter a distinguished taste. Try whipping honey or maple syrup, or even orange juice into your butter for a sweet accompaniment to corn bread or muffins. Or add herbs such as rosemary or thyme for a savory spread. The options are only limited by your imagination!

Method

The process is really quite simple. Place 4 sticks of butter (1 pound) in the bowl of a stand mixer. If you will be using a hand mixer, a large mixing bowl will do. Let the butter soften until it is room temperature.

whipped butter
Let the butter soften until it is room temperature.

With a whip attachment on the mixer, whip the butter on low speed for a minute or so. Then slowly pour in 1/3 cup of heavy cream while the mixer is running. Continue to mix on low speed for another minute or two until the cream is incorporated.

Turn the mixer to high speed and beat the butter for another two minutes. The butter should be pale and fluffy. The timing doesn’t have to be a precise measurement. You can stop mixing at any point, but the longer you mix it, the more air will get beaten into the butter, resulting in more volume.

whipped butter
When finished, the butter should be pale and fluffy.

I have gotten a yield of anywhere from 2 3/4 to 3 1/2 cups of whipped butter, depending on how long I mixed it. That’s about a 30% increase in volume from the 2 cups of butter we started with!

Notes

I have seen other recipes for whipped butter that use milk or even water as the liquid that is beaten into the butter. I have not tried these variations, but if I don’t have any cream someday, I might. My mother always used heavy cream, so that’s what I do.

Variations are pretty much unlimited, as I said before. Instead of cream, use a sweetener such as honey or maple syrup. If you decide to go this route, I would suggest starting out with only one or two sticks of butter–unless you anticipate needing a LOT of honey butter! Add the sweetener one tablespoon at a time, while the mixer is on low speed. That way, you can taste for sweetness so you don’t end up with a mixture that’s too sweet. Try adding sweet spices such as ground cinnamon or cloves to complement the sweetened butter!

Savory herbal combinations that work well in butter are rosemary and sea salt, garlic and Italian herbs, or thyme and lemon. I am excited to try some soon with my lemon thyme!

If you come up with any new flavor combinations, let me know in the comments! I would love to hear of your adventures with whipped butter!

Whipped Butter

Light and fluffy, this whipped butter is the perfect base for sweet or savory spreads. Or just use it plain for everyday enjoyment!
Prep Time5 minutes
Cook Time5 minutes
Total Time10 minutes
Course: Condiments
Keyword: Butter, Condiments, Spreads
Servings: 3 cups

Equipment

  • Stand mixer or handheld mixer

Ingredients

  • 2 cups salted butter softened
  • 1/3 cup heavy whipping cream

Instructions

  • Place butter in mixing bowl. Allow it to come to room temperature.
  • With a whisk attachment, beat the butter for 1-2 minutes until creamy.
  • With the mixer running, slowly add the cream. Continue to beat on low speed for 2 minutes until thoroughly combined.
  • Turn the mixer setting to High. Mix for 1-2 minutes more, until the butter is pale and fluffy.
Posted on 3 Comments

Pumpkin Spice Snickerdoodles

Pumpkin Spice Cookies
pumpkin spice cookies
There’s nothing better than a hot drink and a plate of pumpkin spice cookies on a crisp autumn day.

What do you call it when the classic snickerdoodle gets a pumpkin-y makeover? Autumn in a cookie? Snickering pumpkin-doodles? Whatever you want to call them, these soft pumpkin spice cookies are so good that I’ve made three batches in the last month.

They are pleasantly spiced, yet retain the character of snickerdoodles instead of just turning into a pumpkin cookie. You can see from the pictures that the color of these cookies is a very light orange. That’s partly from using homemade pumpkin puree, but it’s also a good clue that the pumpkin flavor is subtle, not overwhelming.

Unexpected Inspiration

I found the original recipe for these in a recently published Amish cookbook. As a whole, the cookbook was disappointing: I was shocked at how many recipes started out with packaged mixes, processed ingredients, or Velveeta. Either those recipes aren’t authentic, or Amish cooking is not what it used to be.

After looking through the cookbook, a handful of the recipes seemed good enough to test. I am very glad I tried this one! Three batches have disappeared pretty quickly in the last few weeks. With a few tweaks of my own, here is a recipe for pumpkin spice cookies that’s fast becoming a family favorite.

pumpkin spice cookies

Dairy-Free Version

You can even make it dairy-free, if you so desire. I substituted melted coconut oil for the melted butter, and it worked just fine. Make sure your coconut oil doesn’t have a strong coconut flavor, however (this depends on how the coconut oil was processed and refined). Pumpkin and coconut might be a good flavor combination, but then again, it might not!

One other note if you’re using coconut oil: normally when you use this to replace butter, you should use the same amount of coconut oil plus a tablespoon of water. For this recipe, you may either add a tablespoon of water, or just use a bit less flour.

Let’s Make Pumpkin Spice Cookies!

First things first: preheat your oven. Mine is a propane oven, which takes a long time to heat up. Maybe if you have an electric oven, this step isn’t so important to do right away.

Next, mix your dry ingredients together. If you will be using coconut oil instead of butter, consider adding 2 1/4 cups of flour instead of 2 1/2 cups. Otherwise, use the full amount and just add a tablespoon of water in with your liquid ingredients.

In a large bowl or stand mixer, combine the sugar with the pumpkin, egg, and cooled melted butter. The butter doesn’t have to be completely cooled- you just don’t want it hot enough to curdle the egg. Mix thoroughly. Stir the flour mixture into the pumpkin mixture. Don’t overmix.

 pumpkin spice cookie dough
Roll balls of cookie dough in the sugar-spice mixture.

In a smaller bowl, combine 1/3 cup sugar with remaining spices. Form the cookie dough into 3/4-inch to 1-inch diameter balls. If you make bigger balls, you probably won’t use all the sugar. Roll in sugar mixture and place on ungreased baking sheets. Bake for 8-10 minutes, or until the tops are firm and the bottoms are golden. Cool on a wire rack and enjoy!

For more pumpkin spice inspiration check out Rosalie’s pumpkin spice oatmeal snack cake!

Pumpkin Spice Snickerdoodles

Pumpkin and spice and everything nice: that's what these cookies are mafe of! Try these pumpkin spice snickerdoodle cookies for a new twist on a classic!
Prep Time20 minutes
Cook Time20 minutes
Total Time40 minutes
Course: Dessert
Keyword: Cookies, Pumpkin
Servings: 2 dozen

Ingredients

  • 2 1/2 cups all-purpose flour
  • 1/2 tsp baking soda
  • 1/2 tsp cream of tartar
  • 1/2 tsp salt
  • 1/2 tsp cinnamon
  • 1/4 tsp nutmeg grated
  • 1 cup sugar
  • 1/2 cup butter or coconut oil melted and cooled
  • 1/2 cup pumpkin puree
  • 1 egg
  • 1/3 cup sugar
  • 1 1/2 tsp cinnamon
  • 1/2 tsp allspice
  • 1/4 tsp nutmeg grated

Instructions

  • Preheat oven to 350 degrees.
  • In a medium bowl, combine flour, baking soda, cream of tartar, salt, 1/2 teaspoon cinnamon, and nutmeg.
  • In a large bowl, mix 1 cup sugar, melted butter, pumpkin, and egg.
  • Add flour mixture to pumpkin mixture just until combined. Dough will be soft.
  • In a small bowl, combine 1/3 cup sugar with remaining cinnamon, allspice, and nutmeg.
  • Form dough into 1-inch balls. Flatten slightly. Roll in sugar mixture and place 1 1/2" apart on ungreased baking sheets.
  • Bake at 350 degrees for 8-10 minutes.
  • Remove to wire rack to cool completely.

Notes

If using coconut oil, add 1 tablespoon of water along with it, or use a little less flour.