Posted on 1 Comment

Make your own whipped butter

whipped butter
whipped butter

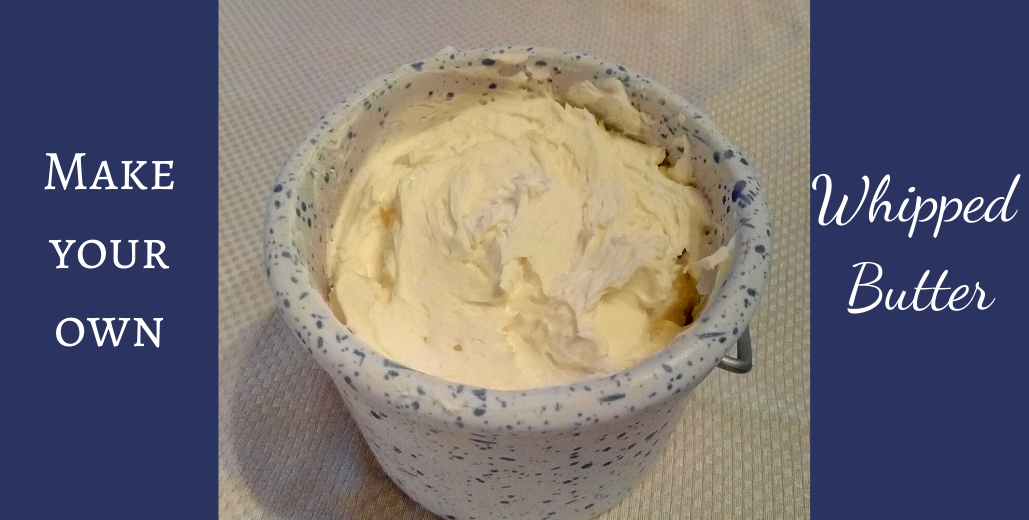
Have you ever looked at those packages of “light” or whipped butter in the grocery store and wondered how they could charge the same amount for a product that has less butter and more air than the regular sticks? It’s a mystery to me. I do, however, make my own whipped butter at home. You can too, because the process is quite simple.

What is whipped butter?

Regular butter is just heavy cream that has been churned enough that the solid particles of fat stick together, while the protein-rich whey runs off. Salt may or may not be added, and then the butter is formed into sticks, rolls, or whatever shape you decide to make. (Have you ever seen old-fashioned butter molds? Some of them are very pretty!)

Whipped butter goes a step further by taking the soft butter and whipping it with some kind of liquid. In effect, you are beating air into the butter, and the liquid helps to thin it out a little. Why would anyone want to do this, you ask? There are actually some good reasons.

Why make whipped butter?

First of all, whipping butter increases the volume. Yes, the extra volume is provided by air (and some extra liquid), but that doesn’t matter too much when you’re spreading the butter on bread or pancakes.

However, you DO NOT want to substitute whipped butter for regular butter in recipes, as equal volumes of regular and whipped butter don’t contain equal amounts of fat. Just stick to sticks for cooking! (Sorry.)

That’s why whipped butter is sometimes labeled “light butter” on the package. It has fewer calories per tablespoon than regular butter, because the volume is partly made up by air.

This can be a good thing if, like me, you’re constantly wondering how the butter disappears so fast! At the rate we eat it, extra volume is a prime benefit.

Another reason to whip butter is because it’s easier to spread. More air = less density, meaning whipped butter reaches room temperature faster than regular butter when you take them out of the refrigerator. It’s also softer at room temperature. This is an especially useful quality when you’re serving bread for supper and forget to take butter out of the refrigerator until it’s almost time to eat.

If the above reasons haven’t convinced you, here’s one final try: whipping butter allows you to incorporate other flavors, in order to give your butter a distinguished taste. Try whipping honey or maple syrup, or even orange juice into your butter for a sweet accompaniment to corn bread or muffins. Or add herbs such as rosemary or thyme for a savory spread. The options are only limited by your imagination!

Method

The process is really quite simple. Place 4 sticks of butter (1 pound) in the bowl of a stand mixer. If you will be using a hand mixer, a large mixing bowl will do. Let the butter soften until it is room temperature.

whipped butter
Let the butter soften until it is room temperature.

With a whip attachment on the mixer, whip the butter on low speed for a minute or so. Then slowly pour in 1/3 cup of heavy cream while the mixer is running. Continue to mix on low speed for another minute or two until the cream is incorporated.

Turn the mixer to high speed and beat the butter for another two minutes. The butter should be pale and fluffy. The timing doesn’t have to be a precise measurement. You can stop mixing at any point, but the longer you mix it, the more air will get beaten into the butter, resulting in more volume.

whipped butter
When finished, the butter should be pale and fluffy.

I have gotten a yield of anywhere from 2 3/4 to 3 1/2 cups of whipped butter, depending on how long I mixed it. That’s about a 30% increase in volume from the 2 cups of butter we started with!

Notes

I have seen other recipes for whipped butter that use milk or even water as the liquid that is beaten into the butter. I have not tried these variations, but if I don’t have any cream someday, I might. My mother always used heavy cream, so that’s what I do.

Variations are pretty much unlimited, as I said before. Instead of cream, use a sweetener such as honey or maple syrup. If you decide to go this route, I would suggest starting out with only one or two sticks of butter–unless you anticipate needing a LOT of honey butter! Add the sweetener one tablespoon at a time, while the mixer is on low speed. That way, you can taste for sweetness so you don’t end up with a mixture that’s too sweet. Try adding sweet spices such as ground cinnamon or cloves to complement the sweetened butter!

Savory herbal combinations that work well in butter are rosemary and sea salt, garlic and Italian herbs, or thyme and lemon. I am excited to try some soon with my lemon thyme!

If you come up with any new flavor combinations, let me know in the comments! I would love to hear of your adventures with whipped butter!

Whipped Butter

Light and fluffy, this whipped butter is the perfect base for sweet or savory spreads. Or just use it plain for everyday enjoyment!
Prep Time5 minutes
Cook Time5 minutes
Total Time10 minutes
Course: Condiments
Keyword: Butter, Condiments, Spreads
Servings: 3 cups

Equipment

  • Stand mixer or handheld mixer

Ingredients

  • 2 cups salted butter softened
  • 1/3 cup heavy whipping cream

Instructions

  • Place butter in mixing bowl. Allow it to come to room temperature.
  • With a whisk attachment, beat the butter for 1-2 minutes until creamy.
  • With the mixer running, slowly add the cream. Continue to beat on low speed for 2 minutes until thoroughly combined.
  • Turn the mixer setting to High. Mix for 1-2 minutes more, until the butter is pale and fluffy.
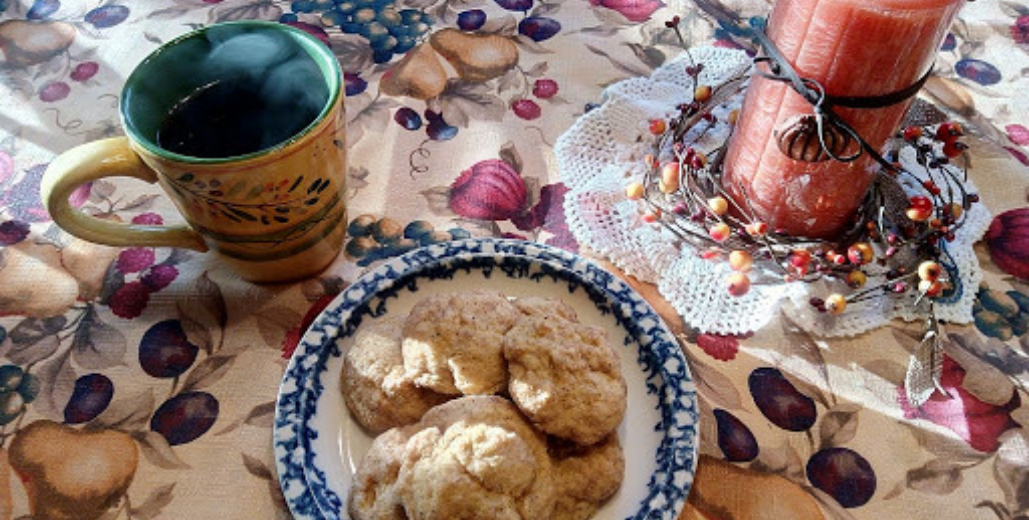
Posted on 3 Comments

Pumpkin Spice Snickerdoodles

Pumpkin Spice Cookies
pumpkin spice cookies
There’s nothing better than a hot drink and a plate of pumpkin spice cookies on a crisp autumn day.

What do you call it when the classic snickerdoodle gets a pumpkin-y makeover? Autumn in a cookie? Snickering pumpkin-doodles? Whatever you want to call them, these soft pumpkin spice cookies are so good that I’ve made three batches in the last month.

They are pleasantly spiced, yet retain the character of snickerdoodles instead of just turning into a pumpkin cookie. You can see from the pictures that the color of these cookies is a very light orange. That’s partly from using homemade pumpkin puree, but it’s also a good clue that the pumpkin flavor is subtle, not overwhelming.

Unexpected Inspiration

I found the original recipe for these in a recently published Amish cookbook. As a whole, the cookbook was disappointing: I was shocked at how many recipes started out with packaged mixes, processed ingredients, or Velveeta. Either those recipes aren’t authentic, or Amish cooking is not what it used to be.

After looking through the cookbook, a handful of the recipes seemed good enough to test. I am very glad I tried this one! Three batches have disappeared pretty quickly in the last few weeks. With a few tweaks of my own, here is a recipe for pumpkin spice cookies that’s fast becoming a family favorite.

pumpkin spice cookies

Dairy-Free Version

You can even make it dairy-free, if you so desire. I substituted melted coconut oil for the melted butter, and it worked just fine. Make sure your coconut oil doesn’t have a strong coconut flavor, however (this depends on how the coconut oil was processed and refined). Pumpkin and coconut might be a good flavor combination, but then again, it might not!

One other note if you’re using coconut oil: normally when you use this to replace butter, you should use the same amount of coconut oil plus a tablespoon of water. For this recipe, you may either add a tablespoon of water, or just use a bit less flour.

Let’s Make Pumpkin Spice Cookies!

First things first: preheat your oven. Mine is a propane oven, which takes a long time to heat up. Maybe if you have an electric oven, this step isn’t so important to do right away.

Next, mix your dry ingredients together. If you will be using coconut oil instead of butter, consider adding 2 1/4 cups of flour instead of 2 1/2 cups. Otherwise, use the full amount and just add a tablespoon of water in with your liquid ingredients.

In a large bowl or stand mixer, combine the sugar with the pumpkin, egg, and cooled melted butter. The butter doesn’t have to be completely cooled- you just don’t want it hot enough to curdle the egg. Mix thoroughly. Stir the flour mixture into the pumpkin mixture. Don’t overmix.

 pumpkin spice cookie dough
Roll balls of cookie dough in the sugar-spice mixture.

In a smaller bowl, combine 1/3 cup sugar with remaining spices. Form the cookie dough into 3/4-inch to 1-inch diameter balls. If you make bigger balls, you probably won’t use all the sugar. Roll in sugar mixture and place on ungreased baking sheets. Bake for 8-10 minutes, or until the tops are firm and the bottoms are golden. Cool on a wire rack and enjoy!

For more pumpkin spice inspiration check out Rosalie’s pumpkin spice oatmeal snack cake!

Pumpkin Spice Snickerdoodles

Pumpkin and spice and everything nice: that's what these cookies are mafe of! Try these pumpkin spice snickerdoodle cookies for a new twist on a classic!
Prep Time20 minutes
Cook Time20 minutes
Total Time40 minutes
Course: Dessert
Keyword: Cookies, Pumpkin
Servings: 2 dozen

Ingredients

  • 2 1/2 cups all-purpose flour
  • 1/2 tsp baking soda
  • 1/2 tsp cream of tartar
  • 1/2 tsp salt
  • 1/2 tsp cinnamon
  • 1/4 tsp nutmeg grated
  • 1 cup sugar
  • 1/2 cup butter or coconut oil melted and cooled
  • 1/2 cup pumpkin puree
  • 1 egg
  • 1/3 cup sugar
  • 1 1/2 tsp cinnamon
  • 1/2 tsp allspice
  • 1/4 tsp nutmeg grated

Instructions

  • Preheat oven to 350 degrees.
  • In a medium bowl, combine flour, baking soda, cream of tartar, salt, 1/2 teaspoon cinnamon, and nutmeg.
  • In a large bowl, mix 1 cup sugar, melted butter, pumpkin, and egg.
  • Add flour mixture to pumpkin mixture just until combined. Dough will be soft.
  • In a small bowl, combine 1/3 cup sugar with remaining cinnamon, allspice, and nutmeg.
  • Form dough into 1-inch balls. Flatten slightly. Roll in sugar mixture and place 1 1/2" apart on ungreased baking sheets.
  • Bake at 350 degrees for 8-10 minutes.
  • Remove to wire rack to cool completely.

Notes

If using coconut oil, add 1 tablespoon of water along with it, or use a little less flour.
Posted on Leave a comment

Autumn Chicken Dinner Recipe

chicken dinner recipe
This no-fuss chicken dinner recipe will leave your kitchen smelling like fall and your family asking for seconds.

Fall is in full swing outside. The trees are gold, the bushes are red, and the garden is starting to look sparsely populated. On a chilly evening, what’s better than to step from the brisk air outside into a warm, cozy kitchen filled with the appetizing aromas of apples, celery, and cabbage? Here’s a chicken dinner recipe that combines all of these flavors in one simple meal.

The flavors of fall combine in an easy meal that’s tasty enough to keep your family coming back for seconds. It’s a one-pot meal, so clean-up won’t take all evening. It’s an inexpensive supper in its own right, and the cost can drop even more if you have a garden or raise chickens.

A Fortuitous Mischance

This recipe is a classic example of my cooking style. I already had a plan for dinner, but then realized I had a cabbage to deal with. So I found another chicken dinner recipe that looked appetizing, and started reading the list of ingredients. Nope, don’t have that. Not that one either. I could maybe substitute something else…

In the end, my meal turned out so different from the original recipe that the resemblance is hard to see. I still want to make that original recipe, whenever I have the right ingredients on hand!

That being said, there is a lot of room for experimenting and adapting this recipe. I used what I had and it turned out very well, but these particular ingredients aren’t the only ones that will work together. Use what you have and let me know if you come up with any great combinations!

Ingredients

I used chicken thighs with the skin on. This helped keep moisture in the meat, and it wasn’t dry at all. If you have a bigger package of thighs or a whole chicken, the recipe doubles just fine. You will want to brown the meat in batches, though.

The type of fat you decide to use should complement the other flavors in the dish. I chose bacon fat for this reason, but butter would be fine as well. I wouldn’t recommend olive oil in this dish.

Vegetables

The celery I had was from my mother’s garden. It didn’t get very big this year, so the stalks were narrow and the flavor was strong. I chopped it pretty finely because of this. If I was using celery from the store instead, I might leave it in bigger chunks for texture and flavor.

I used a normal green cabbage, because I find the flavor more to my taste than red cabbage. However, if you prefer red cabbage, or happen to have a different variety on hand, by all means try it!

The apple(s) used should ideally be tart cooking apples, but feel free to use whatever you have available. Also, use more than one apple if you want to highlight that flavor, or if you have smaller apples. I really miss Pennsylvania apple orchards this time of year. The selection of apple varieties that make it to interior Alaska is pretty limited.

Method

To begin, set a Dutch oven over medium heat. Add a couple spoonfuls of bacon fat and let it melt while you chop some celery and onions. The fat should be hot enough to make the veggies sizzle when you put them in.

Cook, stirring occasionally, until the onion and celery are translucent. If I’m feeling impatient, I will cover the pot so they cook faster.

Remove the veggies and set aside when they are cooked. Use a slotted spoon if you have one, or else tilt the pot so you don’t remove all the fat along with the veggies. You need that for cooking the chicken!

Browning the Chicken

Add the chicken pieces to the Dutch oven. If the pot looks too dry, add another half tablespoon of fat. Alternatively, cook the chicken skin side down at first, to release fat from the skin.

If you’re worried about burning it, turn the heat down to medium-low. Remember you’re just trying to brown the meat at this point. It will have plenty of time to cook in later steps. Flip the pieces over after 3-5 minutes to brown the other side.

chicken dinner recipe
Brown the chicken on both sides.

When the chicken is browned on both sides, return the celery and onions to the Dutch oven. Next, add the apple cider vinegar, Marsala wine, salt, pepper, and caraway seeds.

Give everything a good stir, then arrange the cabbage slices over the chicken. They don’t need to be down in the liquid at the bottom of the pan; once the lid is on, they will steam just fine.

Put the lid on and walk away

Cover and cook for about 20-25 minutes, until the cabbage is crisp-tender, or nearly at the point you want to eat it. Toss some apple slices in and replace the lid. Cook for another 10-15 minutes until the apples are fork tender. Your kitchen should be smelling pretty wonderful at this point!

This is really a no-fuss supper. My favorite kind! Chop everything up, light the stove, and give it a stir now and then. The times listed for cooking are variable and forgiving. I’m pretty sure the cabbage doesn’t mind an extra ten minutes of steaming away atop the chicken if you’re busy with something else.

So the next time you’re wondering what to do with a cabbage, give this chicken dinner recipe a try. Or you could even buy one for the purpose.

Autumn Chicken Dinner

A home-style chicken dinner with great fall flavors of apples and cabbage, this one-pot meal is a quick and easy supper for busy families.
Prep Time5 minutes
Cook Time55 minutes
Total Time1 hour
Course: Main Course
Keyword: Chicken, Main Dish
Servings: 4

Ingredients

  • 2 tbsp bacon fat
  • 1/3 cup chopped onions
  • 1/3 cup chopped celery
  • 4 chicken thighs
  • 2 tbsp apple cider vinegar
  • 3 tbsp marsala wine
  • 1 tsp caraway seed
  • 1/2 tsp salt
  • 1/4 tsp pepper
  • 1/2 small head of cabbage cut into 4 wedges
  • 1 medium apple cut into 12 wedges

Instructions

  • In a Dutch oven over medium heat, saute onions and celery in bacon fat for 5 minutes or until tender. Remove mixture from pan with a slotted spoon and set aside.
  • Add the chicken thighs to the pan and cook until lightly browned on both sides, 5-8 minutes.
  • Return vegetables to pan along with chicken. Add vinegar, wine, caraway seed, salt, and pepper. Place cabbage wedges on top of chicken. Cover and cook until chicken is tender and cabbage is crisp-tender, 20-25 minutes.
  • Top with apples. Cover and continue cooking another 10-15 minutes until apples are fork tender.

For more autumn-inspired recipes, check out this one for pumpkin spice snickerdoodles!

Posted on Leave a comment

5 Ways to Cook Carrots

5 ways to cook carrots

Fresh Ideas for Carrot Recipes

5 carrot recipes
Have an abundance of carrots? Looking for new ways to prepare them? Here’s a handy list of carrot recipes to work these bright orange vegetables into your meal.

Bright blue skies, cool mornings, no more mosquitoes… summer is coming to a close. It’s not quite fall yet; the leaves have just started to turn yellow, and I’m still waiting on the first frost to pick cranberries. This is the season of abundance from the garden. Here’s a selection of carrot recipes to give you some fresh ideas for using produce!

Of course there are plenty of earlier crops, and some will come later, but just now I am so thankful that my kitchen runneth over with a plenitude of tomatoes, peppers, green beans, beets, carrots, and the occasional squash from a friend’s garden.

The moose ate all of our broccoli this year, and most of the lettuce, but we still have quite a colorful harvest.

I love it when I don’t even have to think about buying vegetables at the grocery store–and the home grown ones always taste so much fresher! There’s not much better than just-picked produce that you grew yourself.

My toddler was helping me pick carrots this morning, and it was a job to convince him that we needed to wash the funny three-legged carrot before he could eat it! Our carrots aren’t huge, but most of them are 5-6 inches long and very tasty.

I won’t be surprised if we end up eating most of them fresh, but for those of you with larger carrot patches (or who don’t enjoy fresh carrots), here’s some inspiration for carrot recipes:

Carrot Recipes

Soup

Autumn is the perfect time to make a big pot of soup, as the days start to get a little chilly and there are lots of vegetables ripening.

Vegetable soup, with or without meat, is simple to prepare and also freezes very well. This makes it doubly beneficial for me: I’m preserving vegetables (without spending all day blanching or canning) and putting meals in the freezer at the same time!

Of course there’s also cream of carrot soup if you need to use up more carrots. I am very fond of carrot soup, but don’t try to freeze this one! Cream-based soups do not tolerate freezing.

Spiced Carrots

Carrots are one of those funny vegetables that tastes equally good with savory or sweet flavors. When we were growing up, Mom would often add butter, cinnamon, and a bit of brown sugar to a pot of carrots as soon as they were crisp-tender and drained.

Another good combination is orange juice, orange peel, and ground ginger, along with a pat of butter. Use about 1/2 teaspoon of ground spices per 10 medium size carrots, and a tablespoon or two of butter and orange juice.

Minted Carrots

This is one of my favorite carrot recipes. I’m always looking for ways to use fresh mint, and it makes a nice accent to the carrots. I like to use apple mint, since the flavor is milder than spearmint or peppermint.

I combined orange juice, orange peel, and a pat of butter with cooked carrots, then stirred in about a tablespoon of chopped apple mint just before serving. This was only for 3 servings of carrots, so feel free to use more mint if you’re making a big pot!

Roasted Carrots

Roasting lends itself well to many root vegetables. The long cooking time bring out the flavors and the sugars in carrots, potatoes, sweet potatoes, turnips, parsnips, onions, and more.

Try tossing large chunks of vegetables with olive oil, sea salt, and herbs. Rosemary, savory, and thyme are all good options. Bake at 350 degrees for 45-60 minutes, or until tender.

Another variation is to roast at a higher temperature for a shorter time. This results in a crisper texture and possibly charred edges. You do have to keep an eye on them!

Make sure the carrots and any other vegetables are in smallish pieces so they will actually cook through. Toss with olive oil and seasonings, and make sure you only have a single layer of vegetables in your pan.

Bake at 425 degrees for 30-45 minutes, but DO start checking on them after half an hour!

Carrot Chips

While these involve the same cooking technique as roasting, the end result is so different that I think they deserve their own category.

The basic concept is just like potato chips: you want to slice carrots as thinly as possible, coat them with oil, add salt and seasonings if you wish, then roast at a high temperature for a short time.

Ideally, you want to use large carrots for this recipe, and cut them on the diagonal for maximum surface area. It’s probably not worth the time to cut up small carrots (or even the narrow ends of large ones).

If you would like an actual recipe to follow, check out this one from Mother Would Know. She lists different oven temperatures and cooking times, so you don’t have to guess!

What are your favorite carrot recipes?

Well, there you have it: five different carrot recipes. From creamy soups to crispy chips, in a main dish or starring on their own, carrots are a great way to work some vitamin A into your meals. Do you have a favorite carrot recipe that doesn’t appear here? Let me know!

For more ways to use your garden-fresh produce, check out this post on how to dry tomatoes in the oven.