Posted on 9 Comments

Ultra Power Saving Mode for your Grocery Budget

save money on groceries
21 ways to save money on groceries

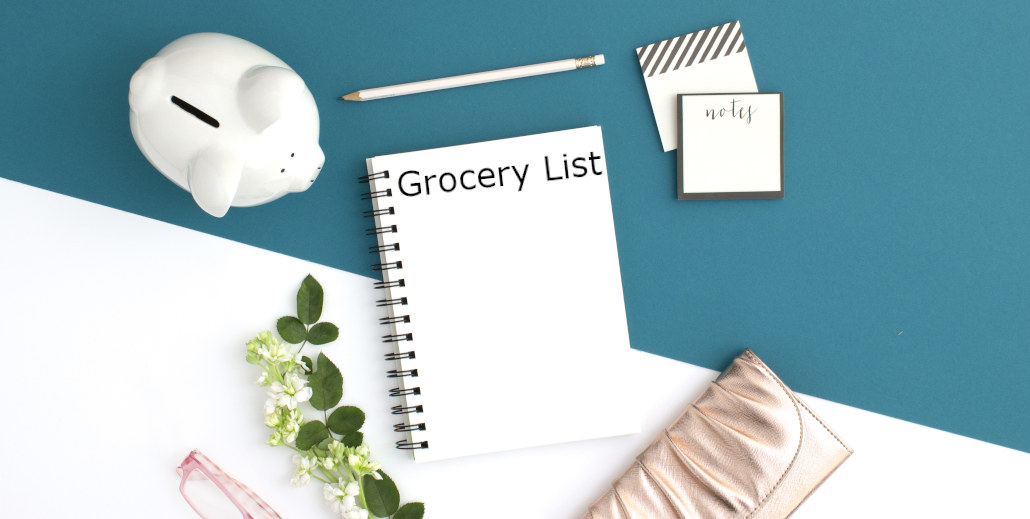
If you’re trying to save money on groceries this year, you’ve come to the right place. There are tons of money-saving resources out there, but this one is different.

I’m always ready to learn new strategies for saving money, but I’ve been disappointed lately. It seems like every article I read about how to save money on groceries just talks about apps or couponing services.

Those may work for some people, but I don’t find most of them to be very helpful. The shopping apps and coupon sites (paid or free) that I’ve seen mostly show coupons or discounts for brand name products. That would be fine if the coupon was worth it. But 50 cents off of a $1.99 can of tomatoes still doesn’t beat the store brand for $0.79.

So I compiled a list of tactics for the shopper who really needs to cut expenses and save money. This is for you if you’ve cut out all extra expenditures and don’t know what else to do.

I know these methods work because I’ve used them for the last 4 years to keep our grocery bills under $350/month for three people (plus a baby). I can keep them under $300/month when I use all of the tactics listed below. And that’s in Fairbanks, Alaska, where there is no Aldi and groceries cost over 25% more than the national average!

I don’t use every single tactic every month because I’m a weak human being, and I like to buy seltzer water now and then! But I do use some of them all the time.

If you would like to save money on groceries, but aren’t desperate, try a few of these tactics. If you need to save a LOT, use all of them. I promise that you will see a difference in your grocery bills!

Again, I don’t use all of them every month. They are meant to be like Ultra Power Saving Mode on your phone: you don’t use it all the time, just when your phone has a low battery and you need it to last as long as possible.

I’m warning you: these tactics aren’t as quick and easy as downloading a fancy app. It takes some time to plan meals before you set foot in the grocery store. Shopping on a tight budget doesn’t allow you to experiment with lots of exotic foods (unless you consider rice exotic…)

But if you don’t have enough money for groceries this month, it’s worth it. If you’re desperately trying to scrape up some extra cash, it’s worth it. This list of tips will help you stretch your grocery budget farther than you ever have before!

Before You Shop

Are you ready to start saving? Don’t head to the store just yet. Having a plan is one of the most important things you can do to save money on groceries. These tips will help you form a plan so you can stretch your hard-earned cash as far as possible!

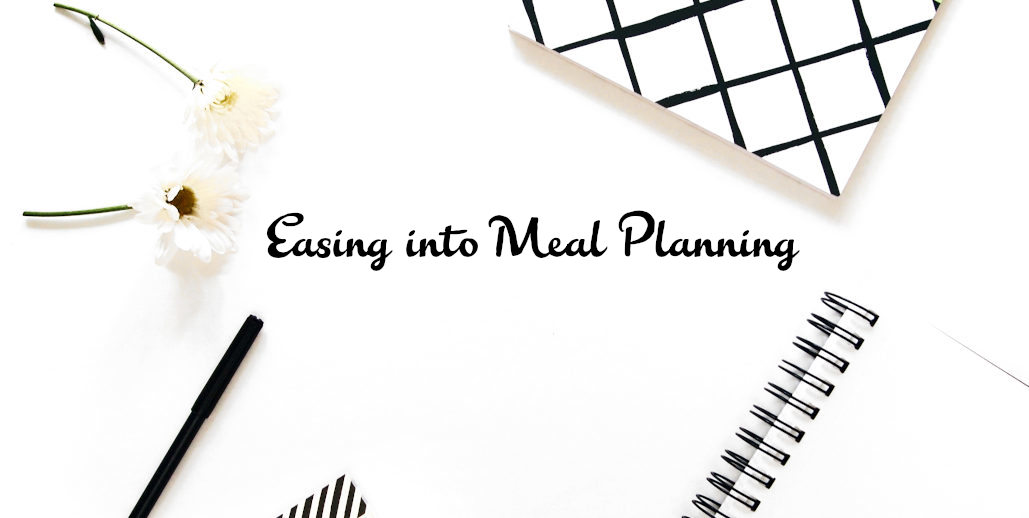
1. Start with a meal plan.

This basic tool will help you plan out your menus for a week or a month at a time. When you’re in Ultra Power Saving Mode, I suggest planning more than one week of meals at a time. You don’t have to tackle the entire month if that idea seems overwhelming, but try to plan two weeks of meals.

You will only be shopping for this week’s groceries, but if you notice something on sale which is on your menu for next week, wouldn’t you rather pay sale price and move the meal to this week? Or just freeze the sale item for later use. You can read more about meal planning here, or just grab a free copy of my meal planning bundle.

2. Take an inventory of your refrigerator, freezer, and pantry before you make a meal plan.

This helps you to use what you already have, so it doesn’t sit in the back of your pantry for months. It’s nice to have a well-stocked freezer and pantry for times when money’s tight.

I like to do this at least every other month, and keep an inventory sheet posted on my fridge. Then I can easily refer to it when making my meal plans and grocery lists, instead of digging through everything trying to find out whether or not I used that last can of corn.

3. Go quasi-vegetarian.

Shoot for 3-4 meatless meals per week. Meat is often one of the most expensive items people buy. By replacing meats with other forms of protein, you can easily shave off a good chunk of your weekly grocery bill.

And choose wisely the meats you continue to buy during this period. When we’re on a tight budget, I only buy bacon or whole chickens. Why? Chickens go on sale for $0.89-$0.99/lb several times a year, and a whole chicken gives our family 3-4 meals if I plan them right. That comes out to just over a dollar per meal for a large chicken.

Bacon is a much higher price per pound, BUT you don’t use as much bacon in a meal as you do other meats. Also, bacon greatly enhances beans, and we eat a lot of beans.

4. Plan to grocery shop just once per week.

No running back to the store for last-minute items you forgot. This will not only save on gas, but also keep you from being tempted to purchase other things you don’t really need.

Some people can walk out of a grocery store with only the one or two things on their list; others just can’t help seeing sales, and come out lugging much more than they planned to buy. (It’s also much easier to keep track of grocery receipts if you only have one per week!)

If you know that you’ll only be grocery shopping once per week, you have to be organized and plan ahead. This means you need to sit down with your meal plan and make a grocery list that includes everything you need to make meals for a week.

5. Look at the weekly ads and coupons for your grocery store before you go.

I said that I don’t find most grocery apps helpful. The exception is apps that are specific to one grocery store. These often have coupons for store-brand items, milk, eggs, and produce.

They might also give you points for gasoline discounts or other rewards or rebates. In my experience, not all grocery apps are created equal. I use the Safeway app all the time, but Fred Meyer only rarely.

how to save money on groceries

At the grocery store

6. Go shopping first thing in the morning.

This is when many grocery stores mark down items that will be expiring soon. I usually shop at 8:30-9:00 on Wednesday mornings, and I can almost always score markdowns on meats, yogurt, and other dairy products.

7. Compare prices for fresh and frozen veggies, especially if it’s not garden season!

For example, I know that I can usually buy fresh broccoli in the winter for about $2.49/lb. However, frozen broccoli runs around $1-$1.25 for a 12 oz. package, which comes out to about $1.67/lb.

It also helps to keep in mind what you will be doing with those fruits and vegetables on your shopping list. Frozen carrots work fine in soups and casseroles, but not in coleslaw. Extra points for planning meals around frozen vegetables while making your meal plan!

8. Don’t put anything in your cart that you could eat on the way home.

What I mean by this is that you shouldn’t be buying convenience foods. Aim for buying ingredients only: flour, butter, and eggs instead of bread or crackers. The obvious exceptions to this rule are fruits and vegetables, which you can often eat in their natural state!

9. Don’t buy any beverages except milk.

If your home doesn’t have a safe source of drinking water, that’s a different story, of course. But in general, stick to this rule. I’m also not going to tell you that you can’t have tea or coffee if you really think you need it. I’m merely pointing out that these beverages aren’t necessary, and can therefore be dispensed with for a period of time if your budget is very tight.

What I’m really talking about are drinks like juice, soda pop, seltzer water, iced coffee or tea, and alcohol. These are extras, and shouldn’t be in your cart while you’re in Ultra Power Saving Mode.

10. Know when to wait.

Let’s say cheddar cheese is on your list. It’s not on sale, but you know that cheese does go on sale at least once a month. Mentally review your meal plan.

Do you have any cheese at home, or was it just on your list because you were running low? Do you have any other cheeses that you could substitute? Could you make the recipe without cheese? Could you save the recipe for next week and make something else that doesn’t require cheese?

Ultimately, only you can make the decision. But learning to adjust your grocery list and meal plan on the fly is a valuable skill.

11. Don’t buy organic anything, unless it’s actually cheaper than store brand.

I don’t want to open a can of worms here. I’m not saying you should never buy organic food. I do, myself, when we’re not in Ultra Power Saving Mode. But buying non-organic food for a month while you’re trying to save money will not kill you.

If you just can’t bring yourself to buy factory-farmed chickens or beef raised on corn, then don’t. Go completely vegetarian for a month, or ask the clerk in the meat department which day of the week the organic meat gets discounted. Shop on that day, first thing in the morning. I often see organic chicken and ground beef discounted up to 50% or more.

12. Buy your beans and rice in bulk.

Like, at least 5 pounds at a time. No cute little 1 or 2-lb. bags. Those aren’t much better than sale-priced meats. And don’t even think about canned beans! It’s really not that bad to cook your own. The hardest part is remembering to do it before 4:00 p.m. Try setting a reminder on your phone.

13. Compare unit prices.

These are the little numbers on a price tag that lists the cost per unit the item is measured in. Units will be different for different items: eggs are measured in dozens, beans are measured in pounds, milk is measured in gallons.

Comparing the unit price across different brands and different sizes of containers will help you to see which item is the most cost effective. Buying a larger package might raise your grocery bill this week, but it will help you to save money on groceries in the long run.

Hint: if you see two different units for the same type of item (ounces or pounds for two different brands of tomato sauce), the one measured in larger units will nearly always be the cheaper option.

14. Don’t assume that buying in bulk is always cheaper.

Now that you know how to compare unit prices, it’s tempting to buy everything in bulk. But that’s not always the best way to save money on groceries. Don’t assume that just because it’s in a big package, it will be cheaper in the long run. Always double check that unit price!

Also, if you don’t need a lot of a particular item, the most cost-effective option may actually be the smaller package. This is especially important to consider when you’re in Ultra Power Saving Mode and every penny counts. Don’t get stuck thinking you ought to buy the item with the lowest unit price.

If you just need a bit of gruyere cheese for your French onion soup, don’t go out and buy the biggest package you can find. Find a small package, or substitute a less expensive cheese with similar characteristics.

Shop sales wisely

15. Resist sale items if they’re not on your list.

This is a tricky one, because it depends on your situation. Normally, I will scan the meat department quickly for markdown stickers or a really great sale on chicken.

It can be tempting to stock up on something when it’s on sale. But if you’re serious about not going over budget this month and you’ve made a meal plan that will keep you on track, don’t let yourself get distracted by the sales.

Again, you have to evaluate your situation. If you think you will be in Ultra Power Saving Mode for more than one month and it’s an item you use frequently, maybe it does make sense to buy two or three instead of one. But don’t buy six jars of peanut butter just because they’re on sale. There will be other sales in the future.

16. Ask for rain checks.

Sometimes stores run out of sale inventory faster than they estimated, and there aren’t any left by the time you get there. If a store is advertising a great sale and you planned for it, so the item is on your list and in your meal plan, ask an employee in that department for a rain check.

As long as the sale wasn’t advertised as “while supplies last,” they should be happy to give you a rain check. This locks in the sale price for you, so you can purchase the item when it is restocked, even though that might not be until after the sale has ended.

17. Make a price comparison book and bring it with you.

This is a great tool for learning how to spot great sales and save money on groceries even at regular prices. Technically, you should do this at home, before you grocery shop. But if you haven’t been saving receipts, you can’t start until you go shopping.

Get a small notebook and write down all the foods you normally buy: one item per page. I wrote down everything I could think of on one piece of paper first, then transferred it to the notebook in alphabetical order.

Take the price book along on shopping trips, and copy prices from your receipts when you get home. List the name of the store, unit price, price you actually paid with the actual quantity purchased, and whether or not it was on sale. An entry for eggs might look like this: Safeway, $2.69/dozen, $4.04/1.5 dozen, SALE.

Expert tips to save money on groceries

18. Figure out which stores have the best prices on items you commonly buy.

Don’t assume you know! Take your price book along and write down regular prices, not just sales. There is a Costco in my city, but I don’t have a membership. It’s not worth it for my family.

I’ve tagged along with relatives on their shopping trips, to check out the prices. Some of them are great; others are no better than our regular grocery stores. You need to know which items you normally purchase in order to accurately judge whether membership-only stores like Costco or Sam’s Club are cost effective.

If you judge that it’s not really worth the price, but there are still a few things you would like from that store, try to find a friend or relative who has a membership. I keep a short list of items that we buy at Costco, and my sister is happy to pick up a few things for me once a month.

19. Put your blinders on.

Stick to your list. If you don’t need anything from a certain aisle, don’t go down it. Do you ever find yourself walking up and down every aisle out of habit? That may be a good way to get some exercise, but it’s not good for your wallet when you’re trying to save money on groceries!

It sounds silly, but if I’m not paying attention to my list, I’ll find myself wandering down the coffee aisle sniffing appreciatively and gazing at all the tea. (And if Stash Irish Breakfast happens to be on sale, it will end up in my cart.)

Avoid temptation by only walking down aisles if you have to. And if you know you have a weakness for something, look the other direction if you have to pass by it!

20. Take a calculator or your phone and tally up prices as you put items in your shopping cart.

I often do this at the end of the month when I have a hard cap on my grocery budget. It prevents that “Oops, I didn’t think it would cost so much,” when you get to the checkout lane. Pick out your most important items first, and come back for the “extras” if you’re not sure you will have enough money.

The hardest items to do this with are different kinds of produce, which are sold by weight. Unless you have two calculators or can do mental math better than me, just estimate.

Side note: you can add everything up in your head as you go along if you don’t have a calculator. You just might get some funny looks as you stare intently at a package of pasta before triumphantly announcing, “Twenty-nine eighty-two!” (Ask me how I know.)

21. Watch that cashier!

Cashiers are human, and humans make mistakes. I don’t know how many times I’ve looked over my receipt after a shopping trip and noticed items that should have been discounted but were not.

Most stores in my area have screens that you can watch while the cashier scans each item. Keep an eye on this, and say something if you notice an item coming up as the normal price instead of the sale price. It’s not bad manners to ask for the sale price, as long as you do it politely.

If you would really rather not confront the cashier, you can always quietly head over to Customer Service when you’re done and point out the mistake.

Conclusion

After reading this collection of tips to save money on groceries, you should be all set to head to the store and start saving money! If you find these tips helpful or have another recommendation, I would love to hear from you! Leave a comment below.

Happy saving!

~Kimberly

Posted on 1 Comment

Sweetheart Cranberry Almond Scones

cranberry almond scones
These sweet, fruity scones are a pretty and delectable way to show a friend or sweetheart you love him!
cranberry almond scones

There’s something about the combination of almonds and cranberries that fascinates me. I experienced it once in a pie, and decided to try again with these cranberry almond scones. To my delight, the same flavor phenomenon took place!

Perhaps it happens because they don’t grow in the same climates. Or because they are both such strong flavors, but very different. I even came up with some verses about it:

I know not if it's real or imagination, 
but the fact stands that the combination
of sweet almond and tart cranberry
has a resulting flavor that's nigh unto cherry!

Okay, so I’m not much of a poet. But these cranberry almond scones do taste surprisingly like cherries, as did the “mock cherry pie” I once tasted, which also used this combination.

I suppose tart cherries are the ones used for pies and most preserves. I’ve never eaten one raw, so I don’t know how close the flavor is to cranberries. But why would almonds make cranberries taste like cherries?

It’s beyond my ken, but in a land where cranberries grow and cherries don’t, I’ll take what I can get!

More and more berries

If you follow my blog, you will note that this is the second cranberry scone recipe I’ve posted in as many months. This recipe is very different, I promise! While I was happy with the first cranberry scone recipe, I wanted something a little different this time.

Keep the bright cranberry flavor, but sweeten it more. And make the scones lighter, if possible. I don’t care for dense scones, and the first recipe- while soft and not actually dense- was still not as light as I wanted.

So instead of complementing the cranberries with orange and spice, I opted for the lighter, sweeter pairing with almond. I sugared the cranberries before adding them, to cut their tartness. And I folded the cranberry mixture into the dough at the very end to preserve as much flaky lightness as possible.

The result: a tender, lightly sweet scone with ripples of cherry-flavored fruit filling. They are a little messy to make, and require a light touch, but the end result is definitely worth it. These cranberry almond scones exceeded my expectations!

My husband says that the almond glaze drizzled on top takes these scones to a whole new level! He gave this recipe his approval by eating most of them.

These cranberry almond scones would be perfect for a Valentine’s Day treat, or make them for any other special occasion to surprise your sweetheart.

sweetheart cranberry almond scones

Method

Preheat your oven. Set the cream cheese out so it can soften a bit. (Set it on the stove while the oven heats for extra warmth.) The butter can stay in the refrigerator, as it should be cold.

Prepare the cranberry filling

If you are using frozen cranberries, make sure they have time to thaw, at least most of the way. Frozen berries won’t take up sugar like fresh ones do, and they will still taste pretty tart in the scones.

Place cranberries and 3 tablespoons sugar in a food processor and whirl for a few seconds until combined. Stir in almond extract.

cranberries
Chopping the cranberries with sugar in a food processor makes the filling more evenly flavored, instead of partly tart and partly sweet.

Make the dough

In a large bowl, combine flour, salt, 2 tablespoons sugar, and baking powder. Mix until thoroughly combined.

Cut the butter into small chunks. Mine are usually about half a tablespoon in size. Cut the cream cheese into smaller pieces as well. These pieces don’t need to be as small, because the cream cheese is (hopefully) softer.

Add the butter and cream cheese to the flour mixture and cut in with a pastry blender or fork until the butter is in roughly pea-sized pieces. You shouldn’t see big chunks of cream cheese at this point.

(If you do, your cream cheese wasn’t soft enough. Next time, try cutting the cream cheese in first, before the butter.)

Stir the egg into the half-n-half, and add to flour mixture. Mix lightly just until combined. Fold in almonds.

Knead & shape the scones

Turn dough out onto a floured board or counter. Knead gently three times. Pat dough out into an oval or rectangle shape about 3/4-inch thick.

scone dough
When spreading the filling over the dough, leave about an inch around the edge. This will make it easier to work with the dough.

Now comes the messy part. Spread the cranberry filling over half of the dough. It will be runny. Fold the other half over top of the filling, pressing down lightly. Fold the dough in half again. Some of the filling will probably fall out. Don’t worry about it.

Pat it out a little and fold one more time. (You can skip this last fold if your dough is falling apart or it looks like it might.)

scone dough
Don’t worry if the dough looks messy when you’re finished. It will look better after you bake the scones. If some of the filling falls out, leave it. You don’t want a lot of juicy filling running onto the baking sheet, or it will burn.

Pat the dough into a circle 9-10 inches in diameter. With a sharp knife, slice the circle into 6 wedges. Place the scones on a buttered baking sheet, slightly separated so the edges aren’t touching.

Sprinkle sliced almonds on top of each scone. You may also sprinkle sugar on top, if you will not be glazing them later.

cranberry almond scones
See, they already look better after being cut into scones and topped with almonds!

Bake the scones for 12-15 minutes, or until the edges are golden. Remove the scones to a wire rack to cool. When they are completely cool, you may glaze them with a thin icing made of powdered sugar, milk or cream, and a few drops of almond extract.

Of course, you don’t have to let them cool all the way, especially if you sprinkled sugar on the tops before baking. Cranberry almond scones are delicious warm from the oven!

cranberry almond scones on plate
My favorite way to eat scones is fresh from the oven! My husband prefers them cooled and glazed.

Have you seen the combination of cranberries and almonds in any other recipes? Leave a comment below!

Cranberry Almond Scones

These cranberry almond scones have a light, flaky texture and sweet filling reminiscent of cherry. An almond glaze makes them extra special!
Prep Time20 minutes
Cook Time15 minutes
Total Time35 minutes
Course: Breads
Keyword: Bread, Cranberry, Scones
Servings: 6

Ingredients

  • 3/4 cup cranberries
  • 5 tbsp sugar divided
  • 1/4 tsp almond extract
  • 1 3/4 cups flour unbleached
  • 1/2 tsp salt
  • 2 1/2 tsp baking powder
  • 2 ounces cream cheese softened slightly
  • 3 tbsp butter cold
  • 1 egg
  • 1/2 cup half and half
  • 1/4 cup sliced almonds + more for topping
  • extra sugar or almond glaze if desired

Instructions

  • Preheat your oven to 425 degrees Fahrenheit.
  • Combine cranberries and 3 tablespoons sugar in a food processor. Pulse for a few seconds until cranberries are chopped. Stir in almond extract.
  • In a large mixing bowl, combine flour, 2 tablespoons sugar, salt, and baking powder.
  • Cut in cream cheese and butter with a pastry blender until mixture resembles coarse crumbs.
  • Whisk the egg into the half and half. Pour into flour mixture and stir just until combined. Fold in sliced almonds.
  • Turn dough out onto a floured board. Knead gently three times. Pat dough out to 3/4-inch thickness.
  • Spread the cranberry filling over half of the dough. Fold the other half over on top of it. Fold the dough in half again. Pat it out a little and fold in half a third time. Pat into a 9 or 10-inch circle. Cut into 6 wedges with a sharp knife.
  • Place scones on a buttered baking sheet, separating them so that the edges are not touching. Top with additional sliced almonds and sugar if desired.
  • Bake for 12-15 minutes, until edges are golden. Cool on a wire rack. Drizzle with almond glaze if desired.

Notes

For almond glaze: Stir a tablespoon of milk and 1/8 teaspoon almond extract into 3/4 cup confectioner’s sugar. Keep adding milk a little at a time until desired consistency is reached.
Posted on 2 Comments

Easing into Meal Planning

meal planning
busy girl's guide to meal planning
meal planning for the beginner
guide to meal planning
meal planning
beginner meal plan
busy girl's guide to meal planning

You’re tired of never knowing what’s for dinner, tired of spending extra money on food because nothing is in the fridge, and tired of eating pre-made, highly processed meals that don’t make you feel good. So you’re thinking about meal planning, but don’t know where to start.

You may have heard friends or family members talk about their meal plans, or maybe you did a Google or Pinterest search and were overwhelmed with the number of different methods and resources out there.

I’ve seen some methods that are quite detailed and seem pretty intense. Others want you to buy an app or even a subscription to dinner kits. Those options can be great, depending on your situation.

But if you’re a busy girl with an unpredictable schedule, you might not be ready to invest in a paid meal planning service. And you definitely don’t need a complicated, rigid system.

I get it. If you’re looking for a way to ease into meal planning without spending a lot of time or money, I’ve got just the plan for you. It’s simple, it’s flexible, it’s free, and it will take you less than half an hour per week.

Is meal planning worth it if you’re single, busy, or both?

Some meal planning systems seem to be built for stay-at-home moms with unlimited time for cooking. I’m a stay-at-home mom myself, but I still appreciate fast, healthy meals that my family will enjoy.

And I understand unpredictable schedules. If you’re staying late at school or work and coming home hungry to an empty refrigerator, I get it. Tortilla chips and salsa used to be my go-to meal on busy nights.

I remember buying vegetables at the grocery store, and then watching them rot in my fridge because, well, what am I going to do with a bunch of celery when it’s 7:30 pm and I need something to eat now, not in an hour?

At that time, I thought that a meal plan wouldn’t help me because I was so rarely home to cook. I didn’t want to buy a lot of food and have it go bad. I didn’t need a meal plan that would make my life more expensive and stressful than it already was.

But there is a way to make a simple meal plan that fits your life, even if it’s crazy. Even if you feel like you’re never home. And I promise that cooking real food- even if it’s only once a week- will save you money.

This meal plan is designed to be flexible. If you are home for dinner most nights of the week, but just don’t have much time to cook on weeknights (or whatever your schedule is), I’ve got you covered!

How to start a meal plan

Just read through the steps and choose which option fits your life best right now. Don’t pick a plan based on your ideal life or what you think your schedule will be a month from now.

It’s easy to change your meal planning slightly to fit a different schedule down the road. For now, stick with something you KNOW will work.

If you can only plan one week at a time, that’s fine. If you have no clue what you’ll be doing on the weekend, I’ll show you how to plan for that too.

The key is to start slowly. If you try to take on too much at once, you will probably end up overwhelmed and just give up on meal planning altogether.

Ready? Grab a pen and some paper to jot down ideas, and let’s get started!

meal planning

Make a Meal Planning Cheatsheet

What’s the first thing you need to do when you’re ready to start a meal plan? Think about the kinds of meals you like to eat. Take out your pen and paper, and start making a list of meals you like.

These should be meals you have cooked yourself, or have helped someone else cook. That way, you know you can actually make them! It’s okay to start with boxed mac’n’cheese if that’s where you’re at. You don’t need to know how to cook from scratch to start meal planning.

Don’t write down your favorite fancy restaurant dish that you’ve been meaning to try. We’ll get to that later! Try to come up with a list of 15 familiar meals that you like. (If you’re really having trouble with this, you can start with 8-10, and fill in the gaps later.)

Since you’re just starting out, stick to suppers only: main dishes in particular. You can worry about side dishes later, once you get the hang of this meal planning thing.

This list will become your cheatsheet or master list for meal planning. It will come in handy when you find yourself staring at your meal plan with no ideas- or on those weeks when you didn’t even make a meal plan because your schedule was so crazy.

Organizing your list

If you wish, you can organize your master list of meals into categories. I find it helpful to organize them by the main meat or protein in the meal. This is especially helpful for when you buy meat/seafood/other protein on sale and then don’t know what to do with it!

Or you could organize by type of dish. What exactly do I mean by that? Soups, casseroles, one pot/skillet meals, slow cooker meals, etc. This can help you plan for busy days when you don’t have time to cook, as well as days when you will have an hour or two before supper time.

For example, chicken tortilla soup could be listed under “Chicken” or “Soups.” Italian sausage & peppers could go under “Sausage” or “Skillet Suppers.” You get the idea.

You can find both options for categorizing your meal planning cheatsheet in my free downloadable meal planning pages!

All right. Now that you have your cheatsheet started, you’re ready to make your first meal plan!

You might be saying, “Wait! How’s this cheatsheet supposed to help if it only contains eight meals?”

Don’t worry. You’ll add to it as you cook different meals and find things you like. It’s meant to be a resource you can look back at and adjust over time.

Plan out one week of meals

STEP 1: Grab a sheet of paper

Or a notebook, or my printable meal planning pages. If you’re making your own meal planner, write down the days of the week, with space below or beside each one.

Some people do better visualizing their schedules with a monthly grid or calendar. (There’s one all ready for you in my pack of printable resources!)

If you go this route, don’t feel like you need to fill out the entire month all at once. You can still plan week-by-week, and just keep the schedule organized by month.

TIP: I keep my meal plans in a notebook or binder because I find it helpful to refer back to previous weeks or months when I need inspiration.

I can easily come up with a week’s worth of meals this way- without even opening a cookbook! Who wouldn’t want a quick and easy way to plan meals in less than five minutes per week?

Of course, when you’re just starting out with this, it will take a while before you have enough variation in meals to help with dinner ideas.

STEP 2: Decide which day you will go grocery shopping

This doesn’t have to be the same day every week. Just make sure you plan enough meals to last you until the next grocery shopping trip.

I usually include grocery shopping day in my weekly meal plan, because it tends to be one of my busiest days. I need to have that day’s supper planned in advance, even if it’s going to be leftovers.

For example, if I normally shop on Wednesdays, my meal plans run from Thursday to the next Wednesday.

If you shop on your day off and have plenty of time to cook that day, you might prefer to start your meal plan with shopping day. That’s fine too.

STEP 3: Plan around your schedule and what you already have

Now that you’ve determined when you’ll go grocery shopping, think about your schedule for the next week.

Which days do you have time to cook supper? Which days will you be out for 8-10 hours, but have time to throw something in the slow cooker before you leave? Are there days when you’ll have absolutely no time and need to plan leftovers?

What about special occasions? Is there a holiday or birthday coming up this week? Date night or dinner at your mother’s house? Write it down so you don’t plan too many meals.

If you only see one or two days in the next week where you’ll be able to cook in the evening, that’s okay. Just make sure to cook extra on those days, so you’ll have leftovers to eat later.

TIP: Cook extra on days when you have a little more time than usual. It doesn’t have to be anything fancy; just make a big batch of spaghetti or soup, and you just created an extra meal or two!

Now look in your fridge and freezer. Is there anything you need to use up quickly? Take a peek in your pantry. Do you have a lot of rice or canned tomatoes?

Keep these items in mind as you come up with meals for the week. Starting with what you already have prevents waste and helps you save money.

STEP 4: Start filling in your planner!

It’s finally time to fill in that meal plan! If you haven’t cooked much, stick to simple meals for now. I don’t want you to give up on meal planning when it’s actually the cooking which is the problem!

Look over your meal planning cheatsheet. Based on what you found in your fridge and pantry, do you have most of the ingredients to make a meal or two on the list?

If so, great! Write those meals down on your meal planner. Make sure you put the meals on days when you will actually be able to cook them.

If your fridge is mostly empty, not to worry. You must do a good job of using up what you buy!

Assign leftovers or 10-minute meals to your busiest days. Examples of these speedy suppers include: bean & cheese quesadillas, scrambled eggs with veggies and/or bacon, chicken or taco salad, BLTs or other hearty sandwiches, and canned or frozen (thawed) soups.

STEP 5: Fill in the gaps

You probably still have a few blank spaces to fill. Gather some recipes for inspiration. But before you go grab all 18 of your cookbooks and look up your Pinterest recipe boards, hold on for a minute!

Trying to make a meal plan with too many recipes to choose from is a waste of time and energy. Even if you’re not a novice cook, it’s just overwhelming to look through hundreds of recipes and try to choose from among them.

If you’re like me, you might end up getting distracted and merely flipping through cookbooks or scrolling through recipes on your phone. Before you know it, you’ve wasted an hour and there’s still nothing on your meal plan.

When I make my meal plans, I limit myself to one or two cookbooks, or a Pinterest board full of recipes I want to try.

This way, you will actually use your cookbooks instead of just admiring the pretty pictures! You’ll also find out which books contain recipes that work for you, and which ones aren’t really that useful.

As a general rule of thumb, I don’t schedule more than one or maybe two new recipes per week. New recipes can stress me out, especially if there are a lot of other things going on. You can read more reasons why in this article on cooking simply.

Okay. You have a cheatsheet, you know what ingredients are in your kitchen, and you’ve grabbed a cookbook or Pinterest board for additional ideas. You should be able to come up with meals for a week pretty quickly.

TIP: As you fill in your meal plan, write down the location of the recipe.

If it’s in a cookbook, use an abbreviation for the title and list the page number. I would write “ACF 96” for a recipe on page 96 of the book, “A Continual Feast.” I’ve included little boxes in the upper right corners of your meal planner just for this purpose!

STEP 6: Make a shopping list

Once you’ve filled it out, don’t stop quite yet. There’s one more quick step. Grab your grocery list and write down all the ingredients you need to prepare these meals.

Remember to check your pantry and refrigerator to see what you already have! As you continue meal planning, this will get easier as you learn to stock up on common ingredients.

That’s it! You’re done! Congratulations on completing your first meal plan! Now you’re all set to make a week’s worth of meals that fit your schedule, and you know what ingredients you need to buy and how much time you need each day to cook.

Moving Forward

We focused on planning suppers for this first week’s meal plan. You probably want to eat more than once a day, though. I suggest that for this first week, just stick to what you’ve been doing. If that’s grabbing breakfast or lunch from the cafe close to work, so be it. Start slow, remember?

If you’re using my weekly meal planner, you have spaces to fill in breakfasts and lunches in addition to dinners. You don’t need to use these sections at first, or ever if you don’t want to.

I will occasionally plan special breakfast or brunch dishes, but other than that, it feels kind of silly to write “eggs & toast” or “oatmeal” every day. I know some people really like to plan all their meals, and that’s why I included the extra spaces.

If you don’t want to use them, try my monthly meal planner. That page only has one box for each day, so it’s better suited for dinner planning only.

Review your progress

Every week or so, it’s good to review your meal plan and write down what you actually ate that day if it differed from what’s written there. Life doesn’t always go as planned, so don’t get discouraged if you don’t stick to your meal plan all the time.

Some weeks I’ll make all the meals I had planned, just not on the days I had planned them. Other weeks, our actual menu will look totally different than what was written down. There’s nothing wrong with that. I’ve crossed out my planned meal and written “pizza” quite a few times!

Meal planning isn’t going to work if you make a plan but don’t stick to it and don’t track what you’re eating instead. If you do track what you’re eating, it can help you plan better.

Are you grabbing takeout because you’re too tired to cook after work? Maybe you need to plan really simple meals like a jar of pasta sauce and frozen meatballs, or meals that can be frozen and reheated, or slow cooker meals that can be prepped in the morning.

Periodically reviewing your intended meal plan and comparing it to reality will help you to become a better meal planner. Even if it starts out pretty rocky. Just remember that a meal plan is a tool to help you, not a standard of perfection that makes you feel guilty if you don’t follow it exactly.

***

I hope these tips and resources are helpful. My goal is to equip you to start a successful meal plan that will save you money, time, and energy.

You may also enjoy:

Why You Should Have A Simple Meal Plan

Posted on Leave a comment

Spiced Light Fruitcake

light fruitcake recipe
classic fruitcake
light fruitcake recipe
Here’s a recipe for a light fruitcake with a texture similar to pound cake, and warm spices to complement the fruit flavors.

If you missed the boat for stirring up your fruitcake on the first Sunday of Advent, don’t let that deter you from giving this light fruitcake recipe a try. Fruitcakes are still tasty even when they don’t have several weeks to sit and age!

This year, the first Sunday of Advent found us traipsing about the White Mountains with a few of my siblings and my husband’s brother, who was visiting over Thanksgiving.

My thoughts were directed more toward mountains and leftover pumpkin pie than getting ready for Advent and Christmas.

It wasn’t until the next day that, surrounded by liturgical resources, cookbooks, and my file of Christmas recipes, I tackled Advent planning. And realized that I’d meant to make fruitcakes the day before. Oops.

Another week passed before I managed to collect all the necessary ingredients and actually bake the cakes.

Disclosure: This post may contain affiliate links. If you click on the links and make a purchase, I may receive a small commission at no extra cost to you. Read my full disclosure here.

Light vs. Dark Fruitcake

I usually make dark fruitcakes: the kind that consist mainly of dried fruits and spices, with a little flour to hold them together. I steep them in either brandy or apple juice, and age them in the refrigerator for a few weeks.

My husband isn’t the biggest fan of those cakes, and since I probably shouldn’t consume an entire fruitcake by myself, I decided to use a light fruitcake recipe this year.

What’s the difference? Well, light fruitcakes have a lot more butter, flour, and sugar than their dark counterparts. They’re more like fruit-studded pound cakes than a dark, sticky brick of spicy fruit (more or less).

Also, dark fruitcakes are meant to be steeped in dark spirits and aged for weeks or months. Light fruitcakes use light spirits, or none at all. Some of them are meant to be eaten fresh, not aged.

They are both fruitcakes in their own right, but light ones are more like fruitCAKE, while dark ones are FRUITcake!

A Brief History of Fruitcake

light fruitcake recipe
Fruitcakes have been around in some form since ancient times!

Which version is older? It’s hard to say. Fruitcakes as we know them were likely first made in England in the Middle Ages, when trade routes to the East introduced exotic spices and dried fruits.

These would have been very expensive, so they were saved for special occasions like Christmas feasts.

According to Saveur, fruitcake was eaten in 18th century Europe around the winter solstice, to mark the annual nut harvest.

There have probably been nearly as many fruitcake recipes are there are fruitcake bakers. The amounts and types of fruits, nuts, and spices varied depending on what was available.

For example, light fruitcakes today often contain vanilla. This is a New World plant, so it would have been unknown to medieval cooks.

By contrast, dark fruitcakes often contain molasses or dark treacle (its British counterpart). Treacle has been around for a long time, but was mostly used for medicinal purposes up until the 17th century or thereabouts.

Irish Dundee cake is a close cousin of the English fruitcake. Other cultures have their own traditional cakes made with fruits and nuts; some are aged with spirits, while others are not.

light fruitcake

The basis for my fruitcake

Anyway, that’s why I didn’t go with my usual dark fruitcake. I have made both fruitcake recipes from A Continual Feast, by Evelyn Birge Vitz. (I highly recommend that wonderful cookbook, by the way! You can read more about it in this post about traditional cooking.) The following recipe is my adaptation of her Classic Light Fruitcake recipe.

Why didn’t I just follow that recipe? Because her light fruitcake recipe didn’t call for many spices. This may be normal in light fruitcakes, but I’m not going to make a fruitcake without spices–and lots of them!

My choice of spices for this cake was nutmeg and allspice, with a hint of green cardamom. I was going for warm flavors, but didn’t particularly want cinnamon. It seems like everything else I’m making for Christmas has cinnamon in it!

So I’ll make my excuse that there’s no one right way to make a fruitcake, and leave it at that.

I adjusted a few other ingredients to fit my tastes, and altered the amounts so that the recipe would yield 4 mini loaves instead of 2 large loaves. That’s a better size for our small family, and still gave me a few extra loaves for gifts.

light fruitcake pin

Method

Leave your butter at room temperature until it is soft. Cream it with the sugar until light and fluffy. You can do this with a stand mixer, hand mixer, or with a good old wooden spoon.

Beat in the eggs one at a time, stirring well after each egg is added. Add spirits or fruit juice. You can use any spirit you prefer.

Light fruitcakes “traditionally” take light spirits like light rum or sherry. But that wasn’t the taste I was going for. I like to use brandy; that’s just how a fruitcake should taste, in my mind. If your grandmother always used Scotch or Irish whisky, go for it!

You can also use fruit juice in place of the spirits. Do use a light-colored juice, so it doesn’t turn your batter a muddy color. White grape juice, apple juice or cider, or apricot nectar are all good choices.

I added a touch of cardamom bitters for extra depth of flavor. This is not traditional as far as I know, but it’s one of my favorite flavors. You are welcome to substitute other bitters, or leave it out altogether.

Combine the dry ingredients in a small bowl before adding them to the creamed mixture. (Go easy on the spices if you aren’t a lover of nutmeg!) Last of all, add the mixed dried fruits and peel.

Choose your fruits

Here again is an opportunity for creativity. Use whatever dried or candied fruits you like. Dark raisins, golden raisins, sultanas, currants, dried cherries, dried pineapple, or various combinations of candied fruits are all options here!

I like to make my own candied orange peel. It’s simple to make and tastes much better than what you can buy at the store. However, it is perfectly fine to substitute candied citron or a mix of candied fruit peel if that’s what you have available.

Just make sure the final quantity is equal to what’s specified in the recipe, or your baking times may be different.

Butter your pans and pour the batter in. Bake at 325 degrees for an hour if you use the mini loaf pans. If you use larger pans, heat the oven to 300 degrees and plan to bake them for at least 45 minutes longer.

The cakes are done when a toothpick inserted in the center comes out clean. I had no trouble with the cakes browning too fast (although I overbaked the ones in the picture), but if you think they are getting too dark, feel free to cover them with aluminum foil.

Cool in pans for 10 minutes, then remove to a wire rack to cool completely. Decorate with a confectioner’s sugar glaze and candied cherries or pecan halves.

Aging Fruitcakes

aging light fruitcake
Pouring cider over the fruitcakes. Pour it over the underside of the cakes, which absorb more moisture.

If you won’t be eating the fruitcakes right away, round up some cheesecloth- or plain light cotton cloth will do in a pinch. Turn each cake upside down and pour a little spirits or cider over the bottom of the loaf.

This helps the cakes to stay moist during the aging process, and spirits additionally will help meld the flavors of the different fruits.

Wrap each cake in cheesecloth, and again in aluminum foil. I used cider on two cakes and brandy on the others, so I made sure to label them accordingly!

fruitcakes in foil

You may store the wrapped loaves in your refrigerator or in a cool cellar for several weeks to months- although I suspect if you use fruit juice, the won’t last as long.

When you are ready to serve the fruitcakes, unwrap them and decorate as described above.

If you’ve never tried to make fruitcake, I hope this spiced light fruitcake recipe inspires you to give it a go! It’s a very forgiving recipe because it’s supposed to be dense, and it will stand up to a lot of substitutions.

If you do try it, or have your own favorite fruitcake recipe, I would love to hear about it! Leave a comment below.

Spiced Light Fruitcake

Here's a light fruitcake recipe which is similar to a pound cake in texture, but with the addition of extra spices to make the flavor closer to dark fruitcake.
Prep Time20 minutes
Cook Time1 hour
Cooling and Wrapping38 minutes
Total Time1 hour 58 minutes
Course: Dessert
Cuisine: British
Keyword: Cake, Christmas, Fruitcake
Servings: 4 small cakes
Author: kimberly

Equipment

  • cheesecloth

Ingredients

  • 1 cup butter softened
  • 1 cup sugar
  • 3 eggs
  • 3 tbsp spirits or fruit juice see note
  • 1/4 tsp citrus or cardamom bitters optional
  • 2 cups flour
  • 1 1/2 tsp baking powder
  • 1 tsp salt
  • 1/2 tsp nutmeg freshly grated
  • 1/2 tsp allspice
  • 2/3 cup candied orange peel chopped
  • 2 1/2 cups mixed dried fruit
  • 4 ounces spirits or apple cider optional
  • 2/3 cup confectioner's sugar
  • milk
  • candied cherries or pecan halves

Instructions

  • Preheat oven to 325 degrees F.
  • Cream the butter and sugar in a large mixing bowl.
  • Beat in eggs one at a time, mixing well between each addition.
  • Add spirits or fruit juice and bitters, if using.
  • In a medium bowl, mix the flour, baking powder, salt, and spices. Add them to creamed mixture until combined.
  • Mix in dried fruits and orange peel.
  • Butter 4 mini loaf pans. Divide the batter evenly between the pans and smooth the tops. Bake at 325 degrees F for about an hour, until a toothpick inserted in the center comes out clean.
  • Cool in pans for 10 minutes, then remove to a wire rack to cool completely.
  • To Age: If you are not planning to serve the cakes right away, turn them upside down and slowly pour an ounce of spirits or apple cider over each cake. Wrap each in cheesecloth, and again in aluminum foil. Label and store in the refrigerator or a cool cellar for several weeks.
  • Before serving, make a thin glaze of confectioner's sugar and milk. Drizzle over the tops of cakes, and decorate with candied cherries or pecan halves if desired.

Notes

You may use whichever spirits you like in the cake and for aging. Lighter spirits such as light rum or sherry are often recommended for light fruitcakes, but I like to use brandy.
If you would rather not use alcohol, feel free to substitute any light-colored fruit juice. I recommend white grape juice, apple juice or cider, or apricot nectar.
Even if you use alcohol in the cakes themselves, you may wish to use fruit juice to age them if you will be serving to children. Apple juice or cider works well for this purpose.