Posted on Leave a comment

The Best Teas for Winter

winter teacup
best teas for winter
Winter Teas

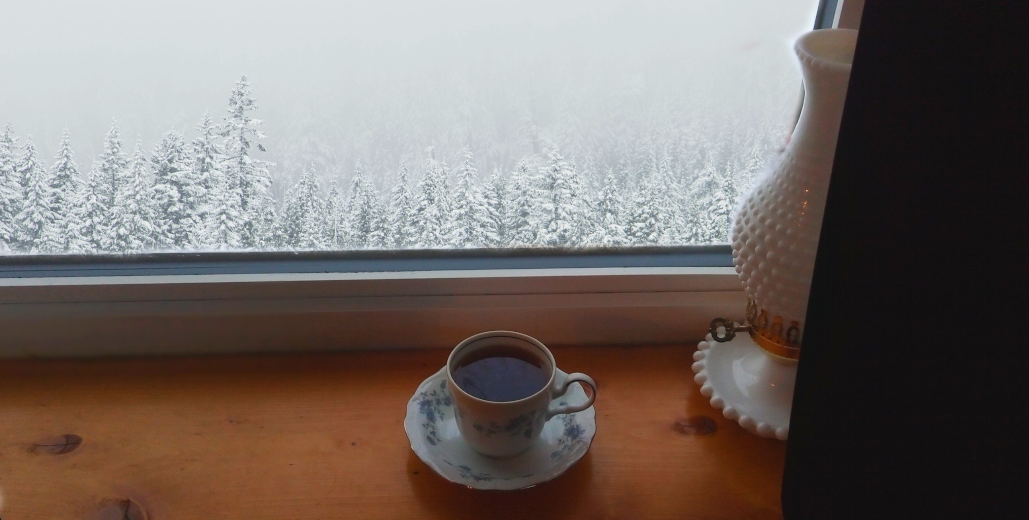
Wintertime, and the kettle is always ready to boil. What better than a steaming cup of tea to warm hands stiff with wind and cold? Or cheer the heart grown weary of the long, dark winter months? These teas for winter are sure to comfort and satisfy all season long.

A pot of tea with pleasant conversation is the solution to a case of cabin fever, while a solitary cup may be all the company you need to enjoy a quiet evening by the fireside.

There are many facets of winter, reflected by the different teas listed here. Bold and spicy blends reflect the firelight dancing on the wall. Red winter fruits tell tales of merry gatherings or brighten up a dreary day.

Whatever your mood or occasion, there is a tea to match! Whether you prefer your tea loose-leaf or bagged, read on to discover some new favorite teas for winter.

Disclosure: This post contains some affiliate links. If you click on one of these links and make a purchase, I may receive a small commission at no extra cost to you.

Cranberry Blood Orange Black Tea

Let’s start with black teas, and move down the list by caffeine content. This pretty loose leaf tea has flecks of color from dried cranberries and orange peel. When steeped, it turns a lovely reddish color in your teacup.

The flavor is surprisingly mellow for cranberry and orange: this is certainly not a zingy hibiscus tisane! Instead, you can appreciate the flavor of the Indonesian black tea with grace notes of sweet fruit.

It is perfectly complemented by a drizzle of honey and a squeeze of lemon. Serve it for afternoon tea with a plate of sweet cranberry almond scones!

The cranberry and blood orange flavors make this a tea to drink from the first snow flurry until spring breezes appear. The absence of aromatic spices in this blend remind me more of winter itself than specific holidays, which makes it a nice change of pace in January and February!

Comfort & Joy Tea

This bagged black tea is made by The Republic of Tea. It is hands down my favorite Christmas tea, and drinking it brings back many happy memories.

A bold black tea with notes of cinnamon, cloves, and licorice makes any day feel like a holiday! There is a subtle sweetness to this blend, imparted by bits of dried apples amongst the spices. It’s not strong enough to give the blend an apple flavor, just lends a complementary hint of sweetness.

I like this tea best black, but it dances well with milk too. The sweetness makes it an ideal dessert tea. The warm spices match nicely with fruitcake! This warmly spiced blend is sure to become a holiday favorite!

Sweet & Spicy Herbal and Black Tea

Here is another bagged tea from the Good Earth tea company. If I had to describe it in one word, that word would be “unexpected.”

I realize that’s not a word normally used to describe tea, so let me explain. This tea is full of so many flavors: some familiar, others perhaps not, and all gathered from different parts of the world.

Orange and cinnamon are the predominant flavors, mixed with a hearty black tea. They are joined by a chorus of other voices, including: rosehip, lemongrass, peppermint, chamomile, anise, and ginger.

I can’t think of any other food or drink that could take so many wildly different flavors and combine them in a deliciously different melange. Tea provides a backdrop that is strong enough to carry them all, yet subdued enough to take a supporting role.

Raspberry Black Tea

Looking for a delicate afternoon tea that’s still strong enough to drink with milk? Rich and sweet, this tea is heavenly with a splash of milk. It’s worthy of an afternoon tea with your valentine–just add shortbread hearts!

Many different tea companies make a raspberry black tea. Some have raspberry flavor added, and others have real pieces of dried raspberry in them. This seems to be more common in loose teas than bags.

I have tried several different brands, and my favorite is Herman’s Boy, a local specialty of Rockford, Michigan. It is a loose tea that comes in a charming paper packet.

Another good option is Raspberry Indulgence Black Tea by Ahmad Tea, if you prefer your tea in bags. Or try the aromatic Arctic Raspberry loose leaf tea by the English Tea Store.

Spiced Cranberry Tea

spiced cranberry tea

Did you know that certain spices and fruits are rich in antioxidants and other immune-boosting compounds? Spices like cinnamon and cloves have been prized for their medicinal benefits for thousands of years. Fruits like cranberries and citrus fruits also provide great immune benefits.

This easy recipe combines black tea with cranberries, citrus zest, and spices for a warm blend that’s sure to soothe a sore throat or ease cold symptoms naturally. You can also make it caffeine-free if you wish. It’s simple to let the infusion simmer away on the stove while making your kitchen as aromatic as a pomander!

I love to make a big batch and keep some in the freezer all winter long. That way, it’s always on hand when a family member or neighbor is down with a cold or flu. I don’t mind drinking it any day, even when I’m not the least bit sick! You can find the recipe here.

Rooibos Solstice herbal blend

winter solstice tea

If you’re looking for herbal teas for winter, this blend is sure to delight! This loose leaf herbal blend from Summit Spice & Tea Company is a bright, sweet mix of citrus, vanilla, and peppermint. The base is South African rooibos, a bush in the Fabaceae family.

The leaves of this reddish bush have been used to make a tea-like infusion for years in its native land, and now it is drunk worldwide. If you like yerba mate, you might like rooibos. They have similar earthy flavors. I find rooibos somewhat similar to hibiscus teas, but milder.

The combination of these three bold flavors against the backdrop of rooibos is intriguing and complex. The citrus warms, while the vanilla adds a sweet and creamy note, and peppermint provides a soothing finish. It reminds me of firelight and cozy sweaters. If you’re looking for a unique herbal winter tea, I suggest you give this blend a try!

***

winter tea

That sums up my list of winter tea favorites! From fruity to spicy, bold to delicate, each of these embodies some part of wintertime. I do hope you try some of them. I would love to hear about your favorite teas for winter!

If you enjoyed this list of winter teas, take a peek at The Tea Caddy, where I keep a running list of favorite teas for every season!

Happy steeping!

~Kimberly

Posted on 2 Comments

Adventure-Ready Granola Bars

adventure ready granola bars
homemade granola bars
adventure-ready granola bars

When most of the food you eat is made from scratch, sometimes it’s hard to come up with snacks to pack along on hikes, road trips, or other outdoor activities. These homemade granola bars are kid-friendly and adapt to big or small adventures!

Do you ever find yourself trying to head out on some last-minute trip and searching through your cabinets and refrigerator thinking, “The world is so full of a number of snacks, I’m sure we should have some here somewhere…”

Maybe I’m the only one who finds herself in this predicament rather frequently. I’ve packed along some interesting comestibles for day hikes and car trips simply because we didn’t have any “snack food.”

I do realize that you can buy packs of trail mix, nuts, and all kinds of bars in just about any store that sells food. And I do buy dried fruits and nuts for trail mix. But I like to make my own food for several reasons, so I don’t usually stock packaged snacks.

So began my search for healthy snack foods that are simple and easy to make at home, don’t cost much, and are full of real ingredients. Ideally, they would also be portable and not very messy.

adventure-ready granola bars

Versatile Granola Bars

Granola bars rank high for portability and are a compact energy source, which is great for activities where you don’t have a ton of extra space for food.

Homemade granola bars are great for families with allergies or food intolerances, because you can adjust recipes to fit your needs. You can also choose which add-ins like dried fruits, nuts, or chocolate to include based on your family’s preferences.

This has been my go-to granola bar recipe for over a year now. They’re simple to mix up and quick to bake, and many of the ingredients can be substituted if you wish. So if you get tired of my favorite flavor combination (dark chocolate, almonds, and cranberries), there are plenty of others to try instead!

I can make these start to finish in less than an hour, even with a toddler helping me! That is definitely an important factor for me when I’m choosing between recipes. Time is the number one reason I get intimidated by recipes for crackers or other snack foods.

Not only are these quick, they’re also just about as easy as it gets. Stir everything together, spread it in a pan, and pop it in the oven to bake. No rolling out fragile dough or cutting into shapes, no constant checking of the oven. They don’t even make a mess of your counter, because they cool in the pan!

The original recipe was a coconut granola bar recipe from Taste of Home, but I’ve played around with the recipe quite a bit. My biggest challenge with granola bar recipes is always making them stick together and not crumble too easily- but still be more of a granola bar than a cookie bar.

Need a good source of energy for your active lifestyle? This quick and easy granola bar recipe is packed with natural ingredients and 7 grams of protein to keep you going all day long!

Maybe my problem is trying to add too many additions to the dough. But who wants to leave out the chocolate? These bars can be a bit crumbly, so I’m still searching for the perfect granola bar recipe. I would not give one to a toddler in a car seat!

Crumbs aside, these bars have great flavor and texture, and a lot of protein: 7 grams per bar! That’s enough to keep my boys happy. These homemade granola bars don’t last very long in our house! Hence the recurring dilemma of absent snack foods…

Method

In a large mixing bowl, stir together the peanut butter, brown sugar, honey, melted coconut oil, and vanilla. Whisk the eggs lightly and add them to the peanut butter mixture.

Combine the oats, flour, salt, and baking powder, and add to the peanut butter mixture. By the way, you can use oat flour or ground oats to make these gluten free.

Mix in the nuts, flaked coconut, dried cranberries, and chocolate chips. The mixture will be stiff. I use almonds, cranberries, and dark chocolate chips in my bars, but you don’t have to stick with these suggestions.

granola bar dough

Try peanuts, cashews, or pecans in place of the almonds. Sub raisins, dried cherries, or dried blueberries for the cranberries. And switch dark chocolate chips to milk or white chocolate pieces or M&Ms. Or leave them out entirely, if you’re trying to limit sugar.

The same thing goes for the coconut. You can leave it out if coconut isn’t your favorite flavor or texture. Add a little wheat germ or flax seeds instead (but decrease the amount, since these are denser than coconut).

You may be thinking that coconut and peanut butter don’t sound like a great combination. I was a little skeptical about using peanut butter myself, at first. However, the peanut butter is not a dominant flavor in these bars. Its role is to help everything stick together.

Pat the mixture into a buttered 13×9″ pan. Bake at 350 degrees F for 25-30 minutes, until the edges start to brown and the center is set.

Cool the granola bars in the pan and slice into bars with a sharp knife. I usually make 18 bars so they’re big enough to satisfy my husband, but if you are making these mostly for smaller appetites, feel free to cut them as small as you wish.

homemade granola bars
Cool the bars completely before removing them from the pan. This helps to prevent crumbling.

When the bars have cooled, remove them from the pan and wrap individually in plastic wrap. They will keep at room temperature for at least 2 weeks, and in the freezer (individually wrapped and placed in a freezer bag) for several months.

Now you’re ready for any adventure! Pack a few of these bars along, and you’ll have a snack that you can feel good about feeding to your family!

Do you have any favorite take-along snacks? I would love to hear about them! Don’t forget to sign up for my email newsletter for more recipes and homely tips!

homemade granola bars

Adventure-Ready Granola Bars

These granola bars are chock-full of real, healthy ingredients that taste great and are good for you, too. With 7 grams of protein per bar, they are a great snack for adventures big or small!
Prep Time15 minutes
Cook Time30 minutes
Total Time45 minutes
Course: Snack
Cuisine: American
Keyword: Granola Bars, Healthy Snacks
Servings: 18 bars

Ingredients

  • 2/3 cup peanut butter
  • 1/2 cup brown sugar packed
  • 1/2 cup coconut oil melted
  • 1/2 cup honey
  • 2 eggs lightly beaten
  • 1/2 tsp vanilla extract
  • 2 cups rolled oats
  • 1 cup whole wheat flour
  • 1 tsp baking powder
  • 1/4 tsp salt
  • 2/3 cup flaked coconut
  • 2/3 cup sliced almonds
  • 2/3 cup dried cranberries
  • 3/4 cup dark chocolate chips

Instructions

  • Preheat oven to 350 degrees F.
  • In a large mixing bowl, combine peanut butter, brown sugar, honey, coconut oil, and vanilla extract. Beat eggs lightly and add to peanut butter mixture.
  • Combine the oats, flour, baking powder, and salt; add to peanut butter mixture.
  • Mix in coconut, almonds, cranberries, and chocolate chips. The mixture will be stiff.
  • Pat into a buttered 13×9" pan. Bake for 25-30 minutes, until edges start to brown and center is set.
  • Cool in pan. Cut into bars. When cooled, remove from pan and wrap bars individually.

Notes

Gluten-free variation: substitute oat flour or ground oats for the whole wheat flour.
You may also substitute any nuts or dried fruit you like in place of the almonds and dried cranberries.
Posted on 8 Comments

Dutch Oven Baked Beans

Dutch oven baked beans
Dutch oven cooking at its country best! Long, slow cooking is the key to the best Dutch oven baked beans.
If you're looking for hearty country-style meals, try this Dutch oven baked beans recipe. Long, slow cooking brings out great flavor!

I love cooking with a Dutch oven. There’s something about meals like Dutch oven baked beans that makes them feel so substantial. Maybe it’s just the heaviness of the cast iron that feels so solid, or the notion of cooking like the pioneers once did.

It might even be the types of meals I tend to cook in my Dutch oven: long-simmering soups, stews, or other hearty main dishes that home cooks have been serving to their families for centuries.

Here is one such recipe. Baked beans have been an American classic since the time of the early New England settlers. They haven’t lost much popularity since then, spreading West with the pioneers and finally finding their current place as an indispensable component of cookouts and tailgate parties.

Slow baked beans

I wonder what those early New England settlers would think of baked beans being classified as picnic food? They couldn’t just open a can of cooked and seasoned beans at a moment’s notice.

No, their baked beans required some forethought, because they took a night and a day to reach completion: a night to soak, and a day to cook.

You may have gathered that I like old-fashioned ways, so it should come as no surprise that I prefer my baked beans homemade instead of from the grocery store.

But since I don’t pretend to have as much forethought and practicality as New England pioneer cooks, I’ve adapted their recipe for a shorter cooking time.

How short? Well, don’t ask me for a 30-minute meal or anything. Baked beans need a long time to cook, so they can absorb the flavors of the sauce and meat. If you won’t be soaking the dried beans overnight, plan for 1 hour of quick soaking, 45 minutes of cooking, then another 5-6 hours to cook the beans in the oven.

You can shorten this even further by using plain canned beans or by cooking your beans ahead and storing them in the refrigerator or freezer. Cooked beans freeze exceptionally well.

I have cooked the beans for as little as 3 1/2 hours in the oven. They’re still okay at that point if you’re short on time, but they definitely get better with longer cooking. In fact, these beans taste best reheated on the second or third day. Some things just get better with time.

Which cooking method is best?

It took me years to find a recipe for baked beans that I liked. I grew up on baked beans out of a can, and I’m still not sure how they get that particular flavor. (I think there must be a lot of sugar in those cans!)

After trying several slow cooker recipes and different types of beans, I was almost ready to give up. The results varied: too soupy, too sweet, too bland. It was always disappointing. Then I stumbled upon a Dutch oven baked beans recipe that was more like what I had in mind.

I burnt the beans the first several times I made the recipe, but the results were still good enough that I was willing to keep trying, slowly adjusting ingredients to find what worked best.

My theory is that the cooking method really makes a difference. When you use a slow cooker, it traps all the liquid and doesn’t let any evaporate. Cooking beans in the oven–in a Dutch oven or bean pot–is more like cooking over a fire. It imparts a depth of flavor that slow cookers just can’t give.

Think of it like toasting marshmallows. If the only goal is to make them gooey, the microwave works just fine. But if you’re looking for that perfectly-toasted marshmallow flavor, you can’t beat hot coals and a long stick.

Dutch oven beans

Adjust to taste

I hope you won’t have to try as many recipes or make as many adjustments as I did, but you still may need to tweak a few things.

For this reason–and because you shouldn’t leave an oven unattended for long periods–plan to make this recipe on a day when you will be around to check on the beans from time to time.

Ovens can be temperamental

This applies to both temperature fluctuations and dryness. Mine seems to suck all the moisture out of these beans after a few hours, so I have to keep putting more water in. Your oven may not do that, which is why I don’t recommend adding all the water at the beginning.

Just stir the beans every hour or so to check on the amount of liquid and prevent burning. Add no more than a cup of water at a time. You want the sauce to be thick.

Beans may behave differently

Results can vary slightly depending on whether you soak them overnight or use the quick-soak method, or if you choose to start with canned beans. (Or if your beans are prepared and packaged for emergency/long-term storage, as I learned the hard way!)

Different bean varieties can also lend their own particular flavors, colors, and characteristics to the meal. This is a good thing! I encourage you to experiment and find what you like best.

For example, I don’t like to use pinto beans for baked beans, but I have tried recipes that called for them. So far, the successful bean varieties in my book are Great Northern, navy, small white or red beans, and dark or light kidney beans. I usually use some combination of these.

Method

Prepare your beans

You have several options: soak dried beans in cold water overnight, use the quick-soak method for dried beans in the morning, or start with pre-cooked or canned beans (plain, not canned baked beans).

To soak beans overnight: place dried beans in a pot or bowl. Fill the pot with cold water to cover beans by at least an inch. If using a small (2-quart) pot, you may want to add more water.

To use the quick-soak method: place dried beans in a pot and cover with at least an inch of water. Cover and bring to a boil. Remove from heat and let sit, covered, for an hour.

If you’re starting with cooked or canned beans, skip the next step.

Cook the beans

Drain the soaked beans. Place them in a pot or Dutch oven and cover with water. Bring the beans to a boil. Turn the heat down and simmer for 40-45 minutes until the beans are soft.

Cooking times may vary slightly depending on what kind of beans you use and how old they are. Beans also take a little longer to cook at higher altitudes.

*If you are using beans that have been prepared and packaged for emergency rations or long-term storage, your cooking times will be much longer. I allow at least 2-3 hours.

Prepare to bake your beans

If you’re using canned beans, start here.

Preheat your oven to 325 degrees F. Adjust oven racks so your Dutch oven will fit comfortably.

Place cooked beans in a large bean pot or Dutch oven.

Chop the bacon or salt pork into 3/4-inch pieces and add them to the pot. When I’m using salt pork, I slice it first–about twice as thick as bacon–and then chop. You can just chop the entire piece of meat into cubes if you prefer.

Frozen bacon? No problem. Chop the entire block crosswise, and the layers will separate as they cook. No danger of undercooking here!

ingredients in Dutch oven
It will look like a lot of onion when you combine everything! Don’t worry: they cook down and add subtle flavor to the beans.

Add the rest of the ingredients, along with 2 cups of boiling water. Stir well. Cover and place in the oven for 5-6 hours.

Baking the Beans

You will want to check on your beans periodically during the cooking time. How often? You should stir the beans after about two hours, and every hour thereafter.

Add more water if they are getting dry. You don’t want them to burn, but you do want to end up with a nice thick sauce, so don’t add more than a cup of water at a time.

baked beans
This is how my beans looked after 1 hour. They are still pretty soupy at this point, so I didn’t add any liquid yet. Just give them a good stir and keep cooking.

If the beans are absorbing a lot of liquid and seem to be getting too dry between checks, you can stir them more frequently or turn your oven down to 300 degrees F.

If the beans and/or sauce around the edges gets dark, don’t worry. Just add some water and stir thoroughly, scraping the sides. You actually want the color to darken, as this improves the flavor.

If it’s actually burnt black, don’t mix that part in. Chances are that the middle will be fine, even if the edges are burnt.

Dutch oven baked beans
Notice the darker color around the edges. That’s what you’re looking for. These beans have cooked for about 5 hours and are full of great flavor!

You can let the beans cook all day if you want to. Anywhere between 3 1/2 and 8 hours is fine. In general, I try to cook mine for about 5 hours, but the longer the better!

baked beans and cornbread

Serve these Dutch oven baked beans with hot cornbread or toasted English muffins for a real country-style treat!

Dutch oven baked beans
Print Recipe
5 from 1 vote

Dutch Oven Baked Beans

This big pot of hearty baked beans makes a comforting meal that will feed a horde of hungry appetites! It's cooked slowly in the oven for classic American flavor.
Prep Time40 minutes
Cook Time5 hours
Soaking1 hour
Total Time6 hours 40 minutes
Course: Main Course
Cuisine: American
Keyword: Beans, Dutch oven
Servings: 8 hearty servings

Equipment

  • Dutch oven

Ingredients

  • 3 cups dried beans
  • 1 1/4 cups packed brown sugar
  • 2 cups boiling water
  • 1/3 cup coarsely-ground mustard
  • 1/2 cup molasses
  • 12 ounces thick-sliced bacon or salt pork cut into 3/4-inch pieces
  • 2 onions chopped

Instructions

  • Place dried beans in a Dutch oven and cover with cold water. Soak overnight or use the quick-soak method.
  • For quick-soak method: Bring beans and water to a boil. Remove from heat and let sit for one hour, covered.
  • After soaking, add more water to cover beans. Bring to a boil over high heat; reduce heat to low and simmer for 40-50 minutes until beans are soft. Preheat the oven to 325 degrees F.
  • Drain beans. Add the rest of the ingredients to the Dutch oven along with 2 cups boiling water. Stir well and cover.
  • Bake for 5-6 hours, stirring every hour. Add more water as necessary to prevent burning. The beans are done when the color has darkened and the sauce is thick.

Notes

Red or white bean varieties work best. Feel free to use a combination of different types of beans, such as Great Northern, navy, kidney, small white or red beans.
Posted on 4 Comments

How To Actually Enjoy Decluttering

how to enjoy decluttering
Decluttering. For some, that word is enough to brighten their eyes and lift their spirits. For others, not so much. It’s more like a tolling knell of doom.
decluttering help

Have you been feeling the urge to simplify, organize, and declutter your space? For some, the end of the year is the ideal time to set their houses in order. Others prefer to do it at the beginning of the year or in the spring: both seasons feel like new beginnings when change is in the air.

Maybe you’ve been getting that urge, but it feels more like guilt over your messy house than excitement at the opportunity to simplify.

I hope this list gets you excited about decluttering and makes you want to jump right in!

Outlook matters

Does the very thought of minimizing or decluttering give you a sinking feeling of despair?

Before you even start thinking about decluttering, we need a positive mindset: something that will keep you motivated and focused on a goal.

Why does it matter? Well, your perception of decluttering (or minimizing, or simplifying, or whatever you want to call it) sets the tone for the entire process.

If you see it as a huge chore looming ahead of you, you’re likely to drag your feet and do it reluctantly. Reluctant decluttering isn’t as effective as enthusiastic decluttering. Neither does it achieve the same results.

If you can start with a positive mindset and see decluttering as a process that will help you trim the excess from your life so you can focus on the things you really love, then this sets a totally different tone for the whole project.

It becomes almost a game: you give yourself a worthwhile goal and challenge yourself to do your best, knowing that the more thorough you can be, the better the end result will make you feel.

You really can do this, whether you like organizing and decluttering or not. The key is to start with the right attitude. Here’s how to do it.

Finding the right words

Let’s start with words. Words are important. How you say something impacts how you think about it. And how you think about a project influences your attitude toward it.

If “decluttering” just sounds like a bad word to you, what about “simplifying?” “Or minimizing?” Who wouldn’t be excited about a “home beautification project?”

Try to find some way to phrase it that sounds appealing- or at least not disheartening! I’ll try to use all of these words in this article, but I’ll probably use “decluttering” most just for simplicity’s sake.

Picture your ideal home

This is a common recommendation, whether you’re talking about organizing tactics, home decor, or finding your “signature style.”

Basically, it means daydreaming about your ideal home. Sounds fun, right? Then write a description, draw a picture, or find pictures that capture the essence of your dream. Pinterest or home decor books or magazines are great sources of inspiration.

These pictures give you something concrete to look at and renew your inspiration during the decluttering process (which is often messy and can be discouraging).

Picturing your ideal home is a helpful tool, if you don’t try to change everything all at once. Don’t fixate on trying to imitate someone else’s house or clothing too closely, or the end result will feel empty.

My rule of thumb is to find your ideal, then work with what you already have. Your decluttering process probably doesn’t involve buying a new house, so your home isn’t going to look exactly like that glossy magazine photo.

But you can reimagine the space you already have, and create something you love. It’s hard to do this when your house is so full of stuff that you can barely see it. (If you want to read more about this, check out my review of Cozy Minimalist Home.)

That’s the beauty of decluttering: it allows you to start again and create a collection of things you really love, whether you’re tackling a closet or your entire house.

Imagine your life in that ideal home

This is the answer to the question, “How can decluttering help me?” And that is the key question, isn’t it? It’s what provides you with an incentive to start, and also what keeps you going even when it’s overwhelming or you feel like you’re not getting anywhere.

What do you feel when looking at the picture of your ideal home? Peaceful? Cozy? Relaxed? Energized? Serene? Inspired? Whatever it is that defines your ideal home is your end goal of decluttering.

Consider writing down a few words that describe your ideal home and putting them up next to your picture. That way, you can refer back to your ideal when you feel frustrated or discouraged.

how to enjoy decluttering

Set yourself up for success

If you want to enjoy decluttering instead of dreading it, then it’s not enough to daydream and set up a pretty picture. There is actual work involved, but don’t despair! Give a little thought to the process before you start, and you’ll save yourself from headaches and disappointments later on.

Method to the madness

Once you get your ideal home and lifestyle firmly in mind, it can be tempting to jump into declutter mode right away. After all, you’re excited now, and you want to get going before that excitement wears off.

I get it. But before you start, it’s important to have some kind of system in mind. Choose what you will focus on: clothes, books, kitchen and housewares, linens, papers. If you want to tackle everything, that’s great, but you still need to choose a starting point.

There are different decluttering and organizing methods out there. Some people like to go room by room; others sort through all of one category (like clothing, books, or papers) before going on to the next.

Within those two broad methods, there are numerous more specific organizing strategies. You don’t need to narrow it down any more if you don’t want to. It can be overwhelming just looking at all the different organizational philosophies out there!

If you want to do something in depth like the KonMari method, go for it! Just know that it’s okay to ONLY organize your closet or your living room if that’s all you feel ready to take on right now!

I prefer to declutter and organize by category, but that might be because our cabin has just one large living space plus a tiny bathroom. Tackling one room at a time wouldn’t be much of a starting point for me.

Whatever method you want to use is fine; just choose something that works for you and stick to it.

Choose a time wisely

Decluttering isn’t a job to jump into as soon as inspiration strikes. If you do, you’re likely to get distracted by other chores. Even if you can concentrate on your goal, there are bound to be other things that come up and demand your attention.

Kids need love and attention and diaper changes. Husbands need love and attention and lunches packed. They all need meals at regular intervals. And then there are all the other household tasks.

If you decided to tackle a large category or room, it will probably take longer than an hour. I don’t know about you, but if I’m going to do something for more than an hour, I have to plan for it ahead of time.

So sit down and take a look at your week. Find a day that looks fairly calm, and schedule your home beautification process for then. Don’t try to start in the evening after supper. That’s just setting yourself up for frustration, because it’s almost a guarantee that you won’t finish before bedtime.

Minimize Distractions

This goes along with choosing your time wisely. If you foresee distractions, try to find ways to eliminate or reduce them.

For example, I have a baby and a toddler to work around. If I want to be able to focus on my minimizing mission, then I start when the baby takes a nap. When he falls asleep, I put on some music and get my toddler set up with books and toys so he can play by himself for a while.

Your distractions will vary, of course, and you can’t foresee everything! Just think through the scenario and if any potential problems or distractions come to mind, address them first.

Plan Ahead

I’m talking about supper. Make sure dinner is an easy one that day (read: not meatloaf, mashed potatoes, homemade bread, and dessert).

Decluttering will probably take longer than you realized, even if you just start with a small area. Not only that, but if you don’t finish what you started all at one time, you’re apt to feel discouraged and drained of energy for anything else.

You might think that making a great home-cooked meal will give you a sense of accomplishment even if decluttering didn’t. I’ve definitely thought that way.

When it comes down to it, though, at the end of the day when I’m already discouraged, the last thing I want to do is make a big dinner. And if your heart isn’t in your work, it probably won’t give you the satisfaction you crave.

So rather than trying to tackle several big projects on the same day, give yourself a break and pull a meal out of the freezer.

Set the Mood

Here’s an idea for those who really dread cleaning or organizing of any sort. Think about your ideal home, and the words you used to describe it. Choose an essential oil that exudes those same characteristics, and diffuse it while you declutter.

Essential oils can help clear your mind, soothe or energize (depending on the oil used), and boost motivation. They can give you the spark you need to face the task at hand and march bravely in!

Plus, it’s a sensory reinforcement of the goal you are working toward. If your ideal home is soothing and restful, lavender or chamomile essential oil might be a good choice for you to diffuse.

If bright energy is what you’re after, try citrus oils or peppermint. (These are also great for boosting energy and motivation during the declutter phase, even if that’s not your end goal.)

Want to feel warm and cozy? Try this recipe for a blend of grapefruit, angelica root, black pepper, and cypress essential oils to diffuse throughout your home.

Start Early

The earlier in the day you begin, the more time you have to finish, right? I’m not saying you should get up an hour early just to start decluttering (unless you want to, of course!), but look at your schedule and plan to start in the morning if possible.

Also, it’s easy to be motivated in the morning, with the whole day stretching before you. If you don’t start right away, it’s easy to keep putting it off until a “later” that never comes.

No more excuses. Just eat a healthy breakfast, pour yourself a cup of coffee or tea, and go for it!

How do I get my motivation back for decluttering when I’m overwhelmed?

You’ve begun the process of decluttering. You set a time and tackled one closet or category. You sorted and made separate piles for keeping, tossing, donating, and giving to your little sister.

But then you have to go do something else: change a diaper, pick up the kids, make dinner, whatever. The mess is left on the floor, and now when you walk into that room, it looks worse than when you first started.

I know it’s discouraging, but that’s just part of the process. It’s easy to look at the mess and think you’re not getting anywhere, but that’s exactly wrong. The mess means you are committed to getting the job done.

If you’re at this stage of the game and feeling frustrated, I encourage you NOT to touch the mess again until you have another big chunk of time to work on it.

It can be even more frustrating to try to chip away at a big task like this in 5-minute increments throughout the day, and it will make the task seem enormous. I find myself getting more and more discouraged, because it seems like I’m not getting anywhere.

This is not the most effective way to go about it. Stopping and starting a task like that means wasting many minutes staring at the mess trying to remember where you were in the process and what you should do next.

It’s much better to wait until you have a little more time, when you can really get a substantial amount done. That way, you will feel a greater sense of accomplishment for spending the same amount of time on the project.

Next stop: your simplified home

I hope you have found some of these tips helpful in motivating you to start decluttering. Not everyone can get excited about clearing out closets and sorting through piles of stuff (not to mention getting rid of some things).

But my hope is that with a positive mindset and a thoughtful plan of action, you can make what could be a daunting task into something more manageable.

Happy home-beautifying!

~Kimberly