
Question: How do you use up leftover oatmeal?
Answer: You could just reheat it with milk, but it’s really not the same. Or you could make it into muffins, but I am not a fan of the texture. You could even serve it cold to children of strange taste (like one of my sons) who prefer it that way.
Or you could make these easy crackers, and no one will even guess they’re eating leftover oatmeal!
A Cracker’s Tale
I grew up eating oatmeal crackers that my mother made, but I have to admit, I never really appreciated them. They looked and tasted like oatmeal, and I just didn’t care for oatmeal that much. I guess I like more flavors in a cracker.
Since then, I have experimented with different cracker and crispbread recipes, since they are convenient for packing along on adventures, yet I don’t want the preservatives or the price tag of store-bought crackers.
Some recipes just didn’t work out well or my family didn’t like them; others took too much effort for a small batch that disappeared in minutes.
I was hoping for a cracker that would be hearty and filling, so my kids wouldn’t finish off the batch by the end of lunchtime. I wanted more flavor than plain oatmeal crackers, and I wanted to get some healthy seeds into my family’s diet. Most of all, I was looking for a recipe that was quick and easy and didn’t dirty too many dishes!
This recipe is the best result we have had from all the cracker trials!
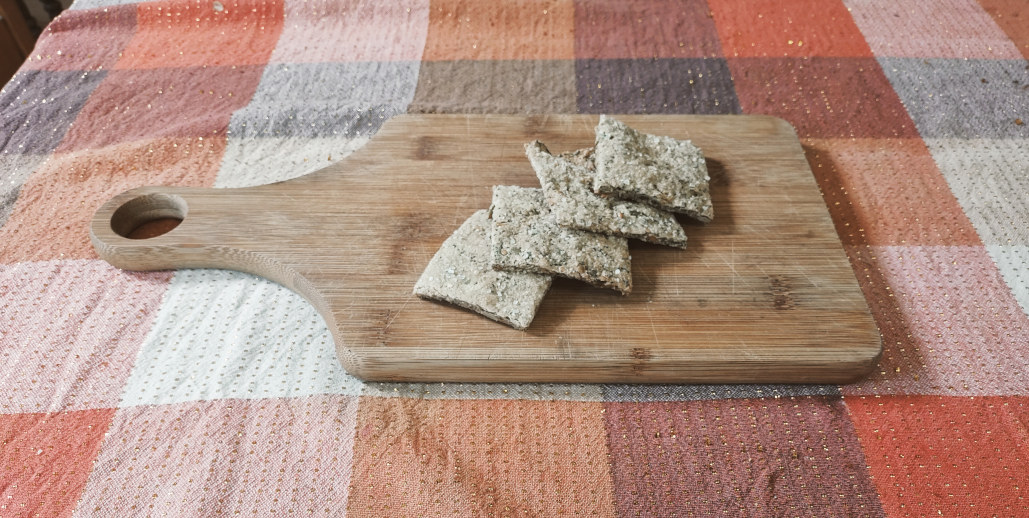
These crackers are oatmeal-based, with added whole wheat flour to make them more of a “normal” cracker texture. I add a little honey, salt, and herbs for flavor, and lots of seeds to add interest and crunch! Even my 18 month-old loves these crackers!
They are hearty–more like waybread than Wheat Thins–so the entire batch isn’t likely to disappear in ten minutes. (You may have to warn children with big eyes and small stomachs to eat just a few, or they might get a tummy ache!)
A Note for the Faint of Stomach
However, people who are sensitive to raw or lightly cooked oats should be able to digest these just fine, since the oatmeal is cooked thoroughly before even being made into crackers. If you are very sensitive, try soaking your raw oats overnight before cooking them.

Method
Preheat your oven to 325 degrees F.
In a large mixing bowl, combine the oatmeal, flour, salt, honey, and melted butter if desired. I include butter for flavor, but you can certainly leave it out for a dairy-free option.
Types of Oatmeal
I used rolled oats cooked in water for my crackers, but you can certainly use quick oats or even instant oats in a pinch. That being said, your leftover oatmeal might well be firmer or looser than mine. If the dough seems too stiff to stir, add a tablespoon or two of water. If it seems too thin, add a little more flour. This recipe does not need exact measurements!
Stir in the pepitas, sesame seeds, flax seeds, and poppy seeds. Of course, you can substitute your favorites as well! Some people like to sprinkle the seeds on top of the crackers before baking, but I like to mix them in so they won’t fall off later in the cracker jar!
Generously butter a large rimmed baking sheet. Mine is 15 x 10 inches. You could use parchment paper instead of butter if you prefer. After peeling parchment paper off the bottoms of too many crackers, I have decided to use butter instead!

Plop the cracker dough on the baking sheet. Roll the dough to the edges of the pan, pressing it into the corners with your hands if necessary. Try to get an even thickness throughout, so the crackers cook evenly. If the dough is too sticky to roll, simply sprinkle a bit of extra flour on the dough before rolling.
Sprinkle about half a teaspoon of sea salt or herb salt over the crackers, if you like. To make your own herb salt, just crush a pinch of dried herbs and mix them with half a teaspoon of sea salt. Rosemary is particularly nice in these crackers, but feel free to use your imagination!
Bake the crackers for 15 minutes. Remove the tray from the oven and use a sharp knife or pizza cutter to score the dough into squares or rectangles or whatever shape you wish. I cut mine into 2″ squares.

Return the crackers to the oven and bake for another 40-50 minutes, until the edges are beginning to brown and the crackers are crisp. They will crisp up a little more as they cool, but do not remove them from the oven if they are still soft. You can always turn off your oven and leave the pan in for 5-10 minutes longer if you aren’t sure whether or not they are quite done.
Cool the crackers completely, then store in an airtight container at room temperature. These crackers will keep for at least a week… if they last that long. They also freeze well!


Savory Oat + Seed Crackers
Ingredients
- 1 1/2 cups cooked oatmeal
- 2 cups whole wheat flour
- 1 tsp salt
- 1 tbsp honey
- 2 tbsp butter melted
- 1/4 cup pepitas (shelled pumpkin seeds)
- 2 tbsp sesame seeds
- 2 tbsp flax seeds
- 2 tbsp poppy seeds
- additional herb salt or sea salt optional
Instructions
- Preheat your oven to 325 degrees F. Mix together the oatmeal, flour, salt, honey, and melted butter in a large mixing bowl. Add the seeds and stir well to combine.
- Generously butter a large rimmed baking sheet. Roll the dough out on the sheet, or spread it out with your hands. Sprinkle a little additional flour on the dough if it is too sticky to roll.
- Sprinkle about 1/2 teaspoon herb salt or sea salt over crackers, if desired.
- Bake for 15 minutes. Remove from oven and score with a sharp knife or pizza cutter. Return to the oven and bake for 40-50 minutes, until lightly browned and crisp.


 Hi, I’m Kimberly! I’m an Alaskan wife and mother who loves simple, old-fashioned living. If you’re looking for country-style recipes from scratch or simple homemaking ideas, pour yourself a cup of tea and join me!