Posted on 4 Comments

Apple Streusel & Cream Cheese French Toast Bake

The flavors of apple and cream cheese Danishes combined in an easy French toast bake give you delicious flavor with much less effort than pastry-making!

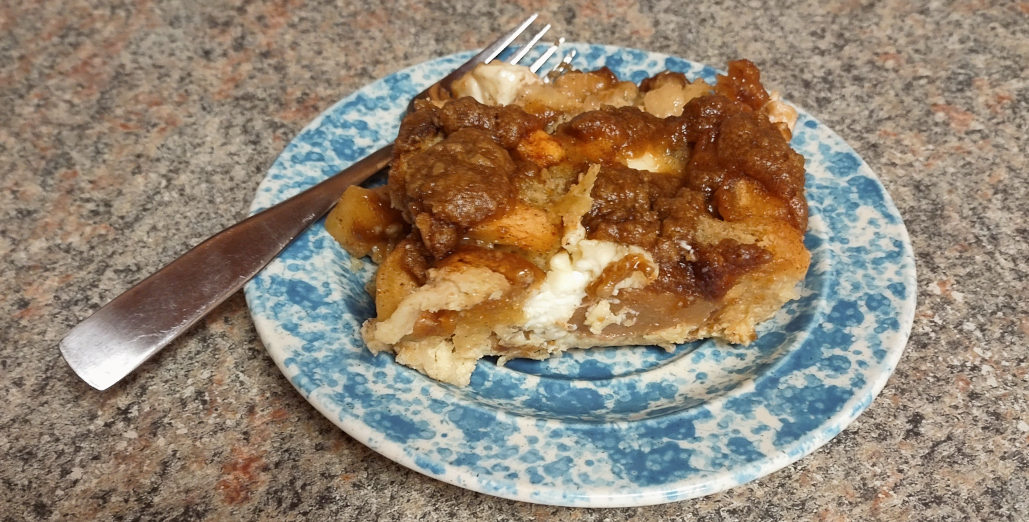
Fresh pastries are delightful, aren’t they? But they do take a fair amount of time and effort, so I don’t find myself making them often! However, the enticing flavors of apple and cream cheese Danishes can still be yours on busy mornings with this heavenly apple streusel French toast bake studded with nuggets of cream cheese!

The idea behind this recipe was twofold: first, I wanted a special dish that took thirty minutes or less in the morning, so I could bring it along to my mother’s house for brunch after church on Sunday mornings, without making hungry kids and husbands wait too long for their food. Second, I wanted something sweet but nutritious, tasty but not too decadent for breakfast.

The answer? A bread pudding (or French toast bake, if that’s what you like to call them) that bakes until not quite set in the evening, then gets popped back in the oven in the morning to add the finishing touches and crisp up the topping!

It relies on cinnamon and apples for natural sweetness, with a streusel topping for just the right amount of sugar on top. Cream cheese adds extra protein, while feeling decadent and making the dish look extra pretty.

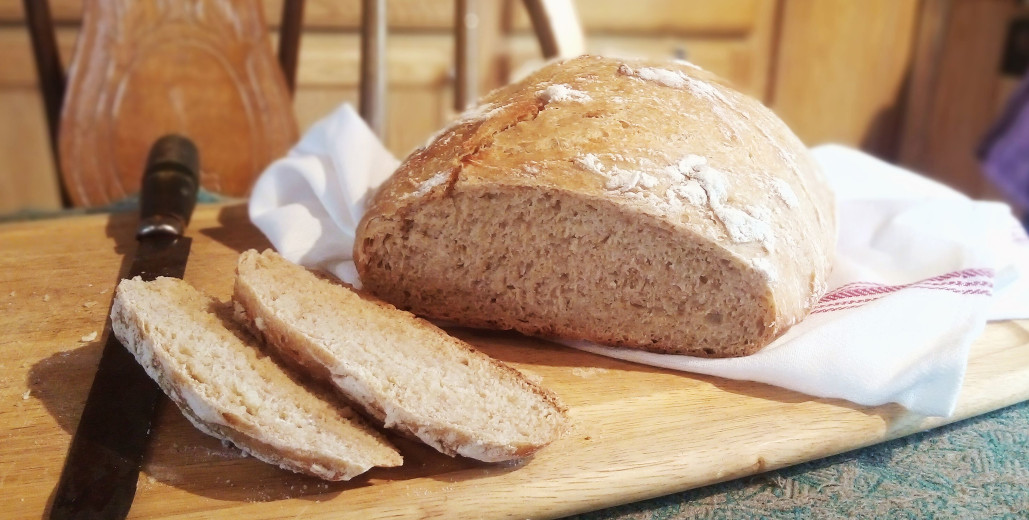
Speaking of protein, bread puddings are definitely health foods, in my opinion! Start with homemade whole wheat bread, add eggs and milk to hold everything together, throw in some flavorful additions like cream cheese, fruit, and spices, and you have yourself a protein-packed breakfast!

Of course, the more sugar you add, the more it starts to taste like dessert… and you certainly could serve this as dessert, with a scoop of ice cream or a whisky cream sauce, perhaps. And for even more decadent Danish-inspired flavor, use day-old croissants instead of regular bread! That combination is pretty magical.

Whether you serve this bread pudding for breakfast or dessert, it will make a pretty addition to any special meal!

I modeled this apple French toast bake recipe loosely after my all-time favorite pumpkin cream cheese French toast bake from Dinner then Dessert. That one is definitely sweeter, but oh so delicious! It makes several appearances in my kitchen throughout September and October each year!

Method

First, preheat your oven to 350 degrees F. Butter the bottom and sides of a 13×9″ baking pan and set aside.

Prepare the apple filling: Peel and chop the apples. Melt butter in a skillet, then add the chopped apples and saute over medium-low heat for about ten minutes, until the apples are soft. Stir in the sugar and cinnamon.

Bread cubes for French toast bake

For the bread pudding: Cube a loaf of bread (you will need about 10 cups) and set aside. Cubes that are 1-inch to 1-1/2 inch in diameter work well. In a large mixing bowl, combine the eggs, milk, cream, vanilla extract, sugar, and cinnamon. Beat lightly to combine. Add the bread cubes and stir well, making sure all the cubes are moistened. Set aside while you make the streusel topping.

Aim for a crumbly texture when making the streusel topping. Don't mix too much!
Aim for a crumbly texture when making the streusel topping. Don’t mix too much!

For the streusel: Combine the flour, brown sugar, cinnamon, and nutmeg in a small bowl or food processor. Cut in the cold butter with a pastry blender, or pulse in food processor until the mixture is crumbly. Don’t process too long, or you will end up with a sticky paste!

Layer the apples and cream cheese chunks on top of the bread cubes in the pan.

To assemble the French toast bake: Layer half of the bread mixture, half of the apples, and half of the cream cheese chunks in the prepared pan. Repeat layers. Sprinkle the streusel topping over the apples and cream cheese.

Baking: Option 1

Bake the French toast bake for 40 minutes, until almost set. Remove from the oven and cool on a wire rack. Cover and chill overnight in the refrigerator.

In the morning, remove the pan from the refrigerator while you preheat the oven to 350 degrees F. Bake for 25 minutes, until the center is set and the topping is crisp.

Baking: Option 2

If you don’t need to chill the French toast bake overnight, go ahead and just bake it for a full 50-60 minutes, until the center is set and the topping is crisp.

Mmm, warm apples and cinnamon, paired with sweet streusel and cream cheese make one decadent brunch bake!

Enjoy!

Apple Streusel & Cream Cheese French Toast Bake

The flavors of apple and cream cheese Danishes in an easy breakfast casserole is simple to make, yet so satisfying! It's perfect for brunch or dessert.
Prep Time35 minutes
Cook Time40 minutes
Reheating25 minutes
Total Time1 hour 40 minutes
Course: Breakfast, Brunch, Dessert
Cuisine: American
Keyword: Apple, Bread Pudding, Brunch, Cinnamon, Cream Cheese
Servings: 16
Author: kimberly

Ingredients

  • 3 large, tart apples peeled and chopped
  • 1 tbsp butter
  • 3/4 tsp cinnamon
  • 2 tbsp sugar
  • 10 cups cubed day-old bread
  • 8 eggs
  • 2 cups milk
  • 2/3 cup heavy cream
  • 1 tbsp vanilla extract
  • 1/3 cup sugar
  • 1/2 tsp cinnamon
  • 8 ounces cream cheese cut into small pieces
  • 1/2 cup flour
  • 1/2 cup brown sugar
  • 3/4 tsp cinnamon
  • 1/4 tsp nutmeg
  • 1/2 cup cold butter cut into small pieces

Instructions

  • Preheat the oven to 350 degrees F. Butter a 13×9" pan and set aside.
  • Saute the apples in 1 tablespoon of butter for about 10 minutes, until they are soft. Stir in 3/4 teaspoon cinnamon and 2 tablespoons sugar.
  • In a large mixing bowl, combine the eggs, milk, cream, vanilla, sugar, and 1/2 teaspoon cinnamon. Add the bread cubes and stir well to combine.
  • In a small bowl or food processor, combine the flour, brown sugar, cinnamon, and nutmeg. Cut in butter with a pastry blender or pulse in food processor until crumbly.
  • To assemble the French toast bake: layer 1/2 of the bread mixture in the buttered pan, followed by 1/2 of the apple filling and 1/2 of the cream cheese chunks. Repeat layers. Top with streusel.
  • Bake for 45 minutes. Remove from oven and let cool on a wire rack. Chill in refrigerator overnight. In the morning, remove the pan from the refrigerator while preheating the oven to 350 degrees. Bake for another 25 minutes, until heated through.

Notes

Alternatively, if you do not need to chill the French toast bake overnight, you can just bake it for 50-60 minutes, until the topping is crisp and the center is set.
The flavors of apple and cream cheese Danishes combined in an easy French toast bake give you delicious flavor with much less effort than pastry-making!
Posted on Leave a comment

Seven Minute Sourdough Bread

Sourdough bread baking doesn't have to be finicky! Just seven minutes of hands-on time in the evening is all you need to make the dough, then let it do all the work of rising while you sleep. Shape and bake in the morning, and you have a delicious, fuss-free loaf of bread with minimal effort!
Sourdough bread baking doesn’t have to be finicky! Just seven minutes of hands-on time in the evening is all you need to make the dough, then let it do all the work of rising while you sleep. Shape and bake in the morning, and you have a delicious, fuss-free loaf of bread with minimal effort!

Working with sourdough can be intimidating, especially when you’re new to it. First, you have to worry about how much to feed your starter and how often. Then how do you know when it’s ready to bake with? How many bubbles signify the active state? And those rising times. If you don’t plan your day right, you might just wind up baking bread in the middle of the night, because it wasn’t ready earlier!

This sourdough bread recipe is a fuss-free alternative to traditional recipes that require lots of kneading and checking on the dough. With just 7 minutes of hands-on time to mix up the dough in the evening, the bread does all the work of rising while you sleep. Then all you need to do in the morning is shape the loaf and let it rise again while your oven heats! Nothing beats that for a simple bread recipe.

Starting out with Sourdough

There’s definitely a learning curve when it comes to sourdough baking. That’s why most cookbooks recommend you start out with something simple, like pancakes. I would agree that that’s a good place to start, and I highly recommend Sourdough A to Z from the Traditional Cooking School if you’re new to sourdough baking. It comes in either an e-course or e-book format, along with a printed manual of techniques and recipes.

Unlike other sourdough cookbooks, which often tell you there is only one right way to make sourdough work, this manual looks at several different “sourdough routines” of different home bakers. Some of them use their sourdough nearly every day, while others only use it once a week or so. I tend to use my sourdough starter once per week on average, but sometimes it’s nice to keep it out on the counter and use it every other day.

Another good resource is the blog, An Oregon Cottage. Jami has a thorough beginner’s guide to working with sourdough.

Types of Sourdough Bread Recipes

Knowing how to “read” your sourdough starter is the key to flexibility in sourdough baking. Again, this comes with practice. It’s wise to expect a failed attempt or two when you’re learning. My first loaf of sourdough bread looked like a brick, and was nearly as dense! I had followed the recipe exactly. I gave that loaf hours and hours of rising time. But my kitchen must not have been warm enough, or humid enough, or something else went wrong.

When you end up with a failure, it’s tempting to just give up. Take a break if you’re frustrated, but don’t assume you’ll never succeed!

If you’re having trouble with classic sourdough bread recipes which call for lots of kneading, rising, shaping, and rising again, try this recipe instead. It’s an artisan-style recipe, which calls for very little kneading and one long period of rising while you sleep, with an additional shorter period of rising while the oven is heating.

Artisan Bread vs. Traditional Bread Recipes

What are the benefits to making artisan-style breads?

  • First, you don’t have to know how much about kneading. As long as you mix all the ingredients thoroughly, your bread should turn out just fine. Kneading for a minute or two can help, but it’s not essential.
  • Secondly, times are approximate. You can let the bread rise for 8 hours or 12 hours, or even longer if you accidentally forget about it!
  • Thirdly, forget about a perfectly smooth, evenly shaped loaf. This bread is dusted with flour before baking, which naturally gives it a rustic, somewhat uneven appearance. That’s all part of the charm of artisan breads!
  • Finally, the ingredients are flexible. This recipe is very forgiving. You can leave out the honey entirely, or double it if your family likes a sweeter bread. You can use whole wheat flour, white whole wheat, or regular all-purpose or bread flour. I generally use a combination of whole wheat and all-purpose, so that’s what I listed in the recipe.

The most important thing to remember about baking with sourdough is that you need to wait until your starter is nice and bubbly before making anything that needs to rise a lot (like bread). As a general rule of thumb, allow about 4 hours between feeding the starter and making your dough. If your kitchen is warm and the starter was sitting out already, it might not need this much time. But if your starter was stored in the refrigerator, or if you haven’t used it in a while, or your kitchen is not very warm, it may take a full 4 hours or more to reach the active state.

NOTE:

If your starter takes longer than 4 hours to double and become bubbly, it might be too new to use for bread baking. Keep feeding it and using it for other “flat” recipes like pancakes or crackers. Once your starter can reach the active state in about 4 hours, it is strong enough to raise bread dough.

Sourdough bread baking doesn't have to be finicky! Just seven minutes of hands-on time in the evening is all you need to make the dough, then let it do all the work of rising while you sleep. Shape and bake in the morning, and you have a delicious, fuss-free loaf of bread with minimal effort!

Recipe Notes

This recipe is a combination of my favorite artisan bread recipe using regular yeast, and a sourdough artisan bread recipe that was a little too finicky for my taste. The result is a chewy loaf with a crispy crust that’s not too tough.

It smells amazing fresh from the oven, but try to let it cool completely before cutting, as warm bread is more crumbly and delicate. (However, I know from experience that it is possible to slice this bread 5 minutes after it came out of the oven!)

How sour is it? The sourness varies loaf by loaf depending on your starter and rising conditions, but in general, it’s a pretty mild flavor.

This recipe uses a very simple method, but I did include detailed instructions in case you have never attempted sourdough bread. If the following instructions look too complicated, remember that really all you need to do is: mix, rise, shape, and bake!

Method

If you plan to let your sourdough rise overnight, feed your starter by mid-afternoon, so it has time to reach the active state before bedtime! Make sure you will have enough starter for this recipe, plus some extra to save and feed again.

You will need a medium sized glass or ceramic mixing bowl. Stir your active, bubbly sourdough starter gently. It will fall a bit, so don’t measure before you stir!

Measure the starter and pour it into the mixing bowl. Add the lukewarm water, honey, salt, and flour. Stir all the ingredients together with a wooden spoon until it is too stiff to stir.

At this point, flour your hands and fold the dough over itself a few times to make sure everything is well mixed. You can do this right in the bowl; you don’t have to actually knead the dough. It should feel a bit moist and sticky. Sourdough bread will “soak up” more of the water as it sits.

Cover the mixing bowl with a tea towel and place it in a warm, draft-free area. Let the dough sit for 8-12 hours. Overnight works great!

In the morning, cut a square of parchment paper larger than the bottom of your Dutch oven. Flour your hands generously, and dust the top of the dough with flour as well. Carefully pull the dough away from the edges of the bowl. Do not punch the dough down, like you would a regular yeast bread. Shape it gently into a ball by folding the edges underneath.

Dust the ball of dough with flour and place it on the parchment paper. You may slash the top of the loaf with a sharp knife a few times if you like. Let the loaf rise for 45 minutes in a warm, draft-free spot. If you’re in a hurry, you can shorten this second rise to 30 minutes, but the texture might suffer and the loaf might be flatter.

Adjust your oven racks to make room for the Dutch oven. (This is easier to do before your oven is hot!) Place the Dutch oven (without the lid) in the oven while you preheat it to 450 degrees F.

When the loaf is done rising and the oven is hot, carefully remove the Dutch oven and set it in a safe place. Transfer the sourdough loaf to the Dutch oven by holding the corners of the parchment paper and setting the loaf in carefully. Replace the lid on the Dutch oven, and return it to the hot oven.

Bake for 15 minutes, then remove the lid and continue to bake for another 15 minutes, until the crust is lightly browned and the bread smells done. Cool the bread on a wire rack before slicing.

Enjoy!

~Kimberly

Seven Minute Sourdough Bread

Sourdough bread doesn't have to be finicky! Mix up the dough and let it rise overnight, then shape and bake the bread in the morning. No kneading or constant checking on the dough required!
Prep Time7 minutes
Cook Time30 minutes
Rising8 hours
Total Time8 hours 37 minutes
Course: Breads
Keyword: Bread, Sourdough
Servings: 1 loaf
Author: kimberly

Ingredients

  • 3/4 cup active sourdough starter
  • 1-1/4 cups lukewarm water
  • 1-1/2 tbsp honey
  • 1-1/2 tsp salt
  • 1 cup whole wheat flour
  • 2 cups all-purpose or bread flour

Instructions

  • In a medium glass or ceramic mixing bowl, combine the sourdough starter, water, honey, salt, and flour. Mix well with a wooden spoon.
  • When the dough is too stiff to stir, flour your hands and fold the dough over on top of itself a few times, to ensure that all the ingredients are mixed.
  • Cover the bowl of dough with a tea towel and set it in a warm, draft-free location for 8-12 hours or overnight.
  • In the morning, cut a square of parchment paper larger than the bottom of your Dutch oven. Generously flour your hands and the top of the dough. Carefully remove the dough from the bowl and shape it into a ball. Dust the ball of dough with flour and place it on the parchment paper. Let rise for 45 minutes.
  • Set your Dutch oven on the bottom rack of your oven and preheat the oven to 450 degrees F. Transfer the risen loaf to the hot Dutch oven and replace the lid. Bake for 15 minutes, then remove the lid and continue to bake for another 15 minutes, until the crust is lightly browned and the bread smells done.
  • Carefully remove the bread from the Dutch oven and cool completely on a wire rack before slicing.
Sourdough bread baking doesn't have to be finicky! Just seven minutes of hands-on time in the evening is all you need to make the dough, then let it do all the work of rising while you sleep. Shape and bake in the morning, and you have a delicious, fuss-free loaf of bread with minimal effort!

Like this recipe? You may also enjoy Secrets to the Best Banana Bread and Lemon Ginger Scones.

Posted on Leave a comment

Almond Peach Muffins

These peach-studded muffins are perfect for breakfast or tea. Not too sweet, they're full of delicate fruit flavor - and they always disappear in a flash!
These peach-studded muffins are perfect for breakfast or tea. Not too sweet, they’re full of delicate fruit flavor – and they always disappear in a flash!

Who wouldn’t want to wake up to the smell of fresh peach muffins for breakfast? Peaches are the star of these bright, fruit-studded morsels. There’s just enough sugar to complement their sweetness, not overpower it. Sliced almonds add just the right amount of crunch and delicate flavor. This recipe relies on handy canned peaches, so you can enjoy these muffins even when the peaches are not in season!

Nothing speaks of summery sunshine and warmth like fresh, ripe fruit. While the growing season is a wonderful, busy time, it doesn’t last forever–especially here in Alaska! Canned fruit allows me to enjoy the flavors of summer even when the weather is rather less than warm.

I enjoy preserving the berries and fruits that grow here, but I’m also thankful for grocery stores that supply me with canned peaches and other fruits which shun this cold climate! Canned fruit is certainly not the same as fresh, and it can’t always be substituted with the same results. For example, canned peaches can’t match fresh ones for their heavenly aroma!

But canned fruit definitely has its place in the world of cookery. It works particularly well when baked into breads or desserts. These almond peach muffins are one of my favorite ways to use canned peaches. I hope you enjoy them, too!

Method

making almond peach muffins

Preheat your oven to 400 degrees F. Butter a 12-cup muffin tin and set aside.

In a medium mixing bowl, whisk together the sour cream, vegetable oil, eggs, and almond extract. You may use any lightly-flavored oil: avocado, sunflower, canola, or regular vegetable oil. Even extra virgin olive oil will work.

In another bowl, sift together the flour, sugar, baking powder, and salt. Once the dry ingredients are well mixed, add them to the egg mixture and stir gently until just combined. Fold in the chopped peaches and sliced almonds.

Spoon the batter into the buttered muffin tin. Fill each muffin cup 3/4 full. Now, the size of muffin tins varies somewhat, so you may need a second tin. This recipe should make between 12-16 muffins, depending on the size of your tins and how full you fill them.

Bake for 18-20 minutes, or until the centers are set and the edges are golden. These muffins should dome nicely, if you don’t stir the batter too much or open the oven door while they are baking.

Cool the muffins in the tin for a few minutes before removing them to a wire rack. You may cool them completely on the rack, or serve warm.

Notes and Variations

I use canned peach halves or sliced peaches in this recipe for their availability and convenience. It doesn’t matter whether they are canned in juice or syrup, but do make sure you drain them first! I live in a place far from peach orchards, and it’s difficult to find good peaches even during the summer. However, if you do have access to good fresh peaches, and you are making these muffins when peaches are in season, by all means use fresh fruit! Frozen peaches will also work. If you decide to use fresh or frozen fruit, you will need one cup of chopped peaches.

If you do not want crunchy muffins, but still want the almond flavor, you may substitute 1/4 cup of ground or finely chopped almonds for the sliced almonds. Or leave them out altogether, if you prefer.

These muffins are slightly sweet, but nowhere near cupcake sweetness. If you prefer a sweeter muffin, sprinkle some additional sugar over the muffins just before baking. I like to use raw sugar, which is sometimes called turbinado sugar or evaporated cane juice. It has larger crystals, which look pretty on the muffins!

Even better, mix equal parts finely chopped almonds with raw sugar and sprinkle the mixture over the unbaked muffins. (You will need about one tablespoon of each.) This adds the perfect touch for tea parties!

For more tea party recipes, see Lemon Thyme Tea Cookies and Sweetheart Cranberry Almond Scones.

Happy baking!

~ Kimberly

These peach-studded muffins are perfect for breakfast or tea. Not too sweet, they're full of delicate fruit flavor - and they always disappear in a flash!

Almond Peach Muffins

These peach-studded muffins are perfect for breakfast or tea. Not too sweet, they're full of delicate fruit flavor – and they always disappear in a flash!
Prep Time15 minutes
Cook Time20 minutes
Total Time35 minutes
Course: Breads, Breakfast, Brunch, Teatime
Cuisine: American
Keyword: Bread, Brunch, Muffins, Peach, Tea Party
Servings: 12 muffins
Author: kimberly

Ingredients

  • 1/2 cup sour cream
  • 1/4 cup vegetable oil
  • 2 eggs
  • 1/2 tsp almond extract
  • 1-3/4 cup all-purpose flour unbleached
  • 1/2 cup sugar
  • 2 tsp baking powder
  • 1/2 tsp salt
  • 15 oz. canned peaches drained and chopped
  • 1/3 cup sliced almonds

Instructions

  • Preheat oven to 400 degrees F. Butter a 12-cup muffin tin and set aside.
  • In a medium mixing bowl, combine the sour cream, oil, eggs, and almond extract.
  • Sift together the flour, sugar, baking powder, and salt in another bowl. Add the flour mixture to the egg mixture and stir until just combined.
  • Fold in chopped peaches and almonds. Spoon batter into prepared muffin tin.
  • Bake muffins at 400 degrees F for 18-20 minutes, or until centers are set and edges are golden.
  • Cool muffins in tin for 5 minutes before removing to a wire rack to cool completely, or serve warm.

Notes

You may substitute 1 cup of fresh or frozen peaches for the canned peaches.
Posted on Leave a comment

Hearty Mountain Man Chili

This hearty chili will warm the coldest days! Filled with meat, beans, and just the right amount of spices, this is a family favorite supper!

Warm up on a blustery evening with this hearty, spicy chili. Loaded with meat, beans, and vegetables, this recipe makes a pot big enough to feed a horde of hungry mountain men! Set it to simmer on the woodstove in the morning, and it will be hot and ready by suppertime. Or, if you happen to lack a woodstove, this chili can certainly be prepared on your stovetop in an afternoon. Don’t be intimidated by the long list of ingredients; this chili takes a little prep time, but then it simmers away happily on its own all day, or at least all afternoon.

Method

In a Dutch oven or large stockpot, cook the sausage and bacon over medium heat. Remove the meat with a slotted spoon and set aside. Keep the drippings in the pan to flavor your meat and onions.

Cook the sausage and bacon first for the chili.
While the bacon and sausage are cooking, chop your stew meat and onions.

While the bacon and sausage are cooking, cut your game meat into 3/4-inch or 1-inch cubes. Caribou and moose meat are both delicious, but feel free to use venison or even beef, if you don’t have any game meat. This recipe is a good place to use tougher cuts of meat, such as those labeled as “stew meat.” The long cooking time will make even tough meats nice and tender.

A note about meat

One other note about meat: the amount is approximate. You can use as little as 2 lbs. of stew meat, or as much as 3 lbs. without adjusting any other ingredients. With a smaller amount of meat, the chili will have proportionately more beans and more liquid, so just keep that in mind.

meat and onions for mountain chili
Brown the meat slowly with the onions and garlic for maximum flavor.

Add the game meat or beef to the Dutch oven along with the chopped onions and minced garlic, and cook over medium low heat until browned. Stir occasionally to brown the meat on all sides. Drain off all the fat.

Return the sausage and bacon to the Dutch oven. Add the beans, beef broth, tomatoes, tomato sauce, chilies, and all the seasonings.

Ingredients for mountain chili
Mix everything together, including the spices. Don’t be shy of using all that chili powder–if it’s dark chili powder. Pictured is the lighter variety, which tends to be spicier.

A note about chili powder

Don’t be shy of using half a cup of chili powder! I know it sounds like a lot, but this recipe makes a big pot of chili, and it’s really not too spicy. That is, if you use dark chili powder. The lighter, redder chili powder tends to be a little stronger, so I would cut back to 1/4 or 1/3 cup if you are using this variety. You can always add more after the chili simmers for a few hours. (If you’re still skeptical, read the adjustments for heat below.)

Bring the chili to a boil, then reduce heat to a simmer. Continue to simmer, covered, for a few hours or all day: until the meat is tender and the sauce is thick. Check the pot every couple of hours to see if it needs more liquid. You may have to add a little water every now and then.

Cooking

That’s it! This chili will be ready to serve in as little as 3 hours, or as long as 8. It’s a low-maintenance dinner that leaves you free to do other things instead of being tied to the kitchen. Try this chili with corn bread or biscuits hot from the oven. Your mountain men will come back for seconds!

This recipe makes a big pot of chili. If you don’t happen to have a horde of hungry men or teenagers around to eat it, the leftovers freeze very well. I have found it helpful to divide the cooled chili into meal-sized containers, and freeze them individually. I get about three meals for our family of four from this recipe, with extra for guests. There’s nothing I like more than cooking one dinner and getting two additional meals from the same amount of effort!

Adjustments for heat and spiciness

If you desire a less spicy chili, here are a few adjustments you can make:

  • use a mild sausage
  • use dark chili powder
  • leave out the Tabasco

If you would like a spicier chili, try these adjustments:

  • use hot sausage (either hot country style or hot Italian style)
  • use light chili powder, or add a little more
  • use more Tabasco – with caution!
This hearty chili will warm the coldest days! Filled with meat, beans, and just the right amount of spices, this is a family favorite supper!

Mountain Man Chili

Warm up on a blustery evening with this hearty chili. Loaded with meat, beans, and spices, this recipe makes a pot big enough to feed a horde of hungry mountain men!
Prep Time35 minutes
Cook Time3 hours
Total Time3 hours 35 minutes
Course: Main Course
Cuisine: American
Keyword: Bacon, Beans, Chili, Sausage, Soup, Stew
Author: kimberly

Ingredients

  • 1 lb. bulk sausage country style or Italian
  • 1/4 lb. bacon chopped
  • 2 large onions chopped
  • 3 lbs. caribou, moose, venison, or beef cubed
  • 2 tbsp garlic minced
  • 30 oz. canned kidney beans drained and rinsed
  • 15 oz. canned pinto beans drained and rinsed
  • 15 oz. beef broth
  • 30 oz. diced tomatoes undrained
  • 3 cups tomato sauce or juice
  • 4 oz. diced green chilies
  • 1/2 cup dark chili powder
  • 1 tsp cumin
  • 1 tsp oregano
  • 1 tsp coriander
  • 1 tsp garlic powder
  • 1-1/2 tsp salt
  • 3/4 tsp black pepper
  • 2-3 drops Tabasco optional

Instructions

  • In a Dutch oven, cook the sausage and bacon over medium heat.
  • Remove meat from the pot with a slotted spoon and set aside. Add the game meat or beef, onions, and garlic to the Dutch oven and cook over medium low heat until browned. Stir occasionally so that all sides are browned. Drain off all the fat.
  • Return the cooked sausage and bacon to the Dutch oven. Add the beans, beef broth, tomatoes and tomato sauce, chilies, and all the seasonings. Stir well to combine.
  • Bring the chili to a boil, then reduce heat to a simmer. Continue to simmer for at least 3 hours, up to 8 hours. Check the chili every couple of hours and add a small amount of water if needed.