Posted on Leave a comment

Harvest Pumpkin Granola

Harvest Pumpkin Granola is filled with the flavors and aromas of fall.

When the chilly air nips noses and cheeks, sweaters come out of hibernation, and the teakettle is always warming, it is time to make this comforting pumpkin-spiced granola! Crunchy clusters of oats, almonds, and golden raisins with sweet spices lend an autumnal touch to a familiar breakfast or lunch treat.

Perhaps granola isn’t the first thing you think of when it comes to fall food. But then, we can’t be indulging in apple dumplings or maple lattes every day. Some days when you want a touch of fall on the table without a lot of fuss (or sugar), this spiced pumpkin granola hits the spot! And if your family loves yogurt as much as mine does (I make half a gallon of yogurt per week), you are always glad for something a little different to go with it.

Notes on Ingredients

Honey

You can use any kind of honey you like for this recipe. I usually keep raw honey in my pantry, so that is what I use here. The only consideration for this recipe is the consistency of the honey. Raw honey tends to be very thick, so you will need to heat it and re-liquefy it so that it will mix in with the other ingredients. Pasteurized honey may or may not be thick; use your judgment about whether or not you need to heat it before mixing it into the granola.

Oil

I used avocado oil for this granola, as it does not have a strong flavor. You are welcome to substitute a different oil if you like, but be aware that this may impact the flavor of your granola. I like coconut oil in granola recipes, but it does leave a slight coconut flavor and aroma, which I did not care for in this particular recipe.

You can also omit the oil altogether, and use a bit more pumpkin puree instead. This does change the texture and flavor of the granola slightly.

Sugar

This recipe is lighter on sugar than other granolas you may have tried. If you like your granola on the sweeter side, increase the brown sugar to a packed 1/3 cup.

If you don’t happen to have any brown sugar around, not to worry! It’s easy to make your own. Just drizzle a little molasses into some white sugar or evaporated cane sugar, mix thoroughly, and you’re all set! Start with a tablespoon of molasses per cup of sugar, and adjust with more sugar or molasses to your liking. Store in an airtight container at room temperature. I like to mix up a cup or two at a time, since brown sugar can get hard if it sits too long.

Method

Preheat your oven to 300 degrees F.

In a small saucepan, combine the honey, pumpkin, and oil. Heat gently over a low flame, stirring until the honey liquefies and melds with the pumpkin and oil. (Heating the mixture might not be necessary if your honey is very runny; I use raw honey, which tends to be quite thick.) Remove from the heat and stir in the vanilla extract.

In a large mixing bowl, combine the oats, flour, almonds, brown sugar, and spices. You can use pumpkin pie spice, or just make your own with cinnamon, nutmeg, cloves, and ginger. Here’s a quick recipe:

This recipe makes one tablespoon of pumpkin pie spice, which is just what you need to make this granola! To make more pumpkin pie spice, simply multiply the recipe by 2 or 3. For example, use 3 tsp cinnamon, 1 1/2 tsp nutmeg, 1 tsp cloves, and 1/2 tsp ginger to make a double batch. That way, you’ll have some handy for other autumn goodies like pumpkin spice snickerdoodles or iced pumpkin scones!

Pour the pumpkin mixture into the oat mixture and stir gently until just combined. You don’t want to stir this too much; leave some large clumps. Those are the best part!

Divide the granola between two 9×13″ baking pans, or use one large rimmed baking sheet.

Bake the granola for 45 minutes to 1 hour, stirring every 15 minutes.

How to tell when your granola is done

You will know your granola is finished baking when:

  • It smells fragrant
  • The nuts are toasted
  • The color darkens a bit, especially around the edges of the pan
  • The clumps don’t break apart easily
Pumpkin, sweet spices, golden raisins, and crunchy almonds make this Harvest Pumpkin Granola a fall favorite!

You do not need to bake the granola until it is completely crispy; remember, granola will continue to crisp up as it cools!

Stir in the golden raisins once the granola is done baking. Cool the pumpkin granola completely in the pans, then store in an airtight container at room temperature for up to 1 month.

Happy fall baking!

~ Kimberly

Harvest Pumpkin Granola

Harvest Pumpkin Granola is filled with the flavors and aromas of fall: warm pumpkin, sweet spices, golden raisins, and crunchy almonds make this an autumn treat!
Prep Time10 minutes
Cook Time1 hour
Total Time1 hour 10 minutes
Course: Breakfast
Cuisine: American
Keyword: Cinnamon, Granola, Pumpkin
Servings: 7 cups
Author: kimberly

Ingredients

  • 2/3 cup pumpkin canned or cooked
  • 1/2 cup honey
  • 1/4 cup avocado oil
  • 2 tsp vanilla extract
  • 4 cups rolled oats
  • 2/3 cup whole wheat flour
  • 1 cup sliced almonds
  • 1/4 cup brown sugar
  • 1 tbsp pumpkin pie spice
  • 1 cup golden raisins

Instructions

  • Preheat oven to 300 degrees F.
  • In a small saucepan, combine the pumpkin, honey, and oil. Heat gently over a low flame until the honey is liquefied, stirring occasionally. Remove from heat and add vanilla extract.
  • In a large mixing bowl, combine the oats, flour, almonds, brown sugar, and spices.
  • Pour the pumpkin mixture over the oats and stir gently just until combined; leave some clumps intact.
  • Divide the mixture between two 9×13" baking pans or use one large, rimmed baking sheet. Bake for 45-60 minutes, stirring every 15 minutes until done.
  • Stir in golden raisins. Cool completely in pans, then transfer to an airtight container and store at room temperature for up to 1 month.

Notes

To make your own pumpkin pie spice, combine:
1-1/2 tsp ground cinnamon
3/4 tsp grated nutmeg
1/2 tsp ground cloves
1/4 tsp ground ginger
Harvest Pumpkin Granola is filled with the flavors and aromas of fall.
Posted on Leave a comment

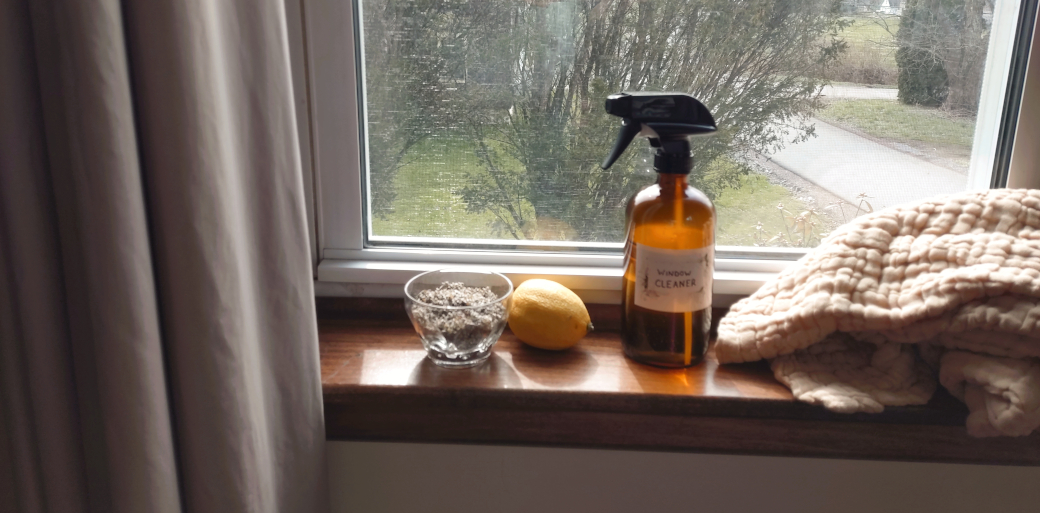
Make Your Own Nontoxic Window Cleaner

Make your own nontoxic window cleaner with just a few household ingredients! Your windows will sparkle, and your house will smell fresh and clean!

Spring cleaning is just around the corner, and I’m preparing by gathering cleaning supplies and making lists. And refilling all of my homemade cleaners. If you have never made your own cleaners, you’re in for a treat! Homemade cleaning products are simple to make, naturally free of toxic chemicals, easy on the pocketbook, and best of all, they smell amazing! (No more turning on the bathroom fan or opening all the windows after a cleaning day!)

What Do You Need to Make Your Own Homemade Nontoxic Cleaner?

The building blocks of a homemade cleaner are vinegar or alcohol, and water. In this basic recipe, I use white vinegar and water.

Many herbs and plants have antibacterial, antiviral, antifungal, and antiseptic properties which are great for cleaning! You can incorporate these plants into your homemade cleaners in two different ways:

  1. You can steep fresh or dried herbs in vinegar or alcohol, then strain out the solids and add the liquid to your cleaner.
  2. You can add a few drops of essential oils to your homemade natural cleaner.

This homemade window cleaner recipe uses essential oils, but if you would like to use fresh herbs instead, try my Citrus + Sage Homemade Cleaner recipe!

Which Essential Oils Are Good For Cleaning?

There are many, many essential oils that can be used for cleaning due to their germ-fighting properties. That’s a good thing, but it can be overwhelming! Here’s a list of my favorites to get you started:

  • Lemon (or any other citrus oil)
  • Eucalyptus
  • Rosemary
  • Lavender
  • Pine
  • Tea Tree

I like the combination of lemon, rosemary, tea tree, and lavender essential oils in this homemade window cleaner recipe. It makes my bathroom smell nice and fresh when I polish the mirror and wipe the windows!

If you don’t have all of these essential oils, you can substitute a different oil from the list above, or just leave out one or two of the oils. For example, you could substitute lemongrass or grapefruit essential oil for the lemon, or leave out citrus altogether. If you do omit an oil, make sure you increase the amounts of other essential oils accordingly, so that the total number of drops will equal about 48. This is a 0.5% dilution.

Does that dilution rate sound pretty weak? You’re right; but a window cleaner doesn’t have to be as strong as a bathroom cleaner, does it? We’re trying to wipe dirt and grime off of our windows and mirrors, and prevent mold or bacteria from colonizing there. And freshen the air at the same time!

How Do You Make Homemade Window Cleaner?

It’s very simple to make this recipe. Just pour the vinegar and water into a glass spray bottle, and add the essential oils. A funnel is helpful for pouring the liquids into a narrow-mouth bottle. Screw the lid on tightly, shake well, and you’re all set to clean those windows!

If you do make this recipe and enjoy it, please leave a review and let me know!

Nontoxic Window Cleaning Spray

Spring cleaning is a breeze with this all-natural window and mirror cleaner! No nasty chemicals necessary, and your house has never smelled nicer!
Prep Time5 minutes
Total Time5 minutes
Keyword: Cleaner, Essential Oils, Household, Lavender, Lemon, Rosemary, Tea Tree
Yield: 12 ounces
Author: kimberly

Equipment

  • 1 Glass Spray Bottle
  • 1 funnel

Materials

  • 6 ounces White Vinegar
  • 6 ounces Distilled Water
  • 14 drops Lavender Essential Oil
  • 10 drops Lemon Essential Oil or lemongrass essential oil
  • 16 drops Rosemary Essential Oil
  • 8 drops Tea Tree Essential Oil

Instructions

  • Combine the vinegar, distilled water, and essential oils in a glass spray bottle. Screw the lid on tightly and shake well.
  • Store away from heat and direct sunlight.

Notes

You may substitute lemongrass essential oil for the lemon essential oil, if you do not wish to use citrus oils.
Make your own nontoxic window cleaner with just a few household ingredients! Your windows will sparkle, and your house will smell fresh and clean!
Posted on Leave a comment

How to Make a Gentle Castile Soap Facial Cleanser

Bathe your face in sweetly scented petals with this gentle castile soap facial cleanser!
Bathe your face in sweetly scented petals with this castile soap and rose water-based facial cleanser.

With what do you wash your face? Soap? Buttermilk? Roses? Avocado? There are so many different recommendations from various times and cultures, each promising to perform some feat of beauty for your complexion.

Any or all of them may work, of course, but here’s one I can recommend wholeheartedly. This solution of castile soap, rose water, and essential oils is a gentle, natural alternative to expensive facial cleansers. It does not contain any harsh chemicals, preservatives, or stabilizers, so it’s wonderful for sensitive skin. There are no synthetic ingredients you can’t pronounce, only a few natural ingredients. If you prefer to use organic products, it’s easy to find organic versions of each of the ingredients.

But the best part? This homemade facial cleanser works well, and it smells like walking through a field of wildflowers on a midsummer’s morn. Now wouldn’t you like to wake up to the scent of dewy blossoms every morning? It always brings a smile to my face, and I don’t think any cleanser in the world could brighten my complexion more effectively than that!

Can you use castile soap on your face?

You may have heard that castile soap is very strong, and may not be the best for washing sensitive skin like your face. It is true that castile soap is concentrated, and should be diluted before putting it on your face. When it is properly diluted, though, castile soap makes a great addition to facial cleansers. It is made of natural ingredients, so you don’t have to worry about putting lots of chemicals on your skin. Pure castile soap is made of only vegetable-based ingredients, so it is not as harsh or drying as some other soaps.

Is castile soap good for oily or dry skin?

When you make your own castile soap facial cleanser, you control the amount of soap, so if your skin is especially sensitive, just add a smaller amount of soap to the bottle. On the other hand, if your skin is extra oily and this recipe doesn’t seem strong enough, go ahead and add a small amount of extra castile soap to the bottle. Don’t add more than a tablespoon at a time. Remember to shake the bottle well after any adjustments to the recipe.

If you are adding more soap, it’s best to patch test on a small area of skin, such as the inside of your upper arm, to make sure the solution doesn’t irritate your skin.

Can you use rose water in a facial cleanser?

Does the thought of using rose water to cleanse your face bring to mind ancient beauties in classical attire? Rose water has, indeed, been used for centuries in beauty rituals. And with good reason: research shows that roses have some incredible benefits for skin.

They soothe inflammation and redness, while inhibiting bacterial growth that may contribute to acne. Rose water helps your skin to retain moisture, which not only combats dry skin, but also makes it look plumper and softer, reducing the appearance of lines and wrinkles.

Rose water is a natural toner, which means it reduces the appearance and size of pores in your skin. (Here’s a recipe for a natural rose water toner, too!)

It’s also a gentle natural cleanser, and helps to clean clogged skin pores and remove makeup residue. No wonder rose water has been a long-beloved cosmetic of women young and old! If you still need more reasons to use rose water on your face, read this article from Fleur & Bee.

Which essential oils should you use in a facial cleanser?

The range of essential oils is wide, but that doesn’t mean they can all be used interchangeably. Each essential oil contains different compounds that are bioactive: these are the “active ingredients” listed on your skincare products. But unlike most skincare products, these are entirely natural and plant-derived!

Some examples of these bioactive compounds are limonene (found in citrus oils), pinene (found in pine and fir oils), and citronellol (found in rose and geranium oils). Each essential oil contains several of these compounds, and the combination of bioactive compounds in a specific essential oil determines its uses. Some oils are nourishing and soothing for skin, others are good for toning or cleansing, and still others have antibacterial or antiviral properties.

Geranium Essential Oil Constituents and Uses

The three main bioactive compounds, also called molecular constituents, of geranium essential oil, are citronellol, geraniol, and linalool. Geranium essential oil has been used in skin care products for many years. It is said to promote bright, youthful-looking skin. It is beneficial for soothing minor skin irritations and decreasing redness.

Citronellol

Citronellol has several effects in the body. When it is used in skin products, it promotes clear and glowing skin. Rose and geranium essential oils are both good sources of this constituent. Citronellol is also a natural insect deterrent.

Geraniol

Geraniol has antimicrobial, antioxidant, anti-inflammatory, anti-cancer, and neuroprotective properties. It has a rose-like scent, and is used in perfumes, skincare products, natural flavors for food products, and as an insect deterrent. Geraniol is a known allergen, but when it is used topically, there is a fairly low risk of sensitivity, since it does not penetrate the skin readily.

The main benefits of geraniol for skin are: anti-inflammatory (soothing), antimicrobial (fights acne-causing bacteria), and antioxidant (fights free radicals which contribute to aging skin).

Linalool

Linalool has anti-inflammatory and insect-repelling properties as well as relaxing and stress-relieving effects. It is most commonly used in skincare products for its flowery fragrance. This compound is also a potential allergen to very sensitive skin, so we use it in very small concentrations. If you have sensitive skin, you may want to do a patch test before trying it on your face.

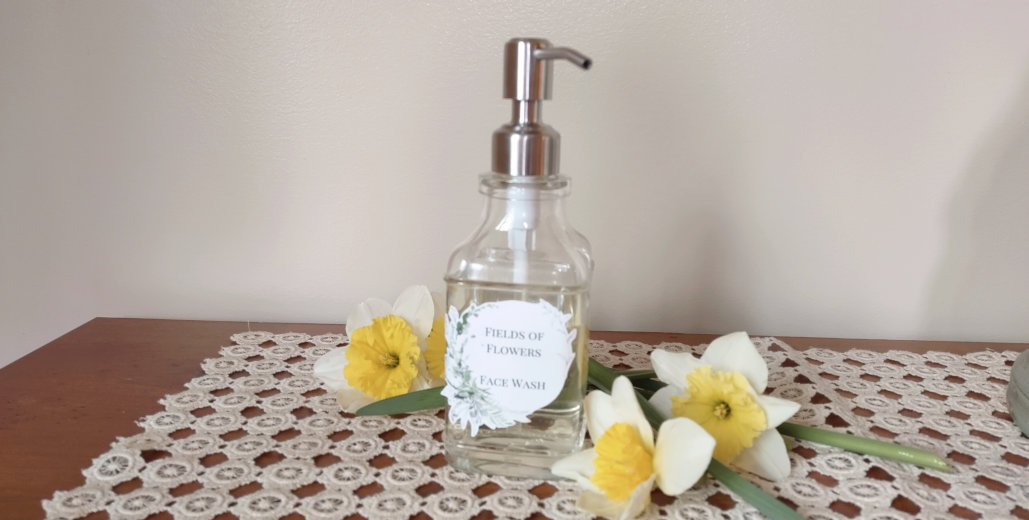
One pump of this foaming floral cleanser is enough to refresh your skin and clear away any residue.
One pump of this foaming floral cleanser is enough to refresh your skin and clear away any dirt or residue.

Ylang-ylang Essential Oil Constituents and Uses

Ylang-ylang essential oil’s main active components are linalool, geranyl acetate, and beta-caryophyllene. It is antimicrobial, anti-inflammatory, anxiolytic (anti-anxiety), and used to help wounds heal faster. It is also effective in treating acne-prone skin. Ylang-ylang oil combats excess oil on skin and scalp, so it is also beneficial for hair care. This essential oil’s most prominent feature, however, is its sweet scent reminiscent of jasmine. Ylang-ylang oil is used for its scent in many perfumes and skincare products.

Geranyl acetate

Geranyl acetate has strong analgesic and anti-inflammatory properties. It is great for reducing skin irritation and redness, as well as treating minor burns, eczema, and dermatitis. This compound is very soothing for skin.

B-Caryophyllene

Beta-Caryophyllene is analgesic, anti-inflammatory, antimicrobial, and antioxidant. It helps to soothe skin and fight free radicals which cause skin cells to age.

Lavender Essential Oil Constituents and Uses

Lavender essential oil contains both cis- and trans-beta-ocimene, linalool, and linalyl acetate. It is regarded as a very calming, soothing oil that promotes sleep and relaxation. It is also used widely in skin and hair care products, as well as perfumes.

Beta-Ocimene

Beta-ocimene is a terpene which is most noted for its antiseptic, antiviral, antifungal, anti-inflammatory, and analgesic properties. This compound is found in many plants, and is considered soothing and healing for skin.

Linalyl Acetate

Linalyl acetate is particularly good for healing rashes and soothing sensitive skin. This compound, when combined with linalool, has an especially effective soothing effect. The anti-inflammatory effect is so strong that it has been researched for use in treating high blood pressure. This is one of the main reasons lavender is used in so many products that promote sleep or relaxation.

How to make castile soap facial cleanser

Making your own facial cleanser is very simple. All you need is a glass bottle with a soap pump.

  1. Mix the castile soap, rose water, and essential oils in the bottle.
  2. Screw the lid on tightly and shake well.

To use your homemade castile facial cleanser, pump a small amount of cleanser onto a dampened face cloth. Apply gently all over your face, avoiding the area around your eyes. Rinse with water.

That’s it! So simple, so refreshing, and only natural ingredients! You’ll never need to buy another fancy cleanser again. Let me know if you like this recipe!

Fields of Flowers Facial Cleanser

Bathe your face in the fresh scent of petals with this simple castile soap-based facial cleanser. It is gentle yet effective for everyday skin cleansing.
Prep Time5 minutes
Total Time5 minutes
Keyword: Castile Soap, Cleanser, Essential Oils, Rose water, Skincare
Servings: 8 ounces
Author: kimberly

Equipment

  • 1 glass bottle with soap pump

Ingredients

  • 2/3 cup Castile soap liquid
  • 1/3 cup Rose water
  • 15 drops lavender essential oil
  • 20 drops geranium essential oil
  • 7 drops ylang ylang essential oil

Instructions

  • Measure castile soap and rose water in the glass bottle. Add essential oils. Screw the lid on tightly and shake well.
  • Store in a cool, dry place away from direct sunlight.
One pump of this foaming floral cleanser is enough to refresh your skin and clear away any residue.
Posted on Leave a comment

A Real, Simple Breakfast Cereal

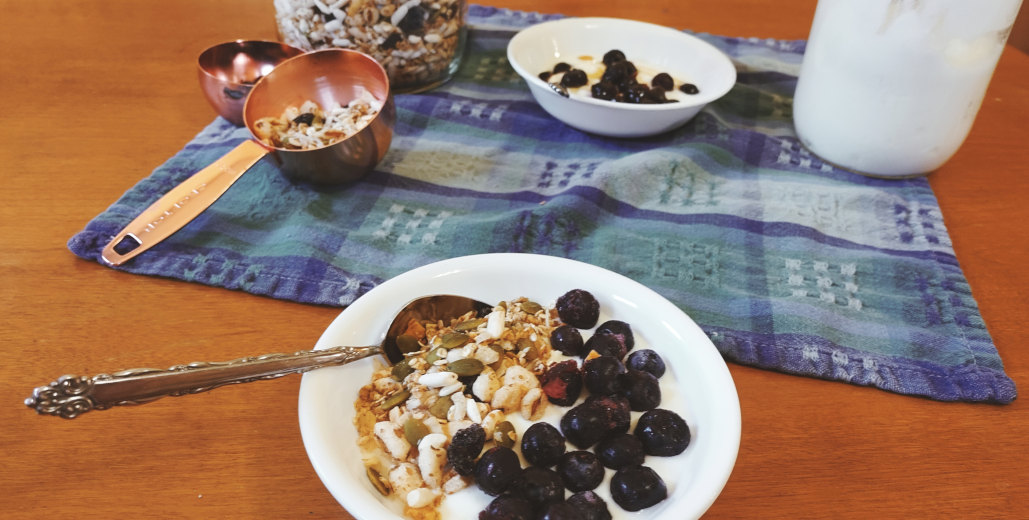
Is there really such a thing as a healthy, homemade breakfast cereal that actually tastes good? Try this, and you'll see!
Is there really such a thing as a healthy, homemade breakfast cereal that actually tastes good? Try this real food recipe, and see for yourself!

Do you like breakfast cereals? I don’t. They never really fill me up in the morning, and I disdain the frosted cardboard taste and texture. But everyone else in my family likes cold cereal, so I usually keep some around for dire circumstances like postpartum and days that my husband leaves for work before 6:30. He doesn’t feel like frying eggs or pancakes at 6 AM, and I don’t blame him. But I also don’t get up that early these days, with a baby keeping me up all hours.


At any rate, when I found a recipe for homemade breakfast cereal, I was only too happy to try it and ditch the honey-flavored rings defying my nutrition goals from the corner cupboard. The first attempt turned out pretty well, I thought. Except for the fact that my kids refused to eat it.

So I played with the recipe a bit until we came up with this version. The original recipe, printed in The Simple Bites Kitchen, does not call for sugar, but I added some for the sake of peace. Two teaspoons of sugar spread out through 12 cups of cereal doesn’t seem too bad. It makes more of a difference in sweetness than you would think, though. The original recipe was supposed to be an “apple crisp” flavor, but… my kids don’t like dried apples for some reason. So I switched up the dried fruits and nuts for a combination that suits my family better. You can adjust them freely to match your own taste.


The cereal we ended up with is a sort of compromise between muesli, granola, and conventional cold cereal. It takes grains and seeds (like muesli), and toasts them (like granola), then mixes them with dried fruit and puffed grains–which could easily be used as a cereal without the extras. The combination certainly adds variety to the breakfast table, while providing ample amounts of protein, carbs, and fiber to hungry kids and grownups alike. Serve it with whole milk or yogurt, and maybe some fresh or frozen fruit for added flavor.

Variations on the Basic Muesli Recipe


You can find many ways to vary this recipe:

  • In place of the oats, try a rolled 7-grain mix
  • Add more spices like cloves or nutmeg, or stir in a teaspoon of vanilla extract
  • Try orange juice instead of apple cider
  • Drizzle in a bit of honey or maple syrup instead of the sugar
  • Switch up the dried fruits and nuts
  • Use different puffed grains
Measure and mix the dried fruits and puffed grains with the cooled oat mixture, and your cereal is ready!

I made a valiant effort to make puffed quinoa for this recipe. It tasted fine, but no matter what method I used, the grains never seemed to get any bigger. To me, it just wasn’t worth to toast half a cup of grains and end up with half a cup of “puffed” grains that got lost in the mix.

If you want to make your own puffed grains, it is pretty easy, and you might well have more success than me! They did taste good, even if they didn’t puff up much.

If you try any variations and find one you like, please let me know! I love to try different flavor and texture combinations.

Method

Preheat your oven to 325 degrees F. Set out two large, rimmed baking sheets and line them with parchment paper. (I don’t know if this step is completely necessary, but I always do it out of habit.)

In a medium-size mixing bowl, combine the oats, coconut, almonds, and pepitas. You may substitute these for different nuts and seeds, but keep the amounts equal.

In a small bowl or measuring cup, combine the apple cider, sugar, and spices. Stir thoroughly, then pour over the oat mixture and toss to combine. So far, this sounds like a granola recipe, but this mixture won’t clump together like granola does.

First, mix all the granola ingredients together and coat with apple cider and spices. Just a touch of raw sugar goes a long way, and brings this cereal from good to great!

Spread it out over the two prepared baking sheets. Pop them in the oven and bake for about 30 minutes. Stir every 10-15 minutes, and rotate the pans. Try not to let the oats get too dark. We’re not making granola, just bringing out the flavor of the grains and nuts by toasting them.

Cool the oat mixture on the pans for 5 minutes or so, then carefully pour everything into a large bowl to cool completely.

Mix in the dried fruits and puffed grains, and you’re all set! Transfer the cereal to an airtight container, and relax in the knowledge that breakfast is ready. The cereal will stay fresh at room temperature for 2-3 weeks… if it lasts that long!

A Real Breakfast Cereal

If an almost-sugar-free breakfast cereal that tastes great sounds too good to be true, try this easy recipe! It makes a nice big batch, enough for many mornings.
Prep Time8 minutes
Cook Time30 minutes
Cooling Time30 minutes
Total Time1 hour 8 minutes
Course: Breakfast
Keyword: Breakfast, Cereal, Granola, Muesli
Servings: 12 cups
Author: kimberly

Ingredients

  • 2 1/2 cups oats rolled or quick
  • 1 cup dried coconut flakes
  • 1 cup sliced almonds raw
  • 1 cup pepitas raw
  • 1/2 cup unfiltered apple cider
  • 1 1/2 tsp ground cinnamon
  • 1/2 tsp ground ginger
  • 2 tsp Demerara or raw sugar
  • 1 cup dried apple rings chopped
  • 1 cup raisins
  • 3 cups puffed wheat
  • 3 cups puffed rice

Instructions

  • Preheat the oven to 325 degrees F. Line two large, rimmed baking sheets with parchment paper.
  • Stir together the oats, coconut flakes, almonds, and pepitas in a mixing bowl.
  • In a small bowl or glass measuring cup, mix the apple cider, cinnamon, ginger, and sugar. Stir well to combine. Pour over the oat mixture and toss to coat evenly.
  • Spread the mixture out over both baking sheets in a thin, even layer. Bake for about 30 minutes, stirring every 10-15 minutes and rotating pans. Do not let the mixture get too dark!
  • Cool on pans for 5 minutes, then transfer to a large bowl to cool completely.
  • Finally, mix in the dried apples, raisins, puffed wheat, and puffed rice. Store in an airtight container. This cereal will stay fresh at room temperature for 2-3 weeks.

Notes

If you would like a sugar-free cereal, omit the sugar.
Feel free to substitute different puffed grains if wheat is a problem for your family.