These peach-studded muffins are perfect for breakfast or tea. Not too sweet, they’re full of delicate fruit flavor – and they always disappear in a flash!
Who wouldn’t want to wake up to the smell of fresh peach muffins for breakfast? Peaches are the star of these bright, fruit-studded morsels. There’s just enough sugar to complement their sweetness, not overpower it. Sliced almonds add just the right amount of crunch and delicate flavor. This recipe relies on handy canned peaches, so you can enjoy these muffins even when the peaches are not in season!
Nothing speaks of summery sunshine and warmth like fresh, ripe fruit. While the growing season is a wonderful, busy time, it doesn’t last forever–especially here in Alaska! Canned fruit allows me to enjoy the flavors of summer even when the weather is rather less than warm.
I enjoy preserving the berries and fruits that grow here, but I’m also thankful for grocery stores that supply me with canned peaches and other fruits which shun this cold climate! Canned fruit is certainly not the same as fresh, and it can’t always be substituted with the same results. For example, canned peaches can’t match fresh ones for their heavenly aroma!
But canned fruit definitely has its place in the world of cookery. It works particularly well when baked into breads or desserts. These almond peach muffins are one of my favorite ways to use canned peaches. I hope you enjoy them, too!
Method
Preheat your oven to 400 degrees F. Butter a 12-cup muffin tin and set aside.
In a medium mixing bowl, whisk together the sour cream, vegetable oil, eggs, and almond extract. You may use any lightly-flavored oil: avocado, sunflower, canola, or regular vegetable oil. Even extra virgin olive oil will work.
In another bowl, sift together the flour, sugar, baking powder, and salt. Once the dry ingredients are well mixed, add them to the egg mixture and stir gently until just combined. Fold in the chopped peaches and sliced almonds.
Spoon the batter into the buttered muffin tin. Fill each muffin cup 3/4 full. Now, the size of muffin tins varies somewhat, so you may need a second tin. This recipe should make between 12-16 muffins, depending on the size of your tins and how full you fill them.
Bake for 18-20 minutes, or until the centers are set and the edges are golden. These muffins should dome nicely, if you don’t stir the batter too much or open the oven door while they are baking.
Cool the muffins in the tin for a few minutes before removing them to a wire rack. You may cool them completely on the rack, or serve warm.
Notes and Variations
I use canned peach halves or sliced peaches in this recipe for their availability and convenience. It doesn’t matter whether they are canned in juice or syrup, but do make sure you drain them first! I live in a place far from peach orchards, and it’s difficult to find good peaches even during the summer. However, if you do have access to good fresh peaches, and you are making these muffins when peaches are in season, by all means use fresh fruit! Frozen peaches will also work. If you decide to use fresh or frozen fruit, you will need one cup of chopped peaches.
If you do not want crunchy muffins, but still want the almond flavor, you may substitute 1/4 cup of ground or finely chopped almonds for the sliced almonds. Or leave them out altogether, if you prefer.
These muffins are slightly sweet, but nowhere near cupcake sweetness. If you prefer a sweeter muffin, sprinkle some additional sugar over the muffins just before baking. I like to use raw sugar, which is sometimes called turbinado sugar or evaporated cane juice. It has larger crystals, which look pretty on the muffins!
Even better, mix equal parts finely chopped almonds with raw sugar and sprinkle the mixture over the unbaked muffins. (You will need about one tablespoon of each.) This adds the perfect touch for tea parties!
These peach-studded muffins are perfect for breakfast or tea. Not too sweet, they're full of delicate fruit flavor – and they always disappear in a flash!
Prep Time15 minutesmins
Cook Time20 minutesmins
Total Time35 minutesmins
Course: Breads, Breakfast, Brunch, Teatime
Cuisine: American
Keyword: Bread, Brunch, Muffins, Peach, Tea Party
Servings: 12muffins
Author: kimberly
Ingredients
1/2cupsour cream
1/4cupvegetable oil
2eggs
1/2tspalmond extract
1-3/4cupall-purpose flourunbleached
1/2cupsugar
2tspbaking powder
1/2tspsalt
15oz.canned peachesdrained and chopped
1/3cupsliced almonds
Instructions
Preheat oven to 400 degrees F. Butter a 12-cup muffin tin and set aside.
In a medium mixing bowl, combine the sour cream, oil, eggs, and almond extract.
Sift together the flour, sugar, baking powder, and salt in another bowl. Add the flour mixture to the egg mixture and stir until just combined.
Fold in chopped peaches and almonds. Spoon batter into prepared muffin tin.
Bake muffins at 400 degrees F for 18-20 minutes, or until centers are set and edges are golden.
Cool muffins in tin for 5 minutes before removing to a wire rack to cool completely, or serve warm.
Notes
You may substitute 1 cup of fresh or frozen peaches for the canned peaches.
Letter writing isn’t a thing of the past. Here’s why it is still important today, as a skill to learn and an art to practice.
What is it about receiving a handwritten letter that is so delightful? Is it the pretty stationery, the unexpected surprise of a personal envelope amongst the ads and flyers in the mailbox, the time and thought that the writer must have given to it? I believe all three contribute to the happiness I feel whenever I receive a letter from a friend, though of course the latter is the most important.
Why take the time to write a letter, when you could more easily pick up the phone and call your friend, or send an email? Letter writing takes more time, thought, and arguably money than other forms of communication. (Stamps and envelopes aren’t free, but then neither are phones or computers!) Still, letter writing is a form of communication that shouldn’t be ignored and left by the wayside as outdated and inconvenient. The written letter has several points to recommend it.
A More Personal Communication Style
Handwritten letters are more personal than other forms of communication. Are emails or text messages really personal communications? How could a line of text on a screen be anything more than impersonal and utilitarian? You can’t even tell for sure who is sending the message. There is no visual or aural evidence that the “sender” is actually the person you think it is!
Text messaging may be convenient when you have a quick question for someone, but beyond that, I think its usefulness dwindles. Conversations over text messages are unwieldy, and always fraught with the danger of mistaking emotion–or lack of emotion. I have heard many, many cases where one person gets upset and affronted by the perceived lack of emotion from the person she was texting. I myself have experienced this, and seen how easy it is to misconstrue another’s meaning over text messages.
What about emails? One could argue that they are just like sending a letter, except the recipient receives it faster than he would in the mail. Not so, my friend. Emails rely on typed text as well, so they carry the same dangers of removing emotion as do text messages.
Emails might be slightly better at conveying complicated ideas than text messages, simply because they can be formatted as paragraphs and thus are easier to read, but I have had more problems with misinterpreting my correspondent (and vice versa) through email than through text messages. Perhaps this is because people often do try to use emails as a replacement for written letters, and use them to discuss highly personal and emotion-laden subjects.
Communicating Emotion
Your handwriting is an expression of yourself, and can convey emotions much better than typed text. When reading a letter, I can tell when the writer gets excited and starts writing faster, so the words bunch together; or when she is calm and collected, and her words are evenly spaced with letters neatly formed.
Of course, you can hear emotion in a person’s voice on the telephone too. However, I find it more difficult to have a telephone conversation about deep or serious subjects; it’s easier when the conversation stays light. I think this is because it’s easy to get distracted during phone conversations. When I’m on the phone with someone, I’m often simultaneously folding laundry, cooking dinner, or at least keeping an eye on the children. I don’t usually devote all of my attention to the person on the other line.
Now, perhaps that’s a failing peculiar to myself, but I suspect it’s more common than not. Cell phones are designed so that people can take them everywhere, and use them constantly. Since they demand so much time, it’s impossible to give them your full attention even when you are using them, or you would never accomplish anything else!
The Dimension of the Personal
How can letters be more personal than these other forms of communication, when they seem just as distant in space, and certainly more distant in time? It’s an interesting question, if you think about it. What makes something personal? Where exactly is the realm of personhood? It does not exist solely in space or time, since those dimensions are particular to this present world. Angels are not materially present in space, and God is not limited to time, yet we call both God and angels “persons.” Let’s look the other direction down the spectrum: we call human beings “persons,” but not so animals or plants. What differentiates a person from a mere animal?
The personal can be found in the dimensions of rationality and spirituality. Human beings have rational intellects and free will. These characteristics are shared with God and the angels, while our physical bodies are grounded in space and time. Material and temporal things come to an end, but rational and spiritual things do not. They are eternal.
We can experience this through truly human, personal expressions such as great music or poetry. A great symphony never dies; it is forever new, eliciting emotions and longings in people despite great differences in time and space. Poetry does the same, as does classic literature. These are preserved in material vessels -books- but they are really the spoken words of one person to another, or many others. Books may be burned, or fall to pieces with age; but words, once spoken, never die.
Letter writing belongs in the dimensions of rationality and spirituality because it, too, is the work of a person. It is the spoken word of a mind and heart, reaching out to touch another mind and heart. It is the immortal communication between two souls.
Letters can delve deeply into personal matters, even though you are not in each other’s presence, because writing a letter gives you time to think out exactly what you wish to say. Precisely because it takes more time and effort to write a letter than it does to make a phone call or type out an email, letters are more intentional and personal. They reflect more than just what the writer was thinking or feeling superficially at the moment. I can easily have a 30 to 40-minute phone conversation with a friend without discussing anything of importance; but I rarely write or receive a letter that is completely superficial.
Letter Writing Preserves Relationships
Of course, not every letter discusses deeply spiritual or highly emotional matters; plenty of letters communicate interesting news or anecdotes of everyday life. Even these letters of apparent triviality can contribute to a deeply rooted relationship, through the very fact of communication. And even amusing, newsy letters have a more personal feel to them than emails or text messages.
While particular letters may discuss superficial matters, the medium of letter-writing lends itself to more important and universal subjects in general. Phone conversations are just like person-to-person conversations: the tone may be deep in select circumstances, but most of the conversations we engage in on a daily basis are casual. Letters, on the other hand, are more like prose or poetry: writing down each word captures it, so to speak.
Unlike poetry and prose, however, letters have the touch of directly personal communication. They are written to one specific person, rather than a general audience. They speak of universal themes in a personal manner. This is what makes letters so effective for sustaining and strengthening relationships, even when the correspondents live far from each other.
Letters may be kept and re-read over and over by the recipient. The personal letters of many notable writers have been published and read by thousands of people. If you admire a particular writer for his wisdom, empathy, or portrayal of reality, then reading his personal letters can offer even more insight into his character and development of ideas.
Style vs. Purpose
The goal of letter writing isn’t to write such impressive letters that they get published some day. Brilliant ideas and elegant style are nice, but they’re not the point. The goal ought to be relationship-oriented. After all, writing letters is a means of keeping in touch with an absent correspondent.
That said, writing good letters doesn’t happen automatically. It takes practice to learn how to condense your thoughts and explain them in a cohesive manner. It takes empathy and concern for others to write in a way that engages the recipient rather than merely narrates events or rambles off in a monologue that only interests yourself.
More than anything else, perhaps, writing good letters takes a true friend. You probably wouldn’t write a personal, philosophical letter to a slight acquaintance you barely know, or to a relative you haven’t seen since childhood. It’s more likely that you would only reveal the depths of your soul to someone you know intimately. Letters can be the means of developing such a relationship, or of continuing a solid relationship after a significant amount of time spent together.
The most important factor isn’t the amount of time you have known the person, but the amount of thought and effort you have put into the relationship–or decide to start putting into the relationship. Think about a soldier who falls in love just before going off to war. Letters to and from his sweetheart are the only way he really gets to know her and develop a relationship over the course of several years. Yet, by the time he returns from foreign lands, the soldier and his sweetheart have formed a deep, close relationship and are ready to enter into marriage. Letters that started out tentative, superficial, and emotional can transition to more meaningful and personal communications.
Likewise, letter writing can take an existing friendship and bring it to a much deeper, more intimate level. Letters allow you to share joys and sorrows, encourage each other, and call each other on to higher aspirations. Written words have the power to change another’s mind and heart, to build up or to tear down, and they should always be used with due respect and love.
How to Write a Letter
If you aren’t in the habit of corresponding by letter, it can seem daunting at first. Getting started might just be the hardest part! If you’re at a loss, try this method to begin:
Pick a friend or relative to write to. Make sure you have the person’s address.
Gather the necessary materials: paper, pen, envelope, stamp.
Begin your letter with a brief and friendly salutation, such as: “Dear Aunt Clara, How are you? I hope you have been enjoying the warm spring weather.” General enquiries after health and wellbeing are also appropriate.
You may begin with general topics such as weather or recent events before moving to more personal topics.
Ask after the person’s health, family, and general circumstances. Try to find other questions that invite the recipient to share more about herself without being nosy or too curious. Showing concern for the recipient and her family is part of being a good friend.
Relate something about your own life recently: changes in jobs or relationships, new ideas or plans, any events you are awaiting.
Conclude your letter with a heartfelt closure: “Sincerely,” “Love,” or “Cordially yours” are good choices.
Letters do not need to be pages and pages long, or filled with flowery language. Be yourself, and write with sincere good wishes for the recipient. Efforts at kindness and friendship are never wasted!
Letter Writing Supplies
Last but not least, I want to touch on stationery. As I mentioned at the beginning of this article, lovely stationery isn’t the most important part of writing letters–but it does make your letters prettier, and brings delight to the recipient.
We are material beings as well as spiritual, and a little bit of beauty can go a long way toward brightening your day–or your friend’s. I enjoy writing letters more when I use pretty papers, cards, stamps, and stickers. These things make me happy, and they seem to infuse my writing with some of that happiness. I also enjoy receiving lovely cards and letters in the mail. A colored envelope or pretty address label signals right away that this piece of mail is something special.
So if you’re looking for pretty writing paper or greeting cards, hop on over to my Etsy shop! I have several lovely designs for all of your letter writing needs. Fill your greetings with flowers, and watch your correspondence bloom! Etsy is also a good place to find custom address labels, if you are interested in those as well.
Click the image below to visit my shop:
If you enjoyed this article, you may also enjoy my Cultivating Hospitality series: Part I and Part II.
This hearty chili will warm the coldest days! Filled with meat, beans, and just the right amount of spices, this is a family favorite supper!
Warm up on a blustery evening with this hearty, spicy chili. Loaded with meat, beans, and vegetables, this recipe makes a pot big enough to feed a horde of hungry mountain men! Set it to simmer on the woodstove in the morning, and it will be hot and ready by suppertime. Or, if you happen to lack a woodstove, this chili can certainly be prepared on your stovetop in an afternoon. Don’t be intimidated by the long list of ingredients; this chili takes a little prep time, but then it simmers away happily on its own all day, or at least all afternoon.
Method
In a Dutch oven or large stockpot, cook the sausage and bacon over medium heat. Remove the meat with a slotted spoon and set aside. Keep the drippings in the pan to flavor your meat and onions.
While the bacon and sausage are cooking, chop your stew meat and onions.
While the bacon and sausage are cooking, cut your game meat into 3/4-inch or 1-inch cubes. Caribou and moose meat are both delicious, but feel free to use venison or even beef, if you don’t have any game meat. This recipe is a good place to use tougher cuts of meat, such as those labeled as “stew meat.” The long cooking time will make even tough meats nice and tender.
A note about meat
One other note about meat: the amount is approximate. You can use as little as 2 lbs. of stew meat, or as much as 3 lbs. without adjusting any other ingredients. With a smaller amount of meat, the chili will have proportionately more beans and more liquid, so just keep that in mind.
Brown the meat slowly with the onions and garlic for maximum flavor.
Add the game meat or beef to the Dutch oven along with the chopped onions and minced garlic, and cook over medium low heat until browned. Stir occasionally to brown the meat on all sides. Drain off all the fat.
Return the sausage and bacon to the Dutch oven. Add the beans, beef broth, tomatoes, tomato sauce, chilies, and all the seasonings.
Mix everything together, including the spices. Don’t be shy of using all that chili powder–if it’s dark chili powder. Pictured is the lighter variety, which tends to be spicier.
A note about chili powder
Don’t be shy of using half a cup of chili powder! I know it sounds like a lot, but this recipe makes a big pot of chili, and it’s really not too spicy. That is, if you use dark chili powder. The lighter, redder chili powder tends to be a little stronger, so I would cut back to 1/4 or 1/3 cup if you are using this variety. You can always add more after the chili simmers for a few hours. (If you’re still skeptical, read the adjustments for heat below.)
Bring the chili to a boil, then reduce heat to a simmer. Continue to simmer, covered, for a few hours or all day: until the meat is tender and the sauce is thick. Check the pot every couple of hours to see if it needs more liquid. You may have to add a little water every now and then.
Cooking
That’s it! This chili will be ready to serve in as little as 3 hours, or as long as 8. It’s a low-maintenance dinner that leaves you free to do other things instead of being tied to the kitchen. Try this chili with corn bread or biscuits hot from the oven. Your mountain men will come back for seconds!
This recipe makes a big pot of chili. If you don’t happen to have a horde of hungry men or teenagers around to eat it, the leftovers freeze very well. I have found it helpful to divide the cooled chili into meal-sized containers, and freeze them individually. I get about three meals for our family of four from this recipe, with extra for guests. There’s nothing I like more than cooking one dinner and getting two additional meals from the same amount of effort!
Adjustments for heat and spiciness
If you desire a less spicy chili, here are a few adjustments you can make:
use a mild sausage
use dark chili powder
leave out the Tabasco
If you would like a spicier chili, try these adjustments:
use hot sausage (either hot country style or hot Italian style)
Warm up on a blustery evening with this hearty chili. Loaded with meat, beans, and spices, this recipe makes a pot big enough to feed a horde of hungry mountain men!
Prep Time35 minutesmins
Cook Time3 hourshrs
Total Time3 hourshrs35 minutesmins
Course: Main Course
Cuisine: American
Keyword: Bacon, Beans, Chili, Sausage, Soup, Stew
Author: kimberly
Ingredients
1lb.bulk sausagecountry style or Italian
1/4lb.baconchopped
2large onionschopped
3lbs.caribou, moose, venison, or beefcubed
2tbspgarlicminced
30oz.canned kidney beansdrained and rinsed
15oz.canned pinto beansdrained and rinsed
15oz.beef broth
30oz.diced tomatoesundrained
3cupstomato sauceor juice
4oz.diced green chilies
1/2cupdark chili powder
1tspcumin
1tsporegano
1tspcoriander
1tspgarlic powder
1-1/2tspsalt
3/4tspblack pepper
2-3dropsTabascooptional
Instructions
In a Dutch oven, cook the sausage and bacon over medium heat.
Remove meat from the pot with a slotted spoon and set aside. Add the game meat or beef, onions, and garlic to the Dutch oven and cook over medium low heat until browned. Stir occasionally so that all sides are browned. Drain off all the fat.
Return the cooked sausage and bacon to the Dutch oven. Add the beans, beef broth, tomatoes and tomato sauce, chilies, and all the seasonings. Stir well to combine.
Bring the chili to a boil, then reduce heat to a simmer. Continue to simmer for at least 3 hours, up to 8 hours. Check the chili every couple of hours and add a small amount of water if needed.
These 9 skills will help you to save and manage your money as a homemaker!
Being a homemaker in this day and age presents some unexpected challenges. You might think that life is a piece of cake for modern homemakers, since we have so many more conveniences and labor-saving devices than our great-grandmothers had: from dishwashers and robotic vacuum cleaners to indoor plumbing and electricity, there are certainly many things to be thankful for in the 21st century!
However, with new advancements come new challenges. Homemaking is becoming less and less common a lifestyle choice among women, and this is reflected in the price of just about everything. Why is this? As more and more women work outside the home and earn an income, families can afford more luxuries, and the standard of living increases across the board.
In order to “keep up” with a “normal” standard of living in developed nations, many people would say it is now necessary for both women and men to work full-time jobs, if not more.
Now, I’m certainly not saying that homemaking isn’t a viable option anymore; it is still a good option, and one that should definitely be considered when young women are choosing among different career paths and lifestyles. However, to state the matter plainly, the modern homemaker faces increased challenges in regards to money.
Frugal Living is a Challenge for Today’s Homemaker
In Great-Grandmother’s day, perhaps her family didn’t have much extra money to spend; but chances are, her friends and relatives were in a similar boat. She had others she could relate to about financial difficulties, and perhaps learn from them some creative ways to make do with what she had.
Today, if you are a family trying to survive on one income so that the wife can be a homemaker (whether she’s raising children at the moment or not), you are the exception instead of the rule. And that can be daunting.
While your friends can afford the newest technology, vehicles, and clothes, you might be driving a ten- or twenty-year-old car and making do with secondhand clothes. Worse still, if you don’t have any close friends or family members who are homemakers, it’s easy to feel alone and “left behind” the rest of the world.
You might start to feel like everyone else has more than you, and it’s not fair. I completely understand this attitude, but it’s dangerous and unhealthy. It’s not healthy for your marriage or your vocation as a homemaker. It can make you dissatisfied with your life, and start focusing on money as the ultimate goal.
The good news is that you don’t have to think this way, and there are many practical things you can do as a homemaker to help with your family’s finances. Learning a few traditional homemaking skills can go a long way toward improving your financial situation. Some of these skills involve saving money, others help you manage your money better, and still others provide ways for homemakers to make some income themselves. Today, we’ll cover ways to save and manage money.
Traditional Homemaking Skills That Help You Save Money
Creativity is key when it comes to saving money without feeling stinted. It’s one thing to say, “We’re not going to spend any extra money this month,” and quite another thing to actually carry it out! If you start thinking in terms of “we can’t do this or that,” it’s easy to get frustrated and start feeling like you’re living in the poorhouse. That’s where creativity comes in, my friend! These skills will help you to find positive ways to save, instead of negative ways (“We can’t order pizza this month”, etc.)
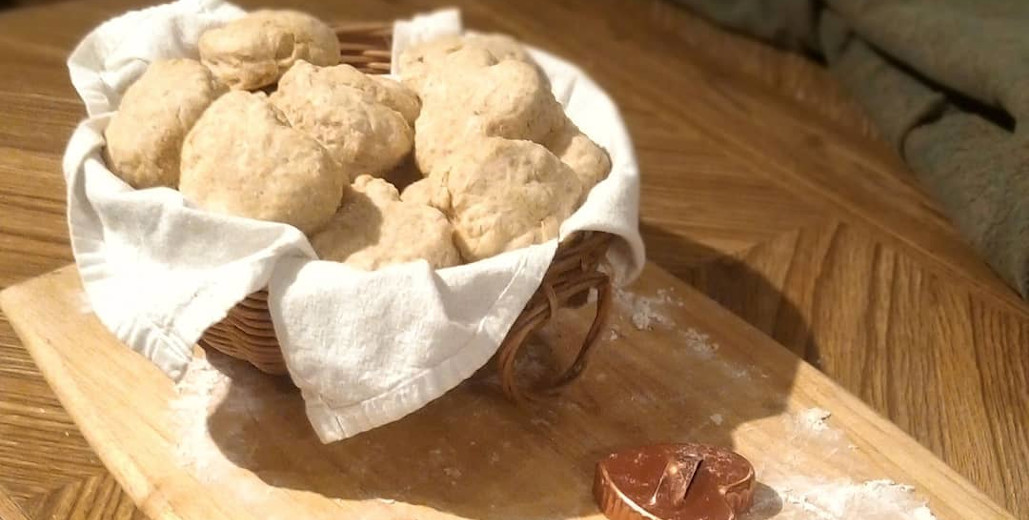
Baking bread
Baking your own bread is much less expensive than buying it at the store… not to mention much tastier!
This one’s first on the list because it’s my favorite! Baking bread can shave quite a bit off of your grocery bill: probably more than you would expect. Think of all the bread or baked items you buy: not just loaves, but buns, muffins, tortillas, bagels, cookies and cakes, etc.
You might think these items are cheap and not worth making yourself. But wait: the price of one whole-grain loaf of bread is roughly $4.00-6.00 (in my area, at least). Or I can buy a 5-lb. bag of whole wheat flour for $6.00, which will yield approximately 6 loaves of bread.
Yes, there are other ingredients in bread, and they do cost money: yeast costs me approximately $0.08 per loaf (I buy mine in bulk); salt costs $0.02 per loaf; and sugar costs $0.02 per loaf. If you use butter or oil, that will add an additional $0.02-$0.25 per loaf. So we’re looking at a total cost of $1.27 for one loaf of homemade whole wheat bread.
If you use all or part all-purpose flour or bread flour, the cost will be even lower (whole wheat flour is more expensive). That’s a significant savings when compared to a $6.00 loaf from the store! Bread baking is a skill to be learned, and it does take practice, but the results are well worth it, both in flavor and price.
Gardening
Do you have memories of visiting your grandparents, and helping with a big garden full of vegetables? Like bread baking, it’s much more convenient to pick up your salad fixings from the grocery store or farmer’s market, but the convenience is costly. I know vegetable prices vary widely by region and season, but home grown is always less expensive.
I can buy a head of leaf lettuce for about $1.50 during the summer, or $2.99 during the winter. But a packet of seeds only costs $1-2.00, and yields enough lettuce for months. Even if you don’t want to start seeds yourself, buying lettuce plugs or starts from a local greenhouse or farmer’s market shouldn’t cost more than $0.50-$0.60 per plant.
You will see even more savings with other vegetables, like tomatoes: if your plant costs $3-4.00, and you harvest 20-40 tomatoes from it, the price of each is $0.10-$0.20 per tomato! Like baking, there are other costs involved with gardening: soil, fertilizer and mulch (natural or not), watering apparatus, etc. But when you divide the costs among each plant, they become negligible. Now, I know that gardening can become expensive if you let it; but the basics shouldn’t put too large a dent in your pocketbook.
Buying in bulk
This is one instance where buying more at a time can actually cost less! Over time, of course. But learning how to spot a good deal and stock up on pantry basics when they’re on sale can save you money down the road. This skill is a bit tedious to learn, as it involves paying attention to normal prices and sales; but once you have it down, it’s really not that time-consuming.
If you’re new to bulk buying, the best tool you can use is a price book. Get a small notebook and write down one item of food you commonly buy at the top of each page: for example, apples, applesauce, baking soda, brown rice, etc. It is helpful to start at the beginning of the alphabet and work your way through, so it’s easier to navigate your price book later. Don’t feel like you have to include every single item you’ve ever purchased; just start with the basics. You can always add more later.
Next, bring your price book along to the grocery store the next time you shop. Note the unit price of each item you buy, as well as any sale prices. The unit price is the price per pound, ounce, liter, or whatever unit of measurement is used for any given item. You can usually find it in a corner of the price tag, in small print.
Comparing unit prices helps you to compare prices on items which are in different sizes of packaging: for example, 15-oz. cans versus 29-oz. cans. This can be particularly helpful when you are comparing different brands, or sale prices of name brands versus the regular price of store brands. For more tips on using price books and saving money on groceries, read the Beginner’s Guide to Grocery Shopping and Ultra Power Saving Mode for your Grocery Budget.
Meal planning
Meal planning is one of those tricky things that can help you save a lot of money–or it can help you spend even more than usual! The basic idea is that you write out a list of meals for the week or month, and then only buy the ingredients you need for those meals. If you’re an impulse shopper, this could clearly help you save a lot of money!
However, if you’re really trying to save money, you need to be careful about which meals (and ingredients) end up on your menu. It’s fun to plan fancy meals, right? But looking at your grocery receipt later might not be so much fun. Once you get the hang of meal planning, it’s quite simple. I’ve got all the information you could want about meal planning right here! Check out Easing into Meal Planning and Why You Should Have a Simple Meal Plan.
Using leftovers
This is everybody’s favorite subject, right? Leftovers don’t have to be boring (or worse). There are plenty of ways you can transform leftovers into something (almost) new and exciting! But sometimes we lack inspiration for what to do with a little of this and a cupful of that.
Wouldn’t it be nice if there was a list of meal ideas for common leftovers like meats, rice, and pasta? Guess what? There is! 16 Ways to get Creative with Leftovers is your cheatsheet for success when faced with a fridge full of random containers. Or read about How to Use Leftovers and Prevent Food Waste if you frequently find yourself throwing out spoiled food.
DIY household items
Did you know that many common household items can be made right at home–for a fraction of the price? Cleaning products, beauty products, toiletries, and a host of other items command a premium for their flashy packaging or brand names, but you can make them for a few cents with some basic ingredients. Try making your own soaps, lip balm, natural cleaning solutions, laundry or dishwasher detergent, and more! Here are a few resources I’ve found helpful:
Instead of throwing out those ripped jeans and buying another pair, why not mend them and use them for gardening or other messy jobs? Why consign your favorite top to the back of the closet merely because it lost a button or a seam is coming undone? Did the zipper break on your winter coat? That can be replaced too–and zippers are a lot cheaper than new coats!
With a few simple sewing skills and inexpensive items like needles, thread, and thimbles, you will be ready to tackle all sorts of clothing catastrophes! Sewing machines are nice, but they’re optional for mending purposes. You can definitely mend clothing by hand; but it’s okay to keep an eye out for a nice used sewing machine, too!
Finding quality used clothing
This goes right along with the previous skill. New clothing costs a pretty penny, and keeping a family well dressed can be a daunting task for today’s housewife. Old clothes can be mended once or twice, but they might not be presentable for church or outings anymore. Acquiring the knack for spotting quality clothes at thrift stores, consignment shops, or garage sales becomes an important skill.
Why does quality matter, if you’re buying it used anyway? Well, quality matters even more when you’re looking at previously owned garments. Some pieces are cheaply made, and begin to unravel or stretch after only a few washings. If you’re shopping at a thrift store, that cute top might be only one washing away from garbage! In order to avoid this predicament, stick to quality brands and natural fibers. These will stand the test of time much better than clingy polyesters or spandex. For more tips, read How to Find Quality Clothes on a Budget.
Budgeting
Speaking of budgets, this is one of the best tools you can use to help keep track of your finances and, ultimately, save more money. Have you ever gotten to the end of a month and wondered where all the money went? Budgeting answers that question by showing you exactly where you spent each dollar.
Its usefulness goes far beyond merely keeping track of your spending, however. Budgets allow you to plan a certain amount of money each month for housing, food, utilities, gas, and anything else. This shows you clearly how much “extra” money can be spent on unnecessary or fun purchases without putting you into debt or digging into savings.
Do you think budgeting won’t work for you because your income isn’t the same every month? Think again. I’ve been in that boat for most of my married life, and budgeting still helps. Yes, we have months where we spend more than we make, and other months where we can save a lot. Budgeting helps us to rein in our spending during the good times, so we have enough left over to get us through the lean times–and still save. I like the EveryDollar app because it’s free and simple to use, although you can pay for an upgraded version if you like.
***
I think that’s enough for one day! These nine skills are simple enough for any homemaker to learn, and fit well into the daily rhythm of a modern housewife. They may take a little while to learn, but over time you will become more adept at saving money, and more confident in managing it! I hope this list inspires you to try your hand at something new.
Hi, I’m Kimberly! I’m an Alaskan wife and mother who loves simple, old-fashioned living. If you’re looking for country-style recipes from scratch or simple homemaking ideas, pour yourself a cup of tea and join me!


 Hi, I’m Kimberly! I’m an Alaskan wife and mother who loves simple, old-fashioned living. If you’re looking for country-style recipes from scratch or simple homemaking ideas, pour yourself a cup of tea and join me!